Quick Summary:
Roof racks and accessories are your ticket to expanding cargo space for adventures. This guide covers choosing the right system (bare, clip, raised rail, track mount), essential accessories like bike carriers and cargo boxes, and a simple installation overview, making gear hauling easy and safe for any vehicle.
Tired of playing Tetris with your gear for every road trip or outdoor adventure? Wish you could bring your bikes, kayaks, or extra luggage without filling every inch of your car’s interior? You’re not alone! Many car owners struggle with limited cargo space. But don’t let that hold you back from your next great escape. With the right roof rack system and accessories, you can unlock serious extra carrying capacity, making your vehicle more versatile than ever. This guide will break down everything you need to know, from picking the perfect rack to choosing the best accessories, all in simple, easy-to-understand steps. Get ready to haul smarter and travel further!
Why You Need a Roof Rack: More Than Just Extra Space
Think of a roof rack as an extension of your vehicle’s storage. It’s not just about fitting more stuff; it’s about fitting the right stuff comfortably and safely. For families heading on vacation, outdoor enthusiasts with bulky gear, or DIYers needing to transport materials, a roof rack transforms a standard car or SUV into a much more capable adventure machine.
The benefits go further than just space:
- Maximizes Interior Comfort: Keep your passengers happy and comfortable by moving bulky items like sports equipment or camping gear out of the cabin.
- Opens Up New Travel Possibilities: Transport bikes for scenic trails, kayaks for a lakeside paddle, skis for winter fun, or extra luggage for longer trips without compromise.
- Protects Your Vehicle: Prevents scratches and damage to your car’s interior from sharp or awkwardly shaped items.
- Increases Vehicle Versatility: Makes your everyday driver ready for weekend getaways and significant adventures.
Understanding Roof Rack Types: Finding Your Perfect Fit
Not all cars are created equal, and neither are roof racks. The type of rack you need depends heavily on your vehicle’s existing roof structure. Here are the most common types, explained simply:
1. Bare Roof Racks
These are for vehicles with smooth roofs that have no existing rails or tracks. They work by using clips or other clamping mechanisms that attach to the edges of your doors or window frames.
- Pros: Often the most affordable option, relatively easy to install and remove, compatible with a wide range of vehicles.
- Cons: Can be less stable than other types, may require frequent adjustment to prevent paint damage, might not support the heaviest loads.
- Best For: Sedans, coupes, and some SUVs or hatchbacks without factory-installed rails.
2. Raised Rail Roof Racks
Many SUVs and wagons come with raised rails – these are bars that run along the length of the roof, with a gap between the rail and the vehicle’s roof.
- Pros: Very common and widely available, offer good stability, easy to attach crossbars to, generally handle good weight capacities.
- Cons: Limited to vehicles equipped with raised rails, can increase wind noise.
- Best For: Most SUVs, crossovers, and station wagons with factory-installed raised side rails.
3. Flush Rail Roof Racks
Similar to raised rails, but these run flush and close to the roof of the vehicle, with little to no gap. They often have a sleeker, more integrated look.
- Pros: Aesthetically pleasing, generally quieter than raised rails, secure attachment points.
- Cons: Only compatible with vehicles that have flush rails, might offer fewer attachment points for some accessories compared to raised rails.
- Best For: Modern SUVs and wagons designed with integrated flush roof rails.
4. Fixed Point Roof Racks
These racks attach to specific mounting points on your vehicle’s roof. You’ll usually find small covers or pre-drilled holes on the roof where these racks connect.
- Pros: Very secure and stable due to direct mounting, often designed for specific vehicle makes and models for a perfect fit.
- Cons: Requires specific mounting points, installation can be more involved, less universal than other types.
- Best For: Vehicles explicitly designed with fixed mounting points, offering a very robust and secure solution.
5. Track Mount Roof Racks
These systems involve installing rails (tracks) directly onto your vehicle’s roof. Crossbars are then attached anywhere along these tracks, offering ultimate flexibility.
- Pros: Highly versatile and adjustable, can be positioned for optimal gear placement, strong and secure.
- Cons: Installation requires drilling into your vehicle’s roof, which can be daunting for DIY beginners and may void warranties if not done correctly.
- Best For: Vehicles where maximum adjustability and load security are paramount, and owners comfortable with, or willing to hire for, semi-permanent installation.
Pro Tip: To figure out your roof type, check your vehicle’s owner’s manual or look carefully at your roof. If you’re unsure, your local automotive accessories shop can help identify your vehicle’s roof type.
Essential Roof Rack Components: What You Need to Carry
A roof rack system typically consists of two main parts: the “feet” or towers that attach to your vehicle, and the “bars” (crossbars) that span across your roof. Your chosen rack type will dictate which of these you’ll need.
- Rack Feet/Towers: These are the parts that grip your vehicle’s roof. They vary greatly depending on your roof type (bare, raised rails, etc.), acting as the crucial link between your car and the crossbars.
- Crossbars: These are the horizontal bars that run from one side of your car to the other. Most accessories (like bike mounts or cargo boxes) attach to these crossbars. They come in different lengths and materials, usually either square, round, or aerodynamic (wing-shaped). Aerodynamic bars are quieter and can improve fuel efficiency slightly.
Important Note: Always check the weight capacity for both your vehicle’s roof and the rack system. Overloading can be dangerous!
Your Guide to Essential Roof Rack Accessories
Once you have your basic rack system (feet and crossbars), the real fun begins: choosing accessories to haul your specific gear. Here’s a look at some of the most popular and useful options:
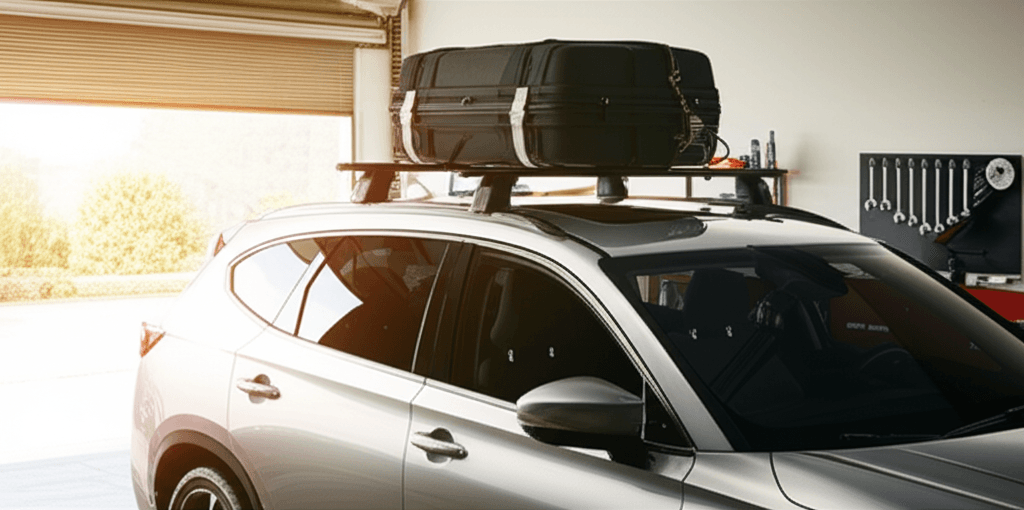
1. Cargo Boxes (Roof Boxes / Cargo Carriers)
These are enclosed, lockable containers that mount on your crossbars. They’re perfect for luggage, camping gear, strollers, and anything else you want to keep protected from the elements and secure.
- Pros: Excellent weather protection, lockable for security, keeps gear out of sight, aerodynamic designs reduce wind noise.
- Cons: Can be expensive, adds significant weight to your roof, affects vehicle’s center of gravity, requires opening the box to access contents.
- Types: Available in various sizes (measured in liters) and shapes. Some open from the side, others from the rear.
2. Bike Racks
Transporting bicycles safely is a top priority for many adventurers. There are several types of bike racks:
- Fork Mount Racks: The bike’s front wheel fork is removed and clamped into the rack. This is often the most secure and aerodynamic option for the bike itself, keeping the bike upright and stable.
- Wheel-On (Frame Mount) Racks: The bike’s wheels sit in trays, and a clamp secures the bike’s frame. These are generally easier to load as you don’t need to remove wheels.
- Wheel Mount Racks: Both wheels are secured in trays, and the bike stands upright without clamping the frame. These are newer and offer a good balance of security and ease of use, with no contact with the bike frame.
- Platform Racks: These are generally for hitch receivers but some roof options exist; they hold the entire bike (wheels included) in a frame.
Consider: The type of bikes you have (road, mountain, fat-tire), how many you need to carry, and how easy you want loading to be.
3. Kayak/Canoe Carriers (Kayaker and Canoe Racks)
Transporting watercraft requires specific carriers to keep them secure and prevent damage.
- J-Cradles: These mount sideways on crossbars and hold kayaks in a “J” shape. They are space-efficient and can often carry multiple kayaks.
- Saddle/Roller Systems: Saddles conform to the shape of the hull, offering good support. Some systems include rollers to help load heavy kayaks more easily.
- Simple Straps: While basic straps might seem sufficient, they are generally not recommended for kayaks as they lack the security and hull protection of specialized carriers.
Key Point: Proper tie-down straps are essential with any kayak carrier. Look for straps with cam buckles or ratchet systems for secure tightening. For more on safe tie-down practices, check out resources from organizations like the American Sailing Association, which often share general principles applicable to all watercraft transport: American Sailing Association – How to Tie Down a Boat Properly.
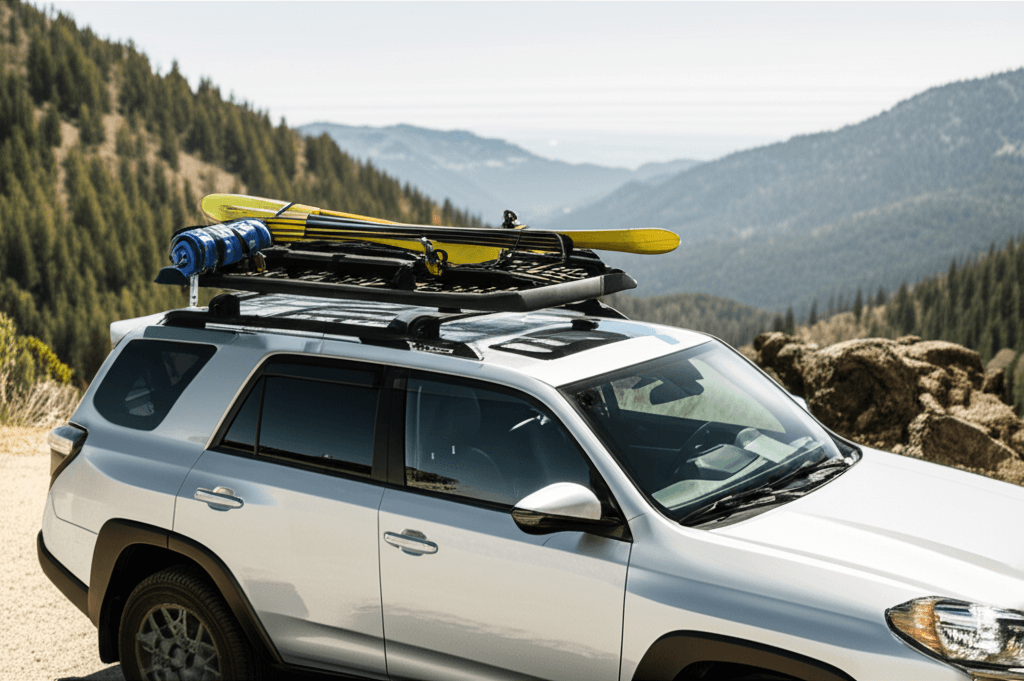
4. Ski and Snowboard Racks
Designed to grip skis and snowboards securely, these racks protect your gear from the elements and keep it contained.
- Types: Most are clamp-style systems that hold multiple pairs of skis or boards. They are lockable for security and often feature easy-open mechanisms, even with gloves on.
- Consider: How many pairs of skis or boards you usually carry and their length.
5. Luggage and Gear Baskets
These are open-air racks, usually made of metal, that offer a large, flexible space for irregularly shaped items, camping gear, or extra luggage that might not fit well in a cargo box. They often have raised sides to help contain items.
- Pros: Very versatile for odd-shaped items, can be more budget-friendly than cargo boxes, good ventilation.
- Cons: Gear is exposed to the elements, requires careful tie-down to prevent items from shifting or falling, can be noisier due to wind.
Choosing the Right System: Key Considerations
Navigating the world of roof racks and accessories can seem overwhelming, but focusing on a few key areas will help you make the best choice:
1. Vehicle Compatibility
This is the absolute first step. As discussed, know your roof type (bare, raised rail, flush rail, fixed point, track). Using a rack designed for your specific vehicle and roof type is crucial for safety and a secure fit. Reputable brands offer fit guides on their websites.
2. What Will You Carry?
Be honest about your typical cargo. If it’s mostly luggage for family trips, a cargo box is ideal. If you’re a cyclist, a bike rack system is your priority. Kayakers will need specific carriers. Prioritize the accessory that serves your primary need.
3. How Many Items?
Consider the quantity. Do you usually carry one bike or four? Two kayaks or one? This will determine the size and number of accessories you need, and if you need specific configurations (e.g., kayak carriers that stack). Always check the load limits.
4. Budget
Roof racks and accessories range from a couple of hundred dollars to over a thousand. Bare racks are generally the cheapest. High-end cargo boxes and specialized carriers will cost more. Consider buying quality components from reputable brands for better durability and safety. Sometimes, buying a complete system from one manufacturer ensures compatibility.
5. Ease of Installation and Use
If you’re a beginner DIYer, look for systems known for straightforward installation. Some racks can be installed with simple hand tools and clear instructions. Others, especially those requiring drilling for track mounts, might be best left to professional installers. Think about how easy it will be to load and unload your gear regularly.
Installation: A Beginner’s Overview
While specific instructions vary greatly by rack and vehicle, here’s a general process for installing a common rack system (e.g., for raised or flush rails):
- Identify Your Rack Type and Vehicle Fit: Ensure you have the correct parts for your car’s roof configuration. Read the manufacturer’s instructions thoroughly!
- Attach Feet to Crossbars (if separate): Some systems come pre-assembled, others require you to attach the feet to the crossbars first.
- Position the Feet on Your Roof: If you have raised or flush rails, you’ll typically place the feet onto these rails. For bare roofs, the feet will attach to the door frame.
- Secure the Crossbars and Feet: Tighten any clamps or bolts according to the instructions. Often, there’s a torque specification to ensure they are just tight enough without overtightening.
- Check for Stability: Once mounted, gently try to wiggle the bars. They should feel solid and secure with minimal movement.
- Attach Your Accessory: Follow the specific instructions for your chosen accessory (bike rack, cargo box, etc.) to attach it to the crossbars.
- Final Inspection: Double-check all bolts and straps. Ensure your accessories are securely fastened and locked if applicable.
Safety First: If you are ever unsure about installation, or if drilling is involved, it’s safer to have a professional installer do the job. For advice on vehicle modifications and safety standards, the National Highway Traffic Safety Administration (NHTSA) provides valuable information: NHTSA Vehicle Safety.
Maintaining Your Roof Rack System
A little bit of maintenance goes a long way in ensuring your roof rack system stays safe and lasts for years:
- Regular Inspection: Before and after each trip, check all bolts, clamps, and straps for tightness and wear. Look for any signs of rust or damage.
- Cleanliness: Wash your rack system regularly to remove dirt, salt, and debris that can cause corrosion or damage your vehicle’s paint.
- Lubrication: If your rack has moving parts (like hinges or locks), a light application of appropriate lubricant can keep them functioning smoothly.
- Protect Your Paint: For bare-roof rack systems, consider using clear protective film or rubber padding where the clamps meet your car’s paint to prevent scratches.
- Storage: If you remove your rack system when not in use, store it in a clean, dry place to protect it from the elements.
Pros and Cons of Using Roof Racks and Accessories
To help you make a final decision, here’s a quick rundown of the advantages and disadvantages:
| Pros | Cons |
|---|---|
| Significantly increases cargo capacity. | Can affect vehicle’s fuel efficiency (due to drag). |
| Keeps vehicle interior clean and clutter-free. | Adds noise (wind whistling) to your ride. |
| Protects delicate interior surfaces from damage. | Can alter vehicle’s center of gravity, requiring careful driving. |
| Enables transport of bulky or specialized gear (bikes, kayaks, skis). | Requires proper installation and regular maintenance for safety. |
| Enhances vehicle versatility for adventures and utility. | Initial investment can be significant. |
| Lockable options provide security for stored gear. | May require modifications (like drilling) for some installation types. |
Frequently Asked Questions (FAQs)
Q1: How do I know which roof rack is right for my car?
A1: The best way is to identify your car’s roof type: bare roof, raised rails, flush rails, or fixed points. Then, use the vehicle fit guides provided by roof rack manufacturers. They’ll show you exactly which systems are compatible with your make, model, and year.
Q2: Can I get a speeding ticket for having a roof rack installed?
A2: No, simply having a roof rack installed is not illegal. However, if the rack or its cargo is not properly secured, or if it exceeds the legal width or height limits for roads, you could face a ticket. Always ensure your cargo is safely strapped down.
Q3: How much weight can my roof rack hold?
A3: This varies significantly. Your vehicle’s owner manual will state the maximum roof load capacity