
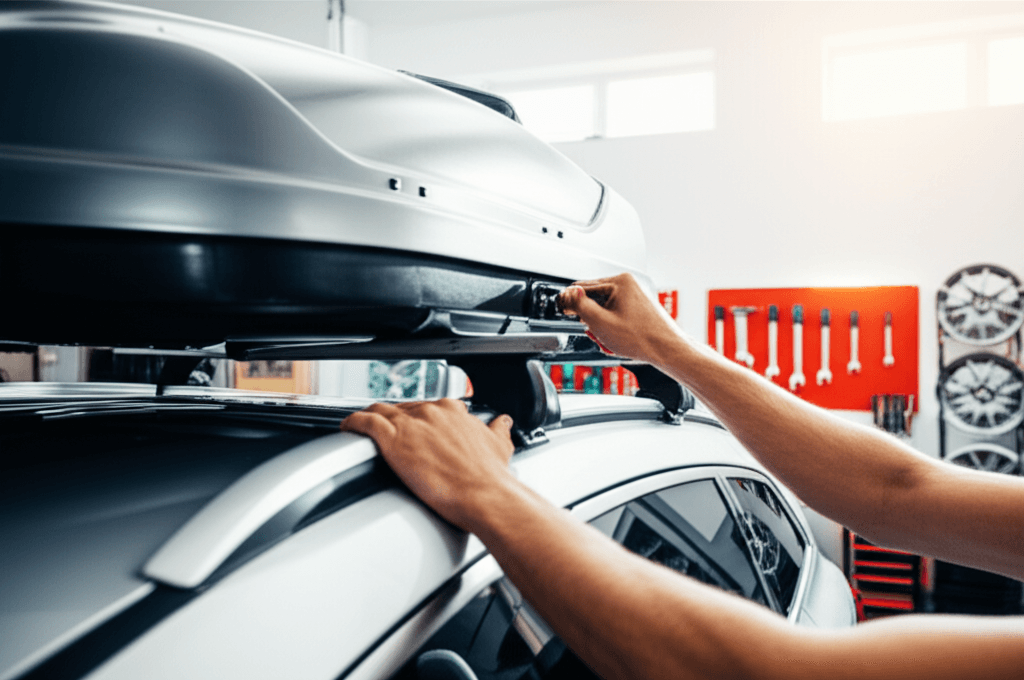
Fixing your roof box is easier than you think! This guide helps you tackle common issues like cracks, broken latches, or worn-out seals. With simple steps and common tools, you can get your roof box back in top shape for your next adventure, saving you money and ensuring secure cargo. As an Amazon Associate, we earn from qualifying purchases at no extra cost to you.
Hitting the road for a family trip or an epic outdoor adventure often means loading everything you need onto your car’s roof. A roof box is a fantastic way to add extra cargo space. But what happens when your trusty roof box gets a little dinged up or a part stops working? Don’t sweat it! Many common roof box problems can be fixed with a bit of know-how and a few basic tools. We’ll walk you through how to fix roof box issues, from minor cosmetic damage to functional repairs, so you can get back to enjoying your travels with confidence.
Ordering gear? Prime members get fast, free delivery on eligible items, and eligible new members can try Prime free.
Try Amazon Prime freeQuick Fix Table: Common Roof Box Problems (Thule and Other Brands)
Find your problem first. Most roof box faults are a lock, a lid lifter, a seal or loose mounting, not a broken box.
| Problem | Likely cause | Fix |
|---|---|---|
| Key will not turn or come out | Dirt in the lock, or one lock point not fully closed. On many Thule boxes the key only comes out when every lock point is engaged. | Press the lid down at each latch, then turn the key. Clean the lock and use a dry lock lubricant, not oil. |
| Lid will not close or lock | Cargo pressing on the lid, or the box sitting crooked on the bars | Move heavy items to the middle, re-center the box and re-tighten the mounts. |
| Lid will not stay open | Worn lid lifter (gas strut) | Replace the lifter. Thule sells lifters by model; check your box name on the lid label. |
| Lost key | – | Read the key number on the spare key or lock face, then order replacement keys or new lock cores. |
| Water inside after rain | Worn or detached lid seal, or a crack | Reglue or replace the seal; see the seal section below. |
| Box rattles or shifts | Loose mounting clamps | Re-tighten. Thule PowerClick mounts click when they reach the right tension; U-bolt mounts need even tightening on both sides. |
| Crack in the shell | Impact or old, UV-brittle plastic | Small cracks: plastic epoxy or plastic welding. Cracks near the mounts: replace the box. |
Lock problems are the most common Thule fault; see our full guide to a Thule roof box that won’t lock.
Understanding Roof Box Materials and Common Issues
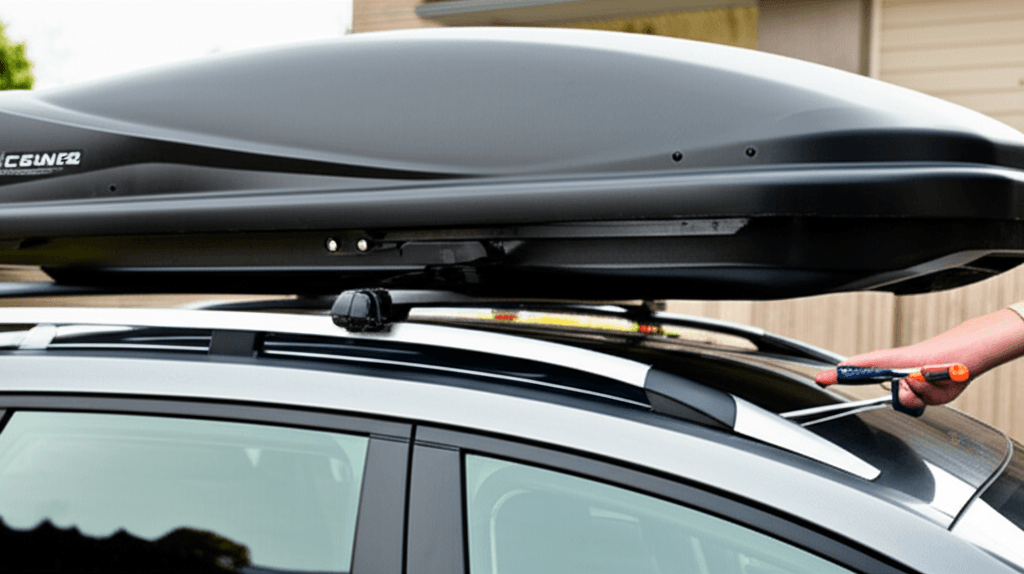
Roof boxes are typically made from plastic, most commonly ABS (acrylonitrile butadiene styrene) or a similar high-impact plastic. This material is chosen for its durability, weather resistance, and relatively light weight. However, like any gear that ventures onto the open road, they can suffer damage.
Common issues you might encounter include:
• Cracks and Punctures: From branches, low overhangs, or impacts during loading/unloading.
• Broken Latches or Hinges: Wear and tear, or forceful use can break these essential components.
• Worn-out Seals: Leading to water leaks and an unhappy interior.
• Scratches and Scuffs: Mostly cosmetic, but can be annoying.
• Loose Mounting Hardware: Requiring tightening or replacement.
Understanding what your roof box is made of will help you choose the right repair materials. For most plastic repairs, you’ll be working with adhesives, patching materials, or plastic welding techniques.
Check your plastic first: most branded boxes (including Thule) are ABS or ASA, which bond well with plastic epoxy. Some budget boxes are polyethylene or polypropylene, which most glues will not hold; plastic welding is the fix there. The recycling code moulded inside the box usually tells you which it is.
Essential Tools and Materials for Roof Box Repairs
Before you start, gather these basics. Having them ready will make the repair process smooth and stress-free.
Tools:
• Safety Glasses: Always protect your eyes, especially when cutting or sanding.
• Gloves: To keep your hands clean and protected from adhesives.
• Screwdriver Set: For removing and reattaching components.
• Utility Knife or Box Cutter: For trimming excess material or making precise cuts.
• Sandpaper: Various grits (e.g., 80, 120, 220) for cleaning and preparing surfaces.
• Drill with Small Drill Bits: For creating pilot holes or removing broken fasteners.
• Clamps: To hold pieces together while adhesive dries.
• Heat Gun (Optional but Recommended for Plastic Welding): For softening plastic to mend cracks.
• Cleaning Supplies: Isopropyl alcohol, soap, and water for de-greasing surfaces.
Materials:
• Plastic Repair Kit: Specifically designed for ABS plastic, often including plastic epoxy, filler, and reinforcement mesh. You can find good kits at most auto parts stores or online retailers specializing in automotive repair.
• Plastic Welder or Soldering Iron (for plastic welding): If you opt for this more advanced repair.
• Replacement Parts: Latches, hinges, or seal strips if yours are completely broken and beyond repair. Check the manufacturer’s website or specialty retailers.
• Silicone Sealant or Rubber Sealant: To reseal edges or repair minor gaps. Look for UV-resistant types.
• Primer and Paint (Optional): If you want to match the color after repair.
Step-by-Step Guide: How to Fix a Cracked Roof Box
Cracks are one of the most common and concerning roof box damages. Luckily, they’re often fixable.
Step 1: Assess the Damage and Clean the Area
• Start by carefully examining the crack. Note its length, width, and depth. Is it a surface-level scuff or a deep puncture that goes all the way through?
• Thoroughly clean the area around the crack. Use soap and water to remove dirt and grime, then wipe it down with isopropyl alcohol. This ensures the adhesive or welding material will bond properly.
• For deeper cracks, you might need to slightly bevel the edges with a utility knife or sandpaper. This creates a V-groove that allows more repair material to fill the damaged area.
Step 2: Prepare for Repair
• For Adhesive/Epoxy Repair: If the crack is on the underside or an area that won’t be heavily visible, you can use a reinforcement mesh. Cut a piece of the mesh slightly larger than the crack.
• For Plastic Welding: Ensure you have a plastic welding rod that matches your roof box material (ABS is common). Clean the plastic thoroughly. You might want to score the plastic on both sides of the crack to create a better bonding surface.
Step 3: Apply the Repair Material
• Adhesive/Epoxy Method:
• Apply a small amount of plastic primer if your kit recommends it.
• Mix the two-part plastic epoxy according to the kit instructions.
• Apply the epoxy to fill the crack. If you have a deep crack, press the reinforcement mesh into the wet epoxy on the underside of the roof box, then cover it with more epoxy. This adds significant strength.
• Smooth the excess epoxy over the crack, ensuring it’s well-covered both inside and out. Use a plastic spreader or putty knife to get a clean finish.
• Allow the epoxy to cure fully according to the product’s instructions. This can take several hours to a full day.
• Plastic Welding Method (More Advanced):
• If you’re using a plastic welder or a soldering iron, heat the area around the crack.
• Melt the edge of the crack slightly, then feed in your matching plastic welding rod. Work slowly and consistently, fusing the rod into the cracked plastic. You can also melt a strip of your roof box plastic and use it as a filler rod.
• For added strength, you can use a hot staple tool or a metal mesh that you embed into the plastic while it’s still hot, on the underside of the crack.
• Allow the welded area to cool completely.
For cracks in ABS boxes: a black plastic bonder fills and bonds the crack and blends in on dark boxes. Rough up both sides and add mesh on the inside for strength.
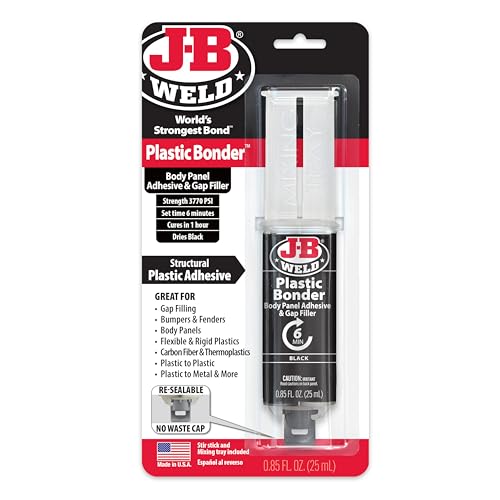
- Plasticbonder: Is A Quick-Set, 2 Part, Urethane Adhesive System That Provides Strong, Lasting Repairs And Works On Therm…
- Count On Us: For More Than 40 Years, Our Products Have Earned A Loyal Following From People Who Take Pride In Their Work…
- Simple To Use: J-B Plasticbonder Has A 1:1 Mixing Ratio, Sets In 15 Minutes And Can Be Sanded After 30 Minutes. With A T…
For long cracks or plastics glue will not hold: a hot stapler melts steel staples across the crack from the inside, then you fill over them.

- Hot Staple Pen designed for quick hot staple and plastic welding repair for damaged or split plastic on cars, motorcycle…
- Quickly heat included repair staples up to 1,022° inline or insert staples into the tool at its 90° ports for greater ac…
- Perfect for plastic components such as bumpers, headlight fittings and assemblies, panel clips, tabs, plastic pins, pane…
Step 4: Finishing Touches
• Once the repair material is fully cured, gently sand the repaired area. Start with a coarser grit (like 80 or 120) to level the repair material with the surrounding plastic, then move to a finer grit (like 220) for a smooth finish.
• Clean the area again.
• If you want to paint the repaired area, apply a plastic-compatible primer, followed by your chosen paint color. Many roof boxes are black or a dark gray, making touch-ups easier.
How to Fix Broken Roof Box Latches and Hinges
Latches keep your roof box securely closed, and hinges allow it to open and close smoothly. Damage here can render your box unusable or unsafe.
Fixing Latches:
1. Identify the Problem: Are the latches not engaging? Is a spring broken? Is the plastic tab snapped off?
2. Clean and Inspect: Remove any debris from the latch mechanism.
3. Lubricate: Sometimes, a lack of lubrication is the culprit. Try a silicone-based lubricant spray.
4. Minor Repairs: If a small plastic piece is broken, you might be able to reattach it using a strong plastic epoxy suitable for the material. Clean both surfaces thoroughly, apply the epoxy, and clamp it in place until it dries.
5. Replacement: If the latch mechanism is too damaged, it’s best to replace it.
• Check your roof box manufacturer’s website for replacement parts. Many brands offer specific hardware kits.
• Find the mounting screws for the old latch. Remove them, often requiring access from inside the lid or base of the box.
• Attach the new latch, ensuring it’s aligned correctly to engage with the locking mechanism on the other half of the box.
Fixing Hinges:
1. Inspect for Damage: Hinges can crack, break, or simply become loose.
2. Tighten Screws: If the hinge is loose, check if the mounting screws need tightening. Sometimes, a missing screw is the issue.
3. Repairing Cracked Plastic Hinges: If the plastic hinge itself is cracked, you can attempt a repair similar to fixing a crack in the box body using plastic epoxy or welding. However, hinges undergo stress, so for critical repairs, replacement is often better.
4. Replacing Hinges:
• Some hinges are integrated into the box, making replacement impossible without significant modification.
• For bolt-on hinges, carefully remove the old ones by unscrewing them.
• Install the new hinges, ensuring they allow the lid to open and close freely without binding. Pay attention to the angle and placement.
• Important: Ensure the new hinge allows the lid to open to a safe angle without overextending and damaging the plastic.
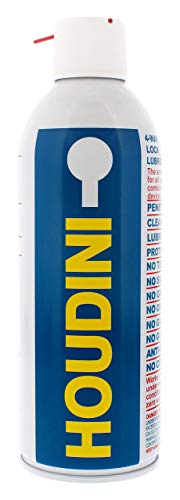
For stiff or frozen locks: a dry lock lubricant frees the cylinder without collecting grit the way oil does.
For a lid that will not stay open: Thule’s replacement lid lifter 14933. The listing names the boxes it fits (623/624/628/633/634, Pulse, Ascent, Atlantis); check your box model before ordering.

How to Repair Leaking Roof Box Seals
A leaky roof box can ruin your gear and make a mess. The seals around the lid are crucial for keeping water out.
Step 1: Identify the Leak Source
• The easiest way to do this is after a car wash or a rainy drive. Open the box and check for drips or wet spots.
• Inspect the rubber or foam seal that runs around the edge of the lid or the base. Look for cracks, compression, gaps, or areas where it has pulled away from the plastic.
Step 2: Clean and Prepare
• Thoroughly clean the area where the seal meets the box. Remove any dirt, mold, or old adhesive. Use isopropyl alcohol for a spotless finish.
Step 3: Repair Options
• For Minor Gaps or Tears in the Seal:
• You can often use a flexible, waterproof adhesive or a high-quality silicone sealant designed for automotive use. Apply a thin bead around the damaged area or a small gap.
• Press the seal back into place. If it has detached, use a strong, flexible adhesive specifically made for rubber, and allow it to cure fully. Note that threadlocker is for screws, not seals: a drop of removable (blue) Permatex threadlocker stops loose latch or hinge screws from backing out.
• For Worn or Compressed Seals:
• If the seal is brittle, cracked extensively, or permanently compressed, it’s often best to replace the entire seal.
• You can buy universal weather stripping from auto parts stores or specialist DIY stores. Measure the length you need carefully.
• Many weather strips have an adhesive backing. Clean the channel where the old seal was attached very well, peel off the backing, and press the new seal firmly into place.
• If the new strip doesn’t have adhesive, use a strong, flexible rubber adhesive to attach it. Ensure it’s applied evenly and the seal is pressed firmly.
For replacing a worn lid seal: self-adhesive EPDM D-profile strip. Measure the old seal’s width and height and the full lid length before you buy.

- MATERIAL: Rubber weather stripping door seal is made of EPDM material. This rubber gasket has the functions of tear resi…
- DESIGN: D Shape foam rubber seal adopts a self-adhesive design, which is simpler to use and convenient to apply to diffe…
- FUNCTION: Foam rubber gasket has a noise reduction function to reduce sound transmission and can play the role of fill g…
Step 4: Test for Leaks
• After the sealant or adhesive has cured, lightly spray the area with water from a hose or sponge. Check inside the box for any signs of moisture. You might need to do this a few times to ensure a complete seal.
Here’s a quick look at common seal materials and their challenges:
| Seal Material | Pros | Cons | Repair Tips |
|---|---|---|---|
| Rubber (EPDM) | Durable, flexible, good UV resistance. | Can be expensive, may lose shape over time if stressed. | Best for replacing worn seals; can be adhered with rubber cement or strong epoxy. |
| Foam (Closed-Cell) | Lightweight, good cushioning. | Less durable than rubber, can compress over time, may absorb water if damaged. | Used for lighter sealing; susceptible to tears. Use flexible adhesive. |
| Silicone | Highly flexible, excellent weather resistance. | Can be less durable against abrasion, can attract dust. | Good for minor gap filling or repairing small tears; use silicone-based adhesives. |
How to Fix Cosmetic Issues: Scratches and Scuffs
While scratches and scuffs don’t affect the function of your roof box, they can be visually unappealing.
• Minor Scuffs: Often, these can be buffed out. Use a plastic cleaner or polish. For tougher marks, a rubbing compound designed for plastics (like those used for car headlights or boat hulls) can be effective. Always test in an inconspicuous area first.
• Deeper Scratches: If a scratch is too deep to buff out, you can fill it.
• Clean the scratch thoroughly.
• Use a fine-grit sandpaper (220 or higher) to smooth the edges of the scratch slightly.
• Use a plastic filler or a colored epoxy that matches your roof box color. Apply it carefully, then sand it smooth once cured.
• For a more professional look, you can then use a plastic primer and spray paint. A guide on plastic painting can be helpful.
For faded or scuffed black boxes: a plastic restorer darkens grey, sun-faded plastic. It does not fill deep scratches.
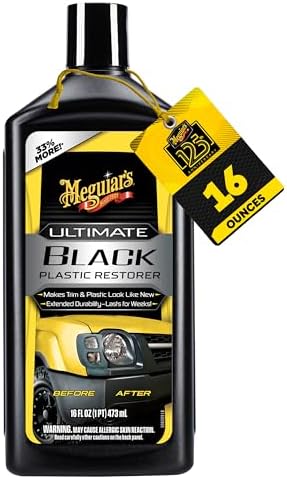
- RESTORE LIKE-NEW LOOK: Meguiar’s Ultimate Black Plastic Restorer revives faded exterior trim, vinyl, and rubber with adv…
- RICH TRIM SHINE & GLOSS: This black plastic restorer delivers deep, dark shine and lasting gloss that enhances exterior …
- LONG-LASTING UV PROTECTION: Meguiar’s trim restorer provides powerful UV defense to help reduce fading, drying, and crac…
Important Considerations for Roof Box Safety
Before and after any repair, it’s vital to prioritize safety.
• Structural Integrity: If the damage is severe, affecting the core structure or mounting points, it might be safer to replace the roof box entirely. A compromised box can detach, posing a serious hazard.
• Load Capacity: Ensure your repairs do not compromise the box’s original load rating.
• Waterproofing: After any seal repair, conduct thorough tests to confirm it’s watertight. Water damage to your cargo is no fun!
• Secure Mounting: Regularly check that your roof box is securely fastened to your roof rack. Loose bolts or straps are a common cause of accidents. This is especially important after any repair that involved the mounting points.
• Manufacturer Guidelines: Always refer to your specific roof box’s manual for any repair recommendations or warnings.
When to Consider Replacement
Sometimes, repairs aren’t feasible or cost-effective. Consider replacing your roof box if:
• The main body has multiple large cracks or significant structural damage.
• Mounting points are severely damaged and cannot be securely repaired.
• The lid or base is warped, preventing a proper seal.
• Replacement parts are unavailable, and the damage prevents safe use.
• The cost of extensive repairs approaches the price of a new or used box.
Black Friday note: if the damage is near the mounting points or the plastic is brittle, a new box is the safer choice, and roof boxes are often discounted around Black Friday. Measure your crossbar spread and check your roof load limit now, then compare options in our best roof box guide.
Frequently Asked Questions About Fixing Roof Boxes
Q1. What kind of plastic are most roof boxes made from?
Most roof boxes are made from ABS (acrylonitrile butadiene styrene) plastic or a similar durable, impact-resistant plastic. This is important to know when choosing repair materials, as you’ll want products designed for ABS.
Q2. Can I use super glue to fix a crack in my roof box?
While super glue (cyanoacrylate) can bond plastics, it’s generally not recommended for structural repairs on a roof box. It can become brittle and may not withstand the vibrations and stresses of travel. A specialized plastic repair epoxy or welding is a much stronger and more durable solution.
Q3. How long does a plastic epoxy repair take to cure?
Cure times vary depending on the specific product. Most plastic epoxies require at least a few hours to set and typically need 24 hours for a full, strong cure. Always check the manufacturer’s instructions. It’s best to let it cure completely before putting any stress on the repaired area or re-installing the box.
Q4. My roof box is old and the plastic is becoming brittle. Can this be fixed?
If the plastic is merely faded or has minor surface oxidation, a good plastic cleaner and polish can help. However, if the plastic is genuinely brittle due to age and UV exposure, it’s a sign of degradation. While you can repair cracks in brittle plastic, it may be more prone to further cracking. In such cases, replacement might be the safest option for long-term reliability.
Q5. What’s the best way to prevent damage to my roof box?
Regular maintenance and careful handling are key. Always ensure the roof box is properly mounted. Be mindful of low overhangs and branches. When loading and unloading, avoid dropping or slamming the box. Routinely check seals for wear and tear, and keep the locking mechanisms clean and lubricated.
Q6. Can I use a heat gun to reshape warped plastic on my roof box?
Yes, a heat gun can be used to gently warm and reshape warped plastic. However, you must be very careful not to overheat and melt or damage the plastic. Work in short bursts, keeping the heat gun moving, and wear protective gloves. Allow the plastic to cool and solidify in the desired shape. This is best for minor warps, not major structural distortion.
Q7. Where can I find specific replacement parts for my roof box brand?
Start with the manufacturer’s official website. Many brands have a “parts” or “support” section where you can order specific components like latches, keys, or mounting hardware. If the manufacturer doesn’t directly supply parts, look for reputable online retailers that specialize in automotive accessories or roof rack systems.
Q8. Why won’t my Thule roof box key come out?
On many Thule boxes the key is released only when every lock point is closed. Push the lid down firmly near each latch and turn the key again. If it is still stuck, clean the lock and use a dry lock lubricant. If a lock core is worn, replacement cores are available.
Conclusion

🛠️ Buying Gear for Your Work Truck?
A free Amazon Business account gets you bulk pricing, tax-exempt purchases, and business-only deals on tools, racks, and truck accessories.
Create Free Amazon Business AccountAs an Amazon Associate we earn from qualifying purchases.