Roof racks work by safely attaching a sturdy frame to your car’s roof, allowing you to securely carry extra gear like bikes, kayaks, or luggage, freeing up interior space for a more comfortable journey. This essential guide explains everything you need to know to choose, install, and use them effectively.
Ever wished you had more space in your car for that weekend camping trip, that new surfboard, or even just extra luggage? You’re not alone! Many car owners find themselves wishing for more room for their adventures or everyday hauling needs. Trying to cram everything inside can lead to a cramped, uncomfortable ride, making your journey much less enjoyable. But what if there was a simple, effective way to add significant cargo capacity without trading in your car for a bigger one? That’s where roof racks come in.
This guide is designed to demystify roof racks for you. We’ll break down exactly how they function, what types are out there, and how to choose the best one for your vehicle and lifestyle. By the end, you’ll feel confident about understanding, selecting, and even installing your own roof rack system, ready to hit the road with all your gear in tow.
Understanding the Basics: How Do Roof Racks Work?
At their core, roof racks are ingenious additions that transform your car’s roof into a versatile cargo-carrying platform. They don’t just magically stick to your roof; they are engineered systems designed for strength, stability, and ease of use. The fundamental principle is simple: a strong frame is attached securely to your vehicle’s roof to support and transport items that would otherwise have to go inside your car.
Think of your car’s roof as a blank canvas. A roof rack system adds the structural elements to make that canvas functional for carrying your adventure gear, bulky items, or extra travel bags. This is achieved through a combination of components that work together:
- Base Rack System: This is the foundation. It typically consists of two or more crossbars that span the width of your car’s roof. These crossbars are the primary load-bearing elements.
- Mounting Attachments: These are the crucial pieces that connect the crossbars to your vehicle’s specific roof design. They ensure the entire system is held firmly in place, resisting forces from the road, wind, and the weight of the cargo.
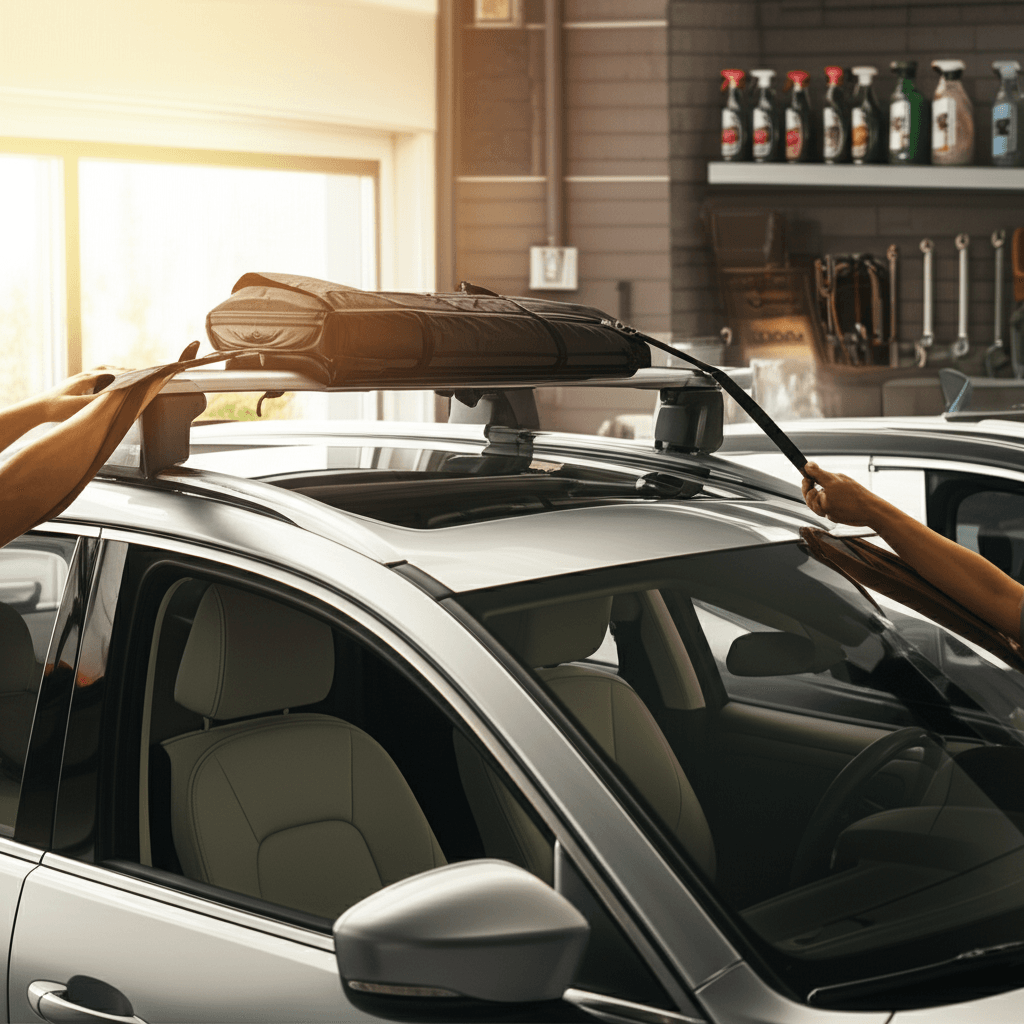
- Accessories (Attachments): Once the base rack is in place, you can add specialized carriers like bike mounts, kayak holders, cargo boxes, or ski racks. These are designed to hold specific items securely to the crossbars.
The magic lies in how securely the mounting attachments grip your car’s roof. Different roof types require different attachment methods, ensuring a solid connection no matter your vehicle. The weight of your cargo is distributed across these strong points, preventing strain on your car’s roof panel.
The Anatomy of a Roof Rack System
To truly understand how a roof rack works, it’s helpful to know its main parts. Most roof rack systems, especially the versatile ones you buy as a kit, are made up of three core components:
1. Feet (or Towers)

These are the parts that directly contact and attach to your car’s roof. They act as the anchor points. The design of roof rack feet varies significantly based on your vehicle’s roof type. They are engineered to provide a secure, non-damaging grip.
2. Crossbars
These are the horizontal bars that run from one side of your car to the other, typically connecting the feet. They are the primary surface where you’ll attach your cargo or specialized carriers. Crossbars come in different materials (like steel or aluminum) and shapes (square, round, or aerodynamic airfoil shapes).
3. Fit Kit (or Specific Mounts)
This is arguably the most critical component for a secure installation. The fit kit provides the custom pieces and hardware required to adapt the universal feet to your vehicle’s specific make, model, and year. This might include rubber padding that contours to your roof, clips that hook into door jambs, or specific mounting points designed for your car.
For example, a car with flush side rails will need different feet and fit kit components than a car with raised side rails, or a car with a naked roof (no rails at all). The fit kit ensures that even though the feet and crossbars might be part of a universal system, they integrate perfectly and safely with your specific vehicle.
Types of Roof Rack Mounting Systems
The way a roof rack attaches to your car is determined by your vehicle’s roof design. Understanding these differences is key to choosing the right system. Here are the most common types:
1. For Vehicles with Raised Side Rails
Many SUVs and wagons come equipped with raised side rails – two parallel rails that run from the front to the back of the car, elevated slightly above the roof. Roof racks for these vehicles typically use feet that clamp onto the bottom of these rails. The crossbars then attach to these feet.
- Pros: Generally easy to install, widely compatible with many rack systems, good weight capacity.
- Cons: Can sometimes add more height than other systems.
2. For Vehicles with Flush Side Rails
Flush side rails are similar to raised rails but sit directly on the roof without a gap underneath. They often have a slightly different profile. For these, specialized feet are designed to grip the underside of the rail, or sometimes they use specific mounting points integrated along the length of the rail. The fit kit is crucial here to ensure a snug and secure hold.
- Pros: Sleek look, can be slightly lower profile than raised rails, secure mounting.
- Cons: Requires a precise fit kit, might have slightly lower weight limits depending on the vehicle.
3. For Vehicles with Fixed Mounting Points
Some vehicles have small, discreet mounting points built into the roofline (often covered by small flaps or panels). These are specifically designed to accept roof rack feet. You simply remove the cover and screw the rack’s mounting hardware directly into these factory-set points. This offers a very secure and integrated look.
- Pros: Very secure, clean aesthetic, often highest weight capacities.
- Cons: Vehicle-specific, less universal compatibility for the rack system itself.
4. For Vehicles with Naked Roofs (No Rails)
This applies to many sedans, coupes, and some SUVs. These vehicles have a smooth roof with no rails, mounting points, or gutters. For these, roof racks use feet that grip the edge of the car’s door frame. The fit kit here usually includes custom-shaped rubber pads and metal clips that hook securely into the door jamb. It’s vital to use the correct fit kit for your specific car model to avoid paint damage or insecure mounting.
- Pros: Widely available for most car types, can be removed easily when not in use.
- Cons: Requires a precise fit kit, potential for paint wear if not installed carefully or if debris gets trapped, sometimes lower weight limits for safety.
5. For Vehicles with Rain Gutters
Older vehicles, some trucks, and classic cars often have external rain gutters along the edge of the roof. Roof racks for these vehicles use feet with brackets that specifically clamp around and over these gutters. This is a very robust and traditional mounting method.
- Pros: Extremely strong and secure, compatible with many older vehicles.
- Cons: Not common on modern cars, can affect aerodynamics.
How Do Crossbars Work?
Once the feet are securely attached to your car, the crossbars are the next essential part of the system. They provide the platform onto which you mount gear. Their design and material influence how much weight they can carry and how much noise they make while driving.
Types of Crossbars
- Square Bars: These are the most basic and often the most affordable. They are strong, durable, and compatible with a wide range of accessories. However, they can be noisier and less aerodynamic, potentially affecting fuel economy.
- Round Bars: Similar to square bars in function, round bars offer a slightly more streamlined profile but can still generate wind noise. They are also very versatile with accessories.
- Aero (Wingbar) Bars: These are shaped like an airplane wing. They are significantly more aerodynamic, leading to less wind noise and better fuel efficiency. They are also typically stronger and have a cleaner aesthetic. Accessories might need to be specific for aero bars, often sliding into integrated channels.
The spacing of your crossbars is important. For most items, a wider spread is more stable. The general rule of thumb is to space them as far apart as your vehicle’s roof and cargo will allow, often with a minimum distance of around 24-36 inches (60-90 cm) recommended for stability.
How Do Accessories Work?
The real utility of a roof rack system comes from the specialized accessories you can add. These are designed to hold specific types of gear securely and safely.
Common Accessories and How They Work
- Bike Racks: These can mount your bike by its frame (requiring the front wheel to be removed) or by clamping around the front wheel. They attach to the crossbars, holding the wheels and frame securely. Some are fork mounts, others front-wheel specific, and some are frame-grip designs.
- Kayak/Canoe Carriers: These often come in J-shaped cradles or padded saddle designs that conform to the hull of your kayak or canoe. They typically strap around the boat and then secure tightly to the crossbars, preventing any shifting during transit.
- Cargo Boxes (Cargo Boxes/Totes): These are enclosed, aerodynamic containers that attach to the crossbars. They offer weather protection for your gear and a secure way to store luggage, skis, or other items. They usually lock for added security.
- Ski and Snowboard Carriers: These are typically clamp-style carriers that hold skis or snowboards between two rubberized grips. They can be mounted longitudinally or transversely and are designed to withstand cold weather and snow.
- Load Baskets: Open-air baskets that mount to the crossbars, offering a versatile space for irregularly shaped gear, camping equipment, or extra bags. Often used with ratchet straps or cargo nets for securing items.
The installation of these accessories is usually straightforward. They typically use T-slots, U-bolts, or clamp mechanisms that integrate directly with the crossbars. Always follow the manufacturer’s instructions for both the base rack and the accessory, ensuring they are mounted correctly and tightened securely.
Choosing the Right Roof Rack: A Step-by-Step Approach
With so many options, selecting the right roof rack can seem daunting. Here’s a simplified approach to help you make the best choice:
Step 1: Identify Your Vehicle’s Roof Type
This is the most crucial first step. Does your car have:
- Raised Side Rails?
- Flush Side Rails?
- Fixed Mounting Points?
- A Naked Roof?
- Rain Gutters?
If you’re unsure, consult your car’s owner’s manual or look up your vehicle’s specifications online. Reputable roof rack brands often have vehicle fit guides on their websites.
Step 2: Determine What You Need to Carry
What kind of gear will you primarily transport?
- Bikes? Consider fork mounts (lighter, often require front wheel removal) or wheel/frame mounts (easier, no disassembly).
- Kayaks/Canoes? Look for specialized cradles designed to protect the hull.
- Skis/Snowboards? Ski and snowboard carriers are ideal for winter sports.
- General Luggage/Camping Gear? A cargo box or a load basket offers great versatility and protection.
- Multiple Items? You might need a combination of accessories.
Step 3: Research Brands and Systems
There are several well-regarded roof rack manufacturers. Some popular and trusted brands include:
- Thule
- Yakima
- Rhino-Rack
- Inno
- Bauer (often a more budget-friendly option)
Each brand offers systems designed for different roof types and with varying features (e.g., aerodynamics, weight capacity, security locks). Many brands also have a “build your own” tool on their website, allowing you to input your vehicle information and see compatible parts.
Step 4: Consider Crossbar Style and Material
Decide whether aesthetics, noise reduction, and aerodynamics are priorities. Aero bars are quieter and more efficient but often cost more. Square or round bars are generally less expensive.
Step 5: Check Weight Capacity
Every roof rack system and your vehicle’s roof itself has a maximum weight limit. This includes the weight of the rack components, accessories, and the cargo itself. Your vehicle’s owner’s manual is the best place to find the maximum roof load capacity. Never exceed it. For reference, most vehicle roof capacities range from 100 to 200 lbs (45 to 90 kg).
A helpful resource for understanding vehicle load ratings and roof capacities can be found on sites like the National Highway Traffic Safety Administration (NHTSA), which provides information on vehicle safety standards and how they relate to accessories.
Step 6: Factor in Security and Locking Mechanisms
If you plan to leave your rack installed or your gear unattended, look for systems with built-in locks for both the rack itself (at the feet/towers) and for accessories like cargo boxes. Most reputable systems offer locking options.
Step 7: Budget
Roof rack systems can range from a few hundred dollars for a basic setup to over a thousand for premium, aerodynamic options with multiple accessories. Set a budget and look for the best combination of features, durability, and safety within that range.
Installation: Doing It Yourself
Installing a roof rack can often be a DIY project, saving you installation fees. While specific steps vary greatly depending on the rack type and your vehicle, here’s a general overview:
Tools You Might Need
- The roof rack components (feet, crossbars, fit kit)
- The included Allen wrench or a compatible hex key set
- A tape measure
- A soft cloth or microfiber towel
- Possibly a rubber mallet (for tapping parts into place gently)
- Torque wrench (highly recommended for precise tightening if specified by the manufacturer)
General Installation Steps
- Read the Instructions: This is the most important step! Each rack system and fit kit has specific instructions. Follow them precisely.
- Clean Your Roof: Thoroughly clean the roof area where the rack will sit. Any dirt, dust, or debris can scratch your paintwork and compromise the grip.
- Assemble the Base Rack: Attach the feet to the crossbars using the provided hardware. If your system requires specific orientation, ensure it’s correct.
- Attach the Fit Kit Components: Install any custom clips, pads, or brackets from the fit kit onto the feet according to the instructions.
- Position the Front Crossbar: Carefully place the front crossbar assembly onto your car’s roof. Position it according to the measurement specifications provided in your fit kit instructions (this is critical for proper fit and load distribution).
- Secure the Front Crossbar: Gently tighten the rack’s adjustment knobs or bolts. Do NOT fully tighten yet. Ensure the clips are engaged correctly in the door jambs or mounting points.
- Install the Rear Crossbar: Measure and position the rear crossbar. The spacing between the front and rear bars is important for stability and is usually specified.
- Secure the Rear Crossbar: Again, hand-tighten initially.
- Final Tightening and Torque: Once both bars are in position, uniformly tighten all bolts. If a torque wrench is recommended or required, use it to tighten to the manufacturer’s specified torque. This ensures they are tight enough not to move but not so tight that they damage your car.
- Check for Stability: Gently try to move the rack. It should not shift, wobble, or creak.
- Attach Accessories: Once the base rack is secure, proceed to install your chosen accessories (bike mounts, cargo boxes, etc.) following their respective instructions.
Important Note: For naked roofs and some flush rail systems, it is highly recommended to use a torque wrench for the final tightening of the rack’s mounting hardware. This ensures consistent pressure and prevents over- or under-tightening, which can damage paint or compromise security. You can find torque specifications in your roof rack manual or on the manufacturer’s website.
Maintenance and Best Practices
To ensure your roof rack system lasts and performs safely, proper maintenance is key.
Regular Checks
- Before and After Each Trip: Always check that all bolts are tight and that the rack feels secure. Lightly wiggle the rack; it shouldn’t move.
- Monthly: Inspect the rack for