A car roof rack is a system mounted on your vehicle’s roof to carry extra gear like bikes, kayaks, luggage, or cargo boxes. It’s a simple solution for freeing up interior space, making it perfect for adventures and hauling larger items without needing a bigger car.
Ever feel like your car is just too small for your adventures? Luggage overflows, bikes clutter the back seat, and that dream kayak trip seems impossible because you don’t have enough space? You’re not alone! Many car and SUV owners face this common challenge. The good news is, there’s a straightforward solution that can significantly expand your vehicle’s carrying capacity without needing a bigger car or endless re-packing. It’s called a car roof rack, and it’s simpler to understand and use than you might think.
This guide is designed to break down everything you need to know about roof racks, from what they are and how they work to how to choose the best one for your needs. We’ll cover the different types, installation basics, and handy tips to help you travel smarter and enjoy more adventures. Let’s get your gear safely on board and explore the possibilities!
What Exactly Is a Car Roof Rack?
Think of a car roof rack as an organized shelf for your car’s roof. It’s an accessory system that attaches to your vehicle’s roof to provide a stable platform for carrying various types of cargo. At its core, a roof rack system typically consists of a few key components:
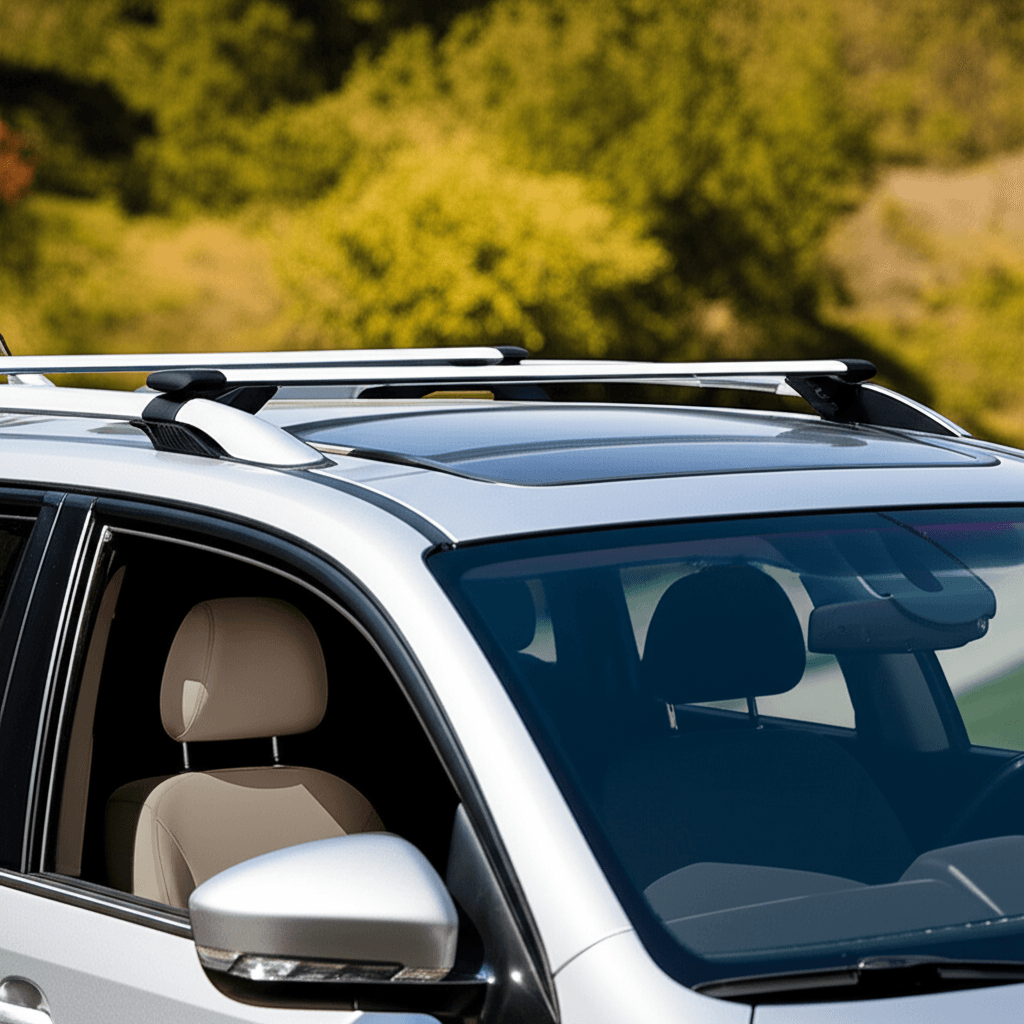
- Crossbars: These are the horizontal bars that run across the width of your car’s roof. They are the main supports on which your gear will be mounted or secured.
- Fit Kit/Foot Pack: This is the specialized hardware designed to attach the crossbars securely to your specific car model. Different vehicles have different roof designs (like raised rails, flush rails, or fixed points), and the fit kit ensures a proper, safe connection.
- Racks & Accessories: These are the add-ons that attach to the crossbars to hold specific items. Examples include bike carriers, kayak mounts, ski racks, cargo boxes, and general cargo baskets.
The primary purpose of a car roof rack is to give you extra space to transport items that are too bulky, dirty, or numerous to fit inside your vehicle’s cabin. This is a game-changer for outdoor enthusiasts, families going on vacation, or anyone who frequently needs to haul gear. It keeps your car’s interior clean and provides a safe and secure way to transport your load.
Why Would You Need a Car Roof Rack? The Benefits Explained
Installing a car roof rack isn’t just about adding extra space; it unlocks a world of practical benefits that can significantly improve your daily life and weekend getaways. Here’s why many drivers find them indispensable:
- Maximize Cargo Space: This is the most obvious benefit. A roof rack instantly expands your vehicle’s carrying capacity, allowing you to bring more gear on trips, transport bulky items home from the store, or even move larger objects.
- Keep Your Interior Clean: Haul muddy bikes, wet camping gear, or sports equipment on the roof instead of tossing them onto your car’s seats or floor. This keeps your car’s interior looking and smelling fresh.
- Transport Large or Awkward Items: Things like surfboards, kayaks, skis, lumber, or even a Christmas tree can be safely and easily transported when you have the right roof rack setup.
- Enhance Travel Experience: With more space available, you can pack more comfortably for road trips, ensuring everyone has room to relax. It also opens up possibilities for activities you might not have considered due to gear limitations.
- Prevent Vehicle Damage: Trying to cram oversized items inside your car can lead to scratches, dents, or tears. A roof rack provides a designated, secure spot for these items, protecting your vehicle’s paint and interior.
- Versatility and Customization: Roof rack systems are modular. You can start with basic crossbars and add specific carriers or accessories as your needs change, making it a long-term investment.
Understanding the Different Types of Car Roof Racks
Not all roof racks are created equal. The type that’s best for you depends on your vehicle’s roof structure and what you plan to carry. Here’s a breakdown of the most common types:
1. Factory-Installed Rack Systems
Some vehicles come with built-in roof rack systems directly from the manufacturer. These can vary widely:
- Raised Side Rails: These are the most common integrated racks. They are rails that run along the length of your car’s roof, usually with a small gap between the rail and the roof. Crossbars can then be clamped onto these rails.
- Flush Side Rails: Similar to raised rails, but they sit directly on the roof with no gap. They offer a sleeker look but sometimes require specific mounting hardware.
- Fixed Points: These are small, discreet mounting points located on the roof, often covered by a small cap. They offer a very secure attachment for dedicated roof rack feet.
- Gutters: Older vehicles might have a small lip or “gutter” along the edge of the roof where rack feet can clamp on.
2. Aftermarket Rack Systems
If your car doesn’t have a factory rack, or if you need a more robust or versatile system, aftermarket racks are the way to go. These are designed to attach directly to your car’s roof.
- Crossbars-Only Systems: These are the most basic aftermarket systems. They consist of two crossbars that attach directly to your vehicle’s roof using specialized feet and a fit kit. You can then attach accessories to these crossbars.
- Complete Systems: These are sold as a package, including the feet, crossbars, and often the necessary hardware to attach them to your specific vehicle.
3. Popular Roof Rack Brands and Their Offerings
Several reputable companies specialize in roof rack systems, offering a wide range of options for almost any vehicle and need. Some of the most well-regarded include:
- Thule: Known for high-quality, innovative, and durable products. They offer a vast array of solutions for everything from bikes to kayaks to ski boxes, with a focus on user-friendliness and robust design.
- aTERR-e: Offers a strong lineup of dependable and often more budget-friendly options. They provide solid, reliable racks and carriers that are great for everyday use and common outdoor activities.
- Rhino-Rack: A popular choice, especially for rugged applications. Rhino-Rack is known for its strong, durable roof rack systems designed to withstand demanding conditions, often favored by off-road and adventure enthusiasts.
- Yakima: Another established player, Yakima offers a comprehensive range of racks, including their popular “LockDown” and “Spider” systems for bikes, and various carriers for water sports and cargo.
When choosing an aftermarket system, it’s crucial to use the manufacturer’s fit guide. You’ll typically enter your vehicle’s make, model, and year, along with information about your specific roof type, to find the compatible components. A great resource for checking vehicle compatibility is the National Highway Traffic Safety Administration (NHTSA) website, which provides safety information and resources, though direct roof rack fit guides are best found on manufacturer sites.
Key Components of a Roof Rack System
Let’s dive a little deeper into the parts that make up a roof rack system, so you know what you’re looking for:
Crossbars
These are the backbone of your roof rack. They span the width of your car and provide the primary mounting surface. Crossbars come in a few different materials and shapes:
- Steel: Strong and durable, often coated to prevent rust. They can be a bit heavier.
- Aluminum: Lighter than steel and less prone to corrosion. They can be shaped into aerodynamic profiles to reduce wind noise.
- Square: The most basic and often most affordable. Known for durability.
- Round: A common shape, often used with a variety of accessories.
- Aero/Wing Bars: These are flatter, often elliptical shapes that minimize wind resistance and noise.
Fit Kits & Towers (Feet)
These are the components that securely attach the crossbars to your car’s roof. Towers (or feet) are the part that connects to the car, and the Fit Kit contains the specific adapters, clips, and hardware that make that connection work for your particular vehicle model and roof type.
- For Raised Rails: Feet designed to clamp onto the raised rail externally or internally.
- For Flush Rails: Feet that grip the flush rail securely, often with a precise contour to match the rail.
- For Fixed Points: Feet that screw directly into the vehicle’s pre-drilled mounting points.
- For Naked Roofs (No Rails): These systems use special clips that hook into the door jambs. This is a very common type for cars without factory rails.
Accessories & Carriers
Once you have your crossbars installed, you can attach various carriers to transport specific gear:
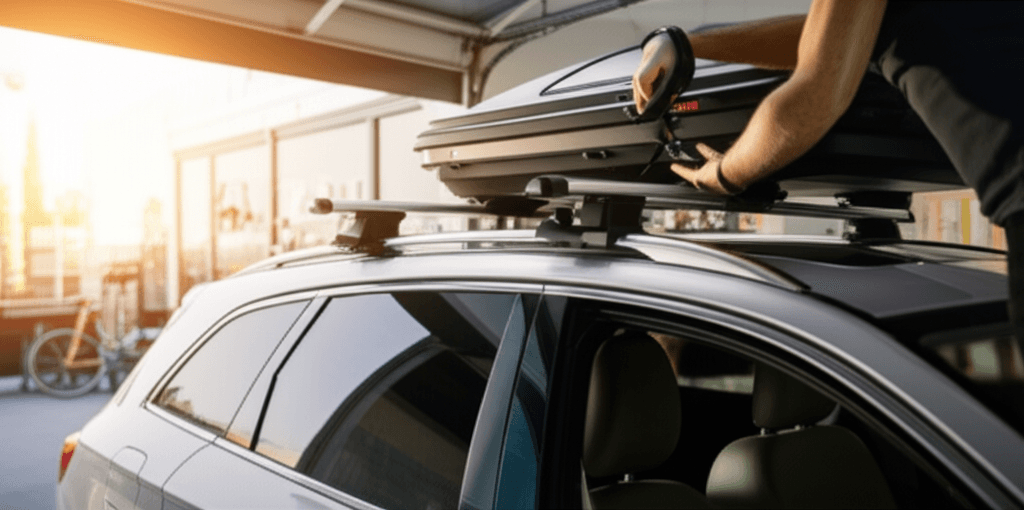
- Cargo Boxes/Totes: Enclosed, aerodynamic boxes that offer lockable, weather-resistant storage for luggage, camping gear, and more.
- Bike Racks: Options include fork-mount (where the bike fork attaches), frame-mount (frame clamps to the rack), or wheel-mount carriers.
- Kayak/Canoe Carriers: J-racks, saddles, or cradles designed to hold watercraft securely.
- Ski/Snowboard Racks: Carriers that clamp skis or snowboards in place, protecting them and keeping snow outside your car.
- Cargo Baskets: Open-air racks, great for bulky or irregularly shaped items that don’t need full enclosure.
- Roof Top Tents (RTTs): For the ultimate adventure, these rigid or soft-shell tents can be mounted to heavy-duty roof racks, providing a comfortable sleeping space off the ground.
Choosing the Right Roof Rack for Your Vehicle and Needs
Selecting the perfect roof rack system involves a bit of thoughtful consideration. Here’s a step-by-step approach to help you make the best choice:
Step 1: Identify Your Vehicle’s Roof Type
This is the most critical first step. Look at your car’s roof and determine which category it falls into:
- Raised Side Rails: Rails that run front to back with a visible gap from the roof.
- Flush Side Rails: Rails that run front to back but sit directly on the roof with no gap.
- Fixed Mounting Points: Small, often covered, threaded mounting holes along the roofline.
- Naked Roof: No rails, no fixed points – the roof is completely smooth.
Knowing this will dictate the type of feet or towers you’ll need.
Step 2: Determine What You Need to Carry
What gear do you haul most often? This will guide your choice of crossbars and accessories. Consider:
- Type of gear: Bikes, skis, kayaks, luggage, lumber, etc.
- Quantity: How many of each item will you carry at once?
- Dimensions and Weight: Check the weight limits of both your vehicle’s roof and the rack system itself.
For example, if you have a larger SUV and love family road trips packed with gear, a cargo box might be ideal. If you’re a cyclist who loves hitting the trails, a dedicated bike rack is essential.
Step 3: Consider Your Budget
Roof rack systems can range from a few hundred dollars for a basic setup to over a thousand for premium brands and multiple accessories. Generally:
- Basic crossbar systems are more affordable.
- Specialized carriers (like kayak mounts or cargo boxes) add to the cost.
- Premium brands often have higher price points due to materials, engineering, and warranty.
It’s wise to invest in a reputable brand known for safety and durability, as a falling load can be dangerous and costly. Many users find that a mid-range option from a trusted brand offers a good balance of quality and price.
Step 4: Research Brands and Read Reviews
Once you have an idea of the type of system you need, research brands. Look for:
- Ease of Installation: Are they known for user-friendly designs?
- Durability and Material Quality: Will they stand up to the elements and repeated use?
- Warranty: What kind of guarantee does the manufacturer offer?
- Customer Reviews: What do other users with similar vehicles and needs say?
Manufacturers like Thule, aTERR-e, Rhino-Rack, and Yakima have extensive online resources and customer support to help you find compatible parts.
Step 5: Use Online Fit Guides
Every reputable roof rack manufacturer will have an online tool. You input your vehicle’s year, make, and model, and it will show you all the compatible parts, including towers, crossbars, and fit kits. This is the most reliable way to ensure you’re buying the correct components for your specific car.
Installing Your Roof Rack: A Beginner’s Guide
Don’t let installation intimidate you! Most aftermarket roof rack systems are designed for DIY installation. While specific steps vary by rack type and vehicle, here’s a general overview:
Tools You Might Need:
- The roof rack parts (towers, crossbars, fit kit)
- The included Allen wrenches/hex keys
- A tape measure
- A soft cloth or towel (to protect your car’s paint)
- Possibly a torque wrench for precise tightening (if recommended by the manufacturer)
General Installation Steps for Naked Roofs or Rails (Example):
Always refer to the specific instructions that come with your roof rack system.
- Prepare Your Car: Clean the roof area where the rack will sit. Place a soft cloth or towel on the roof near the door frame to prevent scratches.
- Assemble Towers and Fit Kits: Attach the specific clips or rubber pads (part of the fit kit) to the towers (feet) according to the instructions.
- Position Towers on the Roof: Carefully place the towers on the roof, aligning them with the recommended mounting points. For naked roofs, the clips will hook into the door jambs. For rails, the towers will likely clamp onto or around the rails at specific intervals.
- Attach Crossbars: Slide the crossbars into the towers. They will have measurement guides or adjustment points to ensure even spacing.
- Tighten Components (Initial): Snug up the hardware to hold everything in place but don’t fully tighten yet. Ensure the rack is positioned correctly according to the manufacturer’s measurements for front-to-back spacing and side-to-side overhang. A common spacing recommendation can be found in vehicle owner’s manuals or automotive resource sites like Edmunds, though always prioritize rack manufacturer specs.
- Final Tightening & Torque: Once everything is aligned and measurements are correct, systematically tighten all the bolts. Many systems require a specific torque setting. If a torque wrench isn’t provided or recommended, tighten until snug and feel secure. Some systems have built-in torque indicators.
- Install Locks (if applicable): If your system comes with locks, install them in the feet for added security.
- Test and Inspect: Gently try to move the rack to ensure it’s completely secure. Check all bolts one last time.
Important: For safety, ensure the rack is mounted as far apart longitudinally (front-to-back) as your vehicle’s roof allows, which provides stability. For naked roofs, ensure the rubber pads and clips are seated correctly to avoid damaging paint or body panels—this is where consulting detailed instructions is crucial.
Loading and Securing Your Gear Safely
A roof rack is only as good as how you use it. Safe loading is paramount for you, your passengers, and other road users.
General Loading Tips:
- Distribute Weight Evenly: Try to place heavier items closer to the front of the rack and balance the load from side to side.
- Secure Everything Tightly: Use strong, durable tie-down straps (cam straps are excellent for this). Avoid bungee cords, as they can stretch and fail.
- Check and Re-Check: Before you set off and at regular stops (e.g., every hour or 50 miles), check that your gear is still secure and the rack hasn’t shifted.
- Don’t Exceed Weight Limits: Be aware of both your vehicle’s roof load capacity (check your owner’s manual) and your roof rack system’s maximum weight limit.