Quick Summary: Roof rack stops are vital accessories that prevent your gear, like bikes or kayaks, from sliding forward or backward on your roof rack crossbars. They create a secure anchor point, boosting safety and peace of mind when transporting anything precious.
Heading out for an adventure? You’ve probably got your sights set on hitting the trails, the water, or a new destination. To get all your gear there safely, a roof rack is a game-changer! But what happens if your kayak or luggage shifts during your drive? That’s where roof rack stops come in. They might seem small, but these little helpers are super important for keeping your cargo exactly where you want it, preventing those scary slides and making your journey much smoother. Don’t worry if this sounds new; we’ll walk through everything you need to know to secure your loads like a pro!
What Are Roof Rack Stops and Why Do You Need Them?
Think of roof rack stops – sometimes called load stops or cargo stops – as the silent guardians of your gear. When you’re loading up bikes, kayaks, lumber, or even just bulky luggage onto your roof rack, there’s a natural tendency for things to want to slide, especially when you brake, accelerate, or take turns. Roof rack stops are specifically designed to prevent this unwanted movement.
They attach to your roof rack’s crossbars and create physical barriers. These barriers work by resisting the forward and backward forces that push against your cargo. Without them, your precious gear could shift, potentially causing damage to your vehicle, the gear itself, or even more dangerously, other vehicles on the road. For anyone serious about safely transporting items on their roof, especially irregularly shaped or heavy loads, roof rack stops are not just a good idea – they’re essential.
How Do Roof Rack Stops Work?
At their core, roof rack stops are simple mechanical devices. Most are designed to clamp or bolt securely onto the existing crossbars of your roof rack system. Once attached, they extend upwards or outwards, creating a physical “stop” that your cargo can rest against. When you tie down your gear, you typically position it snugly against these stops. The tie-down straps then hold the gear firmly in place, with the stops acting as the solid foundation preventing any unwanted sliding.
Some stops are adjustable, allowing you to customize their placement based on the width and length of the items you’re carrying. Others are fixed. The key is that they provide a consistent, reliable point of resistance that significantly enhances the stability of your load. This is especially true for items like long kayaks or narrow lumber, which can be prone to fishtailing or sliding if not properly secured.
Types of Roof Rack Stops
The world of roof rack stops might be smaller than you think, but there are a few variations to consider, each suited to different needs and types of cargo. Understanding these differences will help you choose the best option for your specific adventures.
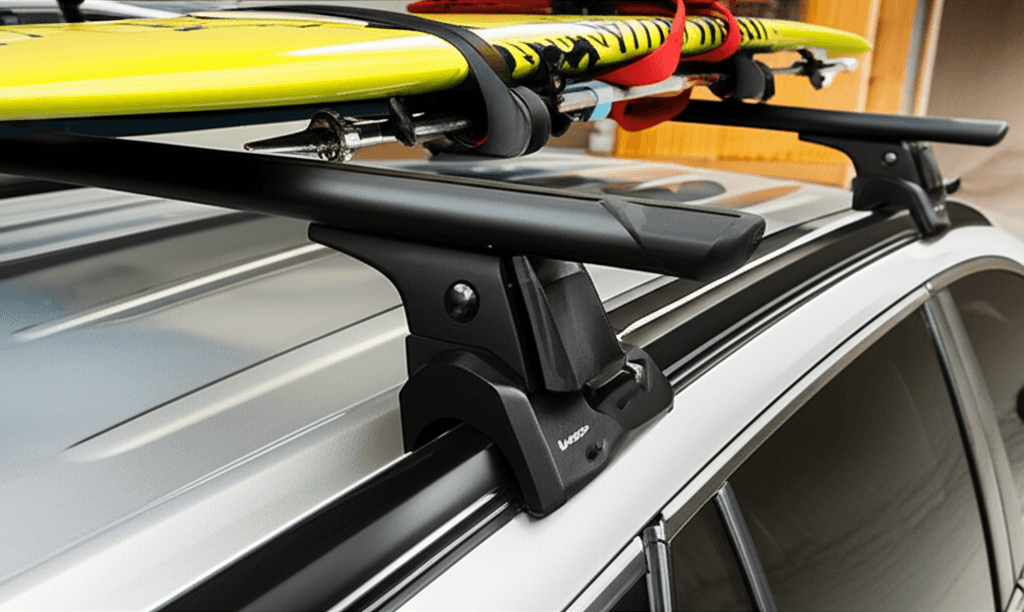
1. Fixed Angle Load Stops
These are common and straightforward. They typically attach to the side of a crossbar and have a fixed angle to create a vertical barrier. They’re great for general cargo and can be used in pairs or multiples to create a secure ‘pocket’ for your items.
2. Adjustable Load Stops
These offer more versatility. Adjustable load stops can often change their angle and position along the crossbar. This is fantastic if you carry a variety of different items, from narrow bicycles to wider kayaks. You can fine-tune their position to perfectly cradle your cargo.
3. Kayak-Specific Stops/Stanchions
Some systems include specialized stops designed explicitly for carrying kayaks or canoes. These might be taller, have a specific contour to match a kayak hull, or be integrated into a larger kayak carrier system. They prioritize keeping the kayak stable and free from the crossbar itself, which can sometimes damage the hull.
4. DIY Solutions & Custom Stops
While not always recommended for beginners, some experienced users might create custom stops. This could involve custom metal fabrication or even clever use of robust materials. However, for most users, opting for purpose-built stops from reputable brands is the safest and most reliable approach.
Why Are Roof Rack Stops So Important? A Deeper Dive
We’ve touched on safety, but let’s really hammer home why these accessories are more than just an afterthought. Transporting gear on your roof rack involves significant physics, and stops play a crucial role in managing those forces.
When you brake suddenly, your vehicle’s inertia wants to keep everything moving forward. Without stops, your cargo will try to slide towards the front of your vehicle. This momentum can be tremendous, especially with heavy or long items. Even a slight shift forward can put immense stress on your tie-down straps and potentially cause them to loosen or fail. A catastrophic failure could mean your equipment ends up on the road, creating a serious hazard for you and others.
Similarly, acceleration causes forces that can try to push cargo backward, and cornering introduces lateral forces that can make your load shift sideways. Roof rack stops provide a stable reference point that, when combined with properly tensioned straps, locks your load down against these forces. They distribute the pressure and give your tie-downs something solid to work against.
Beyond the immediate safety concerns, well-secured loads also mean less noise and vibration during travel. When gear shifts and rattles, it’s not only annoying but also a sign that it’s not as secure as it could be. Stops help minimize this, making for a more pleasant driving experience.
The Role of Stops in Cargo Stability
Stops aren’t meant to be the only way you secure your gear. They are a critical part of a multi-point securing system. Here’s where they fit in:
- Preventing Sliding: Their primary job is resisting forward/backward movement.
- Creating a Fixed Point: They provide a reliable edge for your cargo to sit against.
- Enhancing Tie-Down Effectiveness: They allow tie-down straps to work by holding the cargo against something solid, rather than just trying to friction-hold it in place.
- Distributing Pressure: They can help spread the load and prevent straps from digging into soft cargo.
- Peace of Mind: Knowing your gear is anchored reduces driver stress.
It’s important to remember that stops work best when paired with high-quality tie-down straps (like cam straps or ratchets) and potentially other securing methods such as cargo nets for smaller items. Always check the manufacturer’s recommendations for your specific roof rack and cargo type.
Choosing the Right Roof Rack Stops for Your Needs
Selecting the perfect roof rack stops involves a few considerations. You don’t want to just grab the first set you see; taking a moment to match the stops to your gear and rack will save you headaches and ensure maximum safety. Here’s what to think about:
1. Compatibility with Your Roof Rack System
This is non-negotiable. Roof rack stops are designed to work with specific types of crossbars. Most modern stops are made to fit popular bar shapes, like aerodynamic “wing” bars or standard square/round bars. Some brands offer stops that are proprietary to their own rack systems.
- Check your crossbar shape and dimensions: Before buying, measure the width and height of your crossbars.
- Read product descriptions carefully: Manufacturers will clearly state which bar types their stops are designed for.
- Consider universal fit options: If you have an older or less common rack, look for universal or adjustable clamps.
A great resource for understanding different roof rack designs can be found on sites like NHTSA’s equipment guidelines, which touch upon safe load-securing principles, though they may not detail specific stop types.
2. Type of Gear You’ll Be Carrying
The items you transport will dictate the type and height of stops you need.
- Bikes: Bikes often have frames that can lean. Stops can help prevent them from shifting against each other or sliding down the rack. Some bike carriers have integrated stops or securing points.
- Kayaks/Canoes: These are long and can be heavy. Taller, more robust stops or specialized kayak stanchions are often best. They need to prevent fore-aft movement and potential side-to-side sway.
- Lumber/Building Materials: For long, flat items, robust, high stops are essential to prevent the ends from lifting or sliding.
- Luggage Boxes/Totes: While these are generally stable, stops can add an extra layer of security to prevent them from shifting sideways or forward during hard braking.
3. Adjustability vs. Fixed Stops
As we discussed earlier, adjustable stops offer more flexibility if you switch between different types of gear frequently. Fixed stops are simpler and often more robust for a single purpose, like consistently carrying kayaks.
4. Material and Durability
Roof rack stops are exposed to the elements. Look for durable materials like powder-coated steel or heavy-duty plastics that can withstand UV rays, rain, and varying temperatures without degrading or becoming brittle. Metal stops are generally more robust for heavier loads.
5. Ease of Installation and Removal
Unless you plan to keep your stops on permanently, consider how easy they are to install and remove. Most attach with simple hand knobs or basic tools. If you plan to take them on and off frequently, ease of use can be a significant factor.
Table: Comparing Stop Features
Here’s a quick look at key features to help you decide:
| Feature | Fixed Angle Stops | Adjustable Stops | Specialized (e.g., Kayak) Stops |
|---|---|---|---|
| Best For | General cargo, consistent loads | Varied cargo types, frequent changes | Specific gear like kayaks, canoes |
| Versatility | Low | High | Low (specific to gear) |
| Ease of Use | Simple, set-and-forget | Requires adjustment for each load | Can be very specific, easy once set up |
| Security | High for intended use | High, once adjusted correctly | Very high for intended gear |
| Installation | Usually simple clamp/bolt | Usually simple clamp/bolt | Varies, can be integrated |
How to Install Roof Rack Stops
Installing roof rack stops is generally a straightforward process, designed to be done by the user without special tools. The exact method will vary slightly depending on the brand and style of your stops, but here’s a general guide that covers most common installations.
Tools You Might Need:
- The roof rack stops with included hardware
- Possibly a basic Allen wrench or socket set (often included or commonly available standard sizes)
- A tape measure (helpful for alignment)
- Gloves (optional, for better grip and protection)
Step-by-Step Installation Guide:
- Read the Manufacturer’s Instructions: Always start by referring to the specific instructions that came with your roof rack stops. They will have details unique to your model.
- Position Your Crossbars: If you haven’t already, ensure your crossbars are installed correctly on your vehicle and spaced appropriately for the gear you plan to carry. Make sure they are securely fastened to your vehicle’s roof rails or mounting points.
- Locate Mounting Points on Crossbars: Most crossbars have T-slots (channels) or dedicated mounting points. If your bars are smooth round or square, the stops will likely clamp around them. You’ll need to know where to place the stops relative to each other and where your cargo will sit. A good starting point is usually a few inches in from where your cargo will rest, so they provide a solid boundary.
-
Attach the Stops:
- For T-Slot Bars: If your stops use T-bolts, slide the bolt into the T-slot channel on your crossbar. Position the stop where you want it and then tighten the T-bolt using the provided knob or tool.
- For Clamping Stops: If your stops clamp around the bar, position the clamp around the crossbar. Insert the bolts and tighten them evenly to secure the stop to the bar. Ensure the clamp is snug but not so tight that it deforms the bar.
- Adjust Positioning: Place your intended cargo (or a similar sized item) on the rack to get a feel for placement. Position the stops so they gently support the ends of your gear without causing interference. For items like kayaks, you might place them towards the front and back edges of the kayak’s contact point. For lumber, you might place them at the very ends or at intervals if carrying multiple long pieces.
- Tighten Securely: Once positioned, fully tighten all bolts or knobs. Make sure the stops feel solid and do not wiggle. A loose stop is useless and potentially dangerous.
- Test Fit Your Gear: Before loading for a trip, place your actual gear on the rack and see how it sits against the stops. Check that everything is positioned correctly and that you have enough space for your tie-down straps.
Important Note: Always double-check that your stops are rated for the weight and type of cargo you intend to carry. Overloading or using stops not designed for your gear can lead to failure.
Securing Your Load: Stops are Just One Piece of the Puzzle
While our focus is on roof rack stops, it’s crucial to understand that they are only one part of a comprehensive cargo-securing strategy. They provide the anchor points, but you still need the right methods to hold your gear down firmly.
The Importance of Quality Tie-Down Straps
- Cam Straps: These are excellent for most general-purpose loads. They are easy to use, relatively inexpensive, and provide good tension. Ensure yours are made of UV-resistant webbing. Look for straps with a strong breaking strength suitable for your gear. For instance, carrying a kayak often requires straps with a breaking strength of at least 500-1000 lbs.
- Ratchet Straps: For heavier or more demanding loads (like lumber or heavy equipment), ratchet straps offer superior tensioning capability. Be careful not to overtighten and damage your gear or vehicle.
- Rope: While usable in some situations, high-quality rope is generally less reliable than dedicated straps for securing high-value or potentially hazardous cargo.
Proper Loading and Strapping Techniques
Here’s a reminder of best practices:
- Center Your Load: Distribute weight as evenly as possible over the crossbars.
- Use Multiple Tie-Down Points: Never rely on just one strap. Use at least two straps to secure an item, crisscrossing them or using them to anchor to different points on your vehicle (if your vehicle has appropriate tie-down points).
- Pull Straps Tight: Snug is good, but a strap that’s strained to its absolute limit can cause damage. Aim for firm tension that keeps the load from shifting.
- Secure Loose Ends: Tie off any excess strap material so it doesn’t flap in the wind or get caught.
- Front and Rear Straps (if necessary): For long items like kayaks or lumber, you may need additional straps attaching the front and rear of the item to your vehicle’s front/rear bumper or dedicated tie-down points. This prevents the item from lifting or sliding forward during hard braking.
- Check Periodically: Always check your straps for tension and condition shortly after starting your journey and at regular intervals during long trips. Loads can settle, and straps can loosen slightly.
For more insights into safe vehicle loading, resources like those from The Federal Highway Administration provide comprehensive guidelines on cargo securement principles, reinforcing the importance of a multi-faceted approach.
Maintenance and Care for Your Roof Rack Stops
To ensure your roof rack stops continue to protect your gear voyage after voyage, a little bit of care goes a long way. These accessories are out in the elements almost constantly, so keeping them in good condition is key.
Regular Inspection
- Check for Damage: Look for any cracks, deep gouges, or signs of wear on the stops themselves. If they are made of metal, inspect for rust or bending.
- Inspect Mounting Hardware: Ensure that bolts, nuts, and clamps are still tight and haven’t vibrated loose. Check for any signs of corrosion on metal hardware.
- Examine Fit on Crossbars: Make sure the stops are still firmly