Quick Summary:
Adding a roof rack to your Can-Am X3 significantly expands its cargo-carrying ability, making it perfect for adventure gear. This guide makes choosing, installing, and using a roof rack simple, even for beginners, so you can carry more and explore further with confidence.
Adding a roof rack to your Can-Am X3 isn’t just about looks; it’s about unlocking its full potential for adventure. If you love hitting the trails, carrying extra gear for a long weekend, or just need more space, a roof rack is a game-changer. But where do you even start? It can feel a little overwhelming with so many options out there. Don’t worry! We’ll walk through everything you need to know, from picking the right rack to getting it set up securely. You’ll be ready to haul your essential gear in no time.
4
Top Roof Rack Brands for Can-Am X3 (Examples) These brand examples are illustrative. Always check current availability and reviews for your specific Can-Am X3 model. It’s always wise to research brands known for quality and durability in the off-road UTV market. Some popular names that often come up for UTV accessories and might offer compatible roof rack solutions include: SuperATV: Known for a wide range of UTV upgrades, often with robust designs. Gator Waders: While primarily known for waders, they offer a variety of UTV accessories, some of which might include cargo solutions. KFI Products: A long-standing name in ATV and UTV accessories, offering durable and functional gear. UTV Mountain: Specializes in accessories for mountain-focused UTVs, meaning their racks are built for rugged use. Note: Direct “roof racks” like those for SUVs might not be the primary offering for X3s. Instead, look for “cargo racks,” “bed racks,” or “over-the-cab racks” that are designed to fit the X3’s unique structure. Many companies offer “bed racks” which mount behind the occupants, but “over-the-cab” or “roof” cargo systems are also available. How to Choose the Right Roof Rack for Your Needs Let’s break down how to make the best choice for your adventures. 1. Assess Your Cargo Needs What will you carry? Kayaks, bikes, coolers, camping gear, fuel cans, luggage? How much weight? Estimate the total weight of the gear you plan to carry most often. How often? Will this be for daily use, weekend trips, or infrequent major expeditions? 2. Consider Your X3 Model and Configuration Specific Year and Trim: Can-Am X3 models can vary. Ensure the rack is designed for your exact year and trim level. Existing Accessories: Do you already have a windshield, roof, or other accessories? Check for compatibility to avoid fitment issues. 3. Set a Budget Roof racks can range from a few hundred to over a thousand dollars. Determine what you’re comfortable spending and look for the best value within that range. Remember that quality often means a higher price, but also greater durability and safety. 4. Read Reviews and Ask for Recommendations See what other Can-Am X3 owners are saying about specific racks. Online forums, social media groups, and product reviews can provide invaluable real-world feedback. A great resource for understanding vehicle load limits and safety guidelines for carrying cargo can be found on government transportation websites. For example, the National Highway Traffic Safety Administration (NHTSA) offers valuable information on safe towing and hauling practices, which often apply to roof-mounted cargo as well. Step-by-Step Guide: Installing a Can-Am X3 Roof Rack Installation can vary significantly between rack models, but here’s a general guide. Always refer to the specific instructions provided by the manufacturer of your chosen rack. 1. Gather Your Tools and Materials You’ll likely need: The roof rack kit with all hardware (bolts, nuts, washers) Socket wrench set or adjustable wrench Screwdrivers (Phillips and flathead, based on hardware) Allen wrenches (often included or required) Measuring tape (sometimes helpful for alignment) Safety glasses (essential!) Gloves (to protect your hands) A helper (highly recommended, especially for larger racks) 2. Unpack and Inventory Lay out all the parts and hardware from the box. Compare them against the parts list in your manual to ensure nothing is missing. 3. Prepare Your X3 If your rack requires specific mounting plates or brackets, identify where they attach to your X3’s frame or roll cage. Clean the mounting areas to ensure a good, secure fit. Remove any dirt, mud, or debris. 4. Mount the Base or Brackets Follow the instructions carefully for attaching any base frames or brackets to your X3. Don’t fully tighten hardware at this stage. Leave bolts slightly loose so you have some wiggle room to align the main rack. This is crucial for getting everything to fit perfectly. 5. Attach the Main Rack Structure With your helper, carefully position the main roof rack onto the mounted brackets or frame. Align the holes on the rack with the corresponding holes on the mounting hardware. Insert and loosely fasten the bolts, nuts, and washers. 6. Align and Tighten Once the rack is in place and all hardware is loosely attached, step back and check the alignment. Ensure it sits squarely on the roof. Begin tightening the hardware. Work in a crisscross pattern, similar to tightening lug nuts on a car tire, to ensure even pressure. Tighten bolts gradually. Go around the rack multiple times, tightening each bolt a little more each time until all are securely fastened according to the manufacturer’s specifications. Do not overtighten, as this can strip threads or damage components. 7. Install Any Accessories or Tie-Down Points If your rack came with specific mounts for accessories (like for a spare tire or fuel cans), install them now. Ensure all tie-down points are accessible and secure. 8. Final Inspection Give the entire rack a good shake and push. It should feel solid and not move independently of the vehicle. Double-check that all bolts are tightened. Perform a test drive at low speeds in a safe area. Listen for any unusual noises and check for any instability before heading out on a longer trip. Table: Roof Rack Installation Checklist This checklist helps ensure you don’t miss any crucial steps during installation. Step Action Notes 1 Unpack and verify all parts and hardware. Crucial to avoid mid-installation surprises. 2 Read the manufacturer’s installation manual thoroughly. Every rack is different; follow specific instructions. 3 Gather all necessary tools. Ensure you have the right sizes and types. 4 Prepare mounting locations on the X3. Cleanliness ensures a secure fit. 5 Install any base mounts or brackets loosely. Allows for adjustment and alignment. 6 Position the main rack and loosely attach hardware. Get everything roughly in place. 7 Align the rack properly. Ensure it sits evenly and straight. 8 Tighten all hardware securely in a pattern. Gradually and evenly, don’t overtighten. 9 Install any additional accessory mounts. As needed for your gear. 10 Perform a final inspection and test drive. Safety first! Maintenance and Care for Your Roof Rack To keep your roof rack in top condition and ensure it lasts for many adventures, a little regular maintenance goes a long way. Regular Cleaning Wash your rack with mild soap and water whenever you wash your X3. Rinse thoroughly to remove any soap residue. For stubborn dirt or mud, a gentle brush can be used. Inspect Hardware Regularly Periodically (e.g., every few months or before a long trip), check that all bolts and nuts are still tight. Vibrations from off-roading can cause them to loosen over time. Look for any signs of wear, corrosion, or damage on the hardware. Check for Rust or Corrosion If your rack is steel, inspect for any developing rust spots. Address them promptly by cleaning the area and applying a touch-up paint or rust inhibitor spray. Aluminum racks are less prone to rust but can oxidize; keep them clean. Protect the Finish Avoid using harsh chemicals or abrasive cleaners that could damage the powder coating or paint. Consider applying a protectant or wax to the finish to help repel dirt and UV damage. Weight Limits are Crucial Always be mindful of the rack’s weight capacity and your X3’s roof load limit. Exceeding these can lead to premature failure of the rack or damage to your vehicle. Safety Tips for Using Your Can-Am X3 Roof Rack Safety should always be your top priority when using any aftermarket accessory, especially one that adds weight and affects your vehicle’s aerodynamics. Know Your Weight Limits Rack Capacity: Never exceed the maximum weight specified by the rack manufacturer. Vehicle Capacity: Understand your X3’s roof load capacity (if specified by the manufacturer) and overall vehicle payload capacity. Adding weight to the roof raises the center of gravity. Distribution: Distribute weight as evenly as possible and secure it properly. Secure Your Cargo Properly Use high-quality tie-down straps, ratchets, or cargo nets. Ensure straps are attached to strong points on the rack and the cargo. Check straps frequently during your journey, especially after rough terrain or changes in speed. For oddly shaped items, consider using a cargo net to prevent shifting. Consider Vehicle Dynamics A loaded roof rack will change your X3’s handling. It will have a higher center of gravity, making it more susceptible to rollovers, especially on uneven terrain or during sharp turns. Drive more cautiously, reduce speed on rough trails and curves, and be aware of the increased height when navigating obstacles or undergound structures. Check for Obstructions Always be aware of the increased height of your X3 with a loaded roof rack. This is especially important when driving under: Low bridges Tree branches Parking garage entrances Drive-throughs Aerodynamics and Fuel Economy An empty roof rack can affect aerodynamics and slightly reduce fuel efficiency. A loaded rack will have a more significant impact. Plan your routes accordingly and be prepared for changes in performance. When in Doubt, Leave It Out If you’re unsure about the security of your load or the capacity of your rack, it’s better to err on the side of caution. Leave non-essential items behind or find an alternative way to transport them. Pros and Cons of a Can-Am X3 Roof Rack Here’s a quick rundown to help you weigh the decision. Pros Increased Cargo Capacity: Carry more gear comfortably. Versatility: Adaptable for various outdoor equipment. Improved Vehicle Utility: Makes your X3 ready for longer trips or specific activities. Efficient Space Utilization: Frees up bed and cabin space. Convenience: Easier packing and access to gear on the trail. Customization Options: Can be outfitted with many accessories. Cons Cost: Can be a significant investment. Installation: May require basic DIY skills or professional help. Weight: Adds extra weight to your X3. Center of Gravity: Can raise the vehicle’s center of gravity, affecting handling. Aerodynamics: Impacts fuel efficiency and can create wind noise. Vehicle Height:** Increases overall vehicle height, posing clearance risks.
Why a Roof Rack is an Essential Upgrade for Your Can-Am X3
Your Can-Am X3 is built for fun, speed, and tackling tough terrain. But even the most capable UTV can feel a bit cramped when you’re packing for a serious off-road excursion. Think about bringing along that extra cooler, your fishing gear, a spare tire, or even extra fuel cans. Where does it all go without compromising passenger comfort or safety? That’s where a good roof rack comes in.
Maximizing Your Cargo Space

The most obvious benefit of a roof rack is more storage. By utilizing the space above your passengers, you free up the bed and interior of your X3. This means more room for essentials or simply a more comfortable ride for everyone. Instead of playing Tetris with your gear, you can enjoy a streamlined packing process.
Versatility for Every Adventure
Whether you’re a hunter, angler, camper, or just love exploring new trails, a roof rack offers unique versatility. You can mount specialized carriers for kayaks, bikes, or skis. Or, you can simply use it as a platform for cargo boxes, bags, or strapping down larger items.
Improved Weight Distribution
When you overload the bed of your X3, it can affect how the vehicle handles, especially on uneven ground or at speed. Distributing weight higher up on a roof rack, when done correctly and within the vehicle’s limits, can complement the existing weight of the vehicle and its occupants.
Protection for Your Vehicle
Sometimes, carrying gear in the bed can lead to scratches or damage. A roof rack can offer a protective barrier for the roof itself and provides secure tie-down points, preventing items from shifting and potentially scratching body panels.
Types of Roof Racks for the Can-Am X3
Choosing the right roof rack means understanding the different types available and what they offer. For the Can-Am X3, you’ll generally find a few popular styles, each with its own advantages.
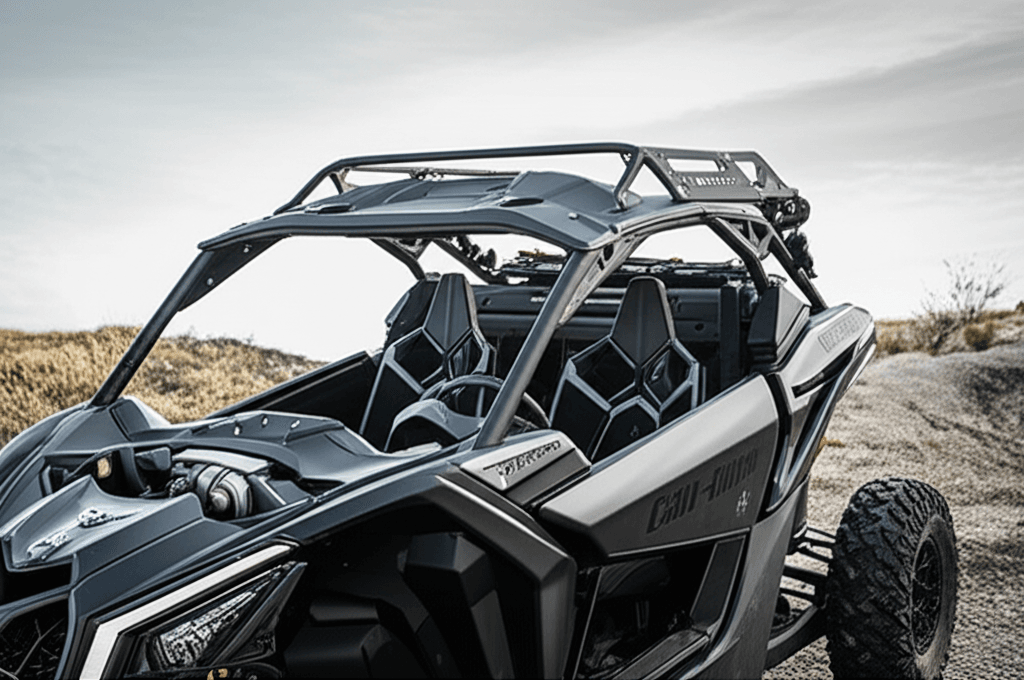
Full Roof Racks (Basket Style)
These are the most common and versatile option. They typically create a large, open basket or platform covering a significant portion of the roof.
Pros: Huge carrying capacity, versatile for various gear types, often includes multiple tie-down points, can offer some protection to the roof.
Cons: Can be bulkier and add significant weight, might require specific mounting points, can affect the vehicle’s center of gravity slightly more than smaller rack systems.
Low-Profile/Sleek Racks
These racks offer a more integrated look, with a lower profile that often blends seamlessly with the X3’s body lines. They might be smaller baskets or more specialized platforms.
Pros: Aesthetically pleasing, can be lighter than full baskets, often designed for specific vehicle models for a perfect fit.
Cons: Less overall carrying capacity compared to full baskets, might have fewer mounting options for diverse gear.
Modular Rack Systems
Some higher-end systems are modular. This means you can add or remove different components like panels, mounts, or extensions to customize their size and function.
Pros: Highly customizable, adaptable to different hauling needs, can grow with your requirements.
Cons: Can be more expensive, assembly might be more complex.
Key Features to Look For
When shopping, keep an eye out for these features to ensure you get a rack that’s durable, functional, and easy to use.
Material and Construction
Look for racks made from sturdy materials like steel or high-grade aluminum. Steel is strong and durable but heavier. Aluminum is lighter and resistant to rust, making it a popular choice for off-road vehicles. Powder coating adds an extra layer of protection against the elements.
Mounting System
How does the rack attach to your X3? Common systems include:
Bolt-on: Attaches directly to pre-drilled holes in the vehicle’s frame or body. This is usually the most secure but requires the vehicle to have these specific mounting points.
Clamp-on: Uses clamps to grip onto existing structural points of the vehicle, like roll bars or roof edges. This is often a good option if your X3 doesn’t have specific roof rack mounting holes.
Drilling Required: Some racks might require you to drill into your X3’s roof or frame for the most secure installation. This is less common for aftermarket UTV racks and usually reserved for more permanent, heavy-duty solutions. Always ensure drilling is done correctly to avoid compromising structural integrity.
Weight Capacity
This is crucial! Check the manufacturer’s stated weight limit for both the rack itself and the roof of your X3. Overloading can damage the rack, the vehicle, and pose a safety hazard.
Ease of Installation
As a beginner, you want a rack that’s relatively straightforward to install. Look for systems that come with clear instructions and all the necessary hardware.
Compatibility with Accessories
Does the rack have integrated mounting points or slots for commonly used accessories like RotopaX, shovels, spare tires, or light bars? This can save you from needing additional adapters later.
Top Roof Rack Brands for Can-Am X3 (Examples)These brand examples are illustrative. Always check current availability and reviews for your specific Can-Am X3 model.
It’s always wise to research brands known for quality and durability in the off-road UTV market. Some popular names that often come up for UTV accessories and might offer compatible roof rack solutions include:
SuperATV: Known for a wide range of UTV upgrades, often with robust designs.
Gator Waders: While primarily known for waders, they offer a variety of UTV accessories, some of which might include cargo solutions.
KFI Products: A long-standing name in ATV and UTV accessories, offering durable and functional gear.
UTV Mountain: Specializes in accessories for mountain-focused UTVs, meaning their racks are built for rugged use.Note: Direct “roof racks” like those for SUVs might not be the primary offering for X3s. Instead, look for “cargo racks,” “bed racks,” or “over-the-cab racks” that are designed to fit the X3’s unique structure. Many companies offer “bed racks” which mount behind the occupants, but “over-the-cab” or “roof” cargo systems are also available.How to Choose the Right Roof Rack for Your Needs
Let’s break down how to make the best choice for your adventures.
1. Assess Your Cargo Needs
What will you carry? Kayaks, bikes, coolers, camping gear, fuel cans, luggage?
How much weight? Estimate the total weight of the gear you plan to carry most often.
How often? Will this be for daily use, weekend trips, or infrequent major expeditions?2. Consider Your X3 Model and Configuration
Specific Year and Trim: Can-Am X3 models can vary. Ensure the rack is designed for your exact year and trim level.
Existing Accessories: Do you already have a windshield, roof, or other accessories? Check for compatibility to avoid fitment issues.3. Set a Budget
Roof racks can range from a few hundred to over a thousand dollars. Determine what you’re comfortable spending and look for the best value within that range. Remember that quality often means a higher price, but also greater durability and safety.
4. Read Reviews and Ask for Recommendations
See what other Can-Am X3 owners are saying about specific racks. Online forums, social media groups, and product reviews can provide invaluable real-world feedback.
A great resource for understanding vehicle load limits and safety guidelines for carrying cargo can be found on government transportation websites. For example, the National Highway Traffic Safety Administration (NHTSA) offers valuable information on safe towing and hauling practices, which often apply to roof-mounted cargo as well.
Step-by-Step Guide: Installing a Can-Am X3 Roof Rack
Installation can vary significantly between rack models, but here’s a general guide.
Always refer to the specific instructions provided by the manufacturer of your chosen rack.1. Gather Your Tools and Materials
You’ll likely need:
The roof rack kit with all hardware (bolts, nuts, washers)
Socket wrench set or adjustable wrench
Screwdrivers (Phillips and flathead, based on hardware)
Allen wrenches (often included or required)
Measuring tape (sometimes helpful for alignment)
Safety glasses (essential!)
Gloves (to protect your hands)
A helper (highly recommended, especially for larger racks)
2. Unpack and Inventory
Lay out all the parts and hardware from the box. Compare them against the parts list in your manual to ensure nothing is missing.
3. Prepare Your X3
If your rack requires specific mounting plates or brackets, identify where they attach to your X3’s frame or roll cage.
Clean the mounting areas to ensure a good, secure fit. Remove any dirt, mud, or debris.
4. Mount the Base or Brackets
Follow the instructions carefully for attaching any base frames or brackets to your X3.
Don’t fully tighten hardware at this stage. Leave bolts slightly loose so you have some wiggle room to align the main rack. This is crucial for getting everything to fit perfectly.
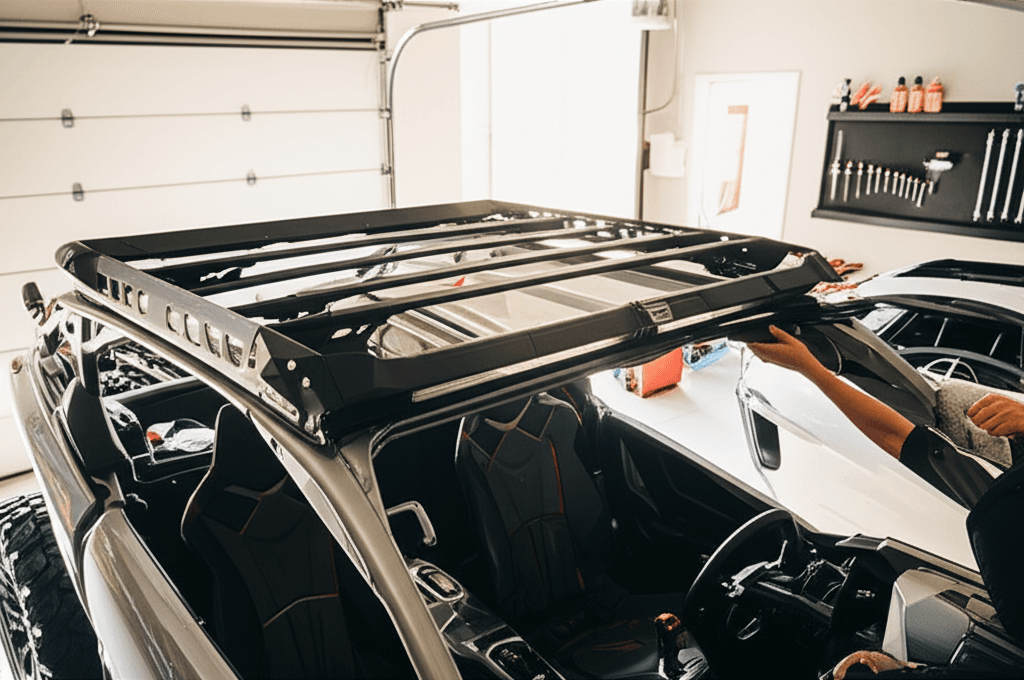
5. Attach the Main Rack Structure
With your helper, carefully position the main roof rack onto the mounted brackets or frame.
Align the holes on the rack with the corresponding holes on the mounting hardware.
Insert and loosely fasten the bolts, nuts, and washers.
6. Align and Tighten
Once the rack is in place and all hardware is loosely attached, step back and check the alignment. Ensure it sits squarely on the roof.
Begin tightening the hardware. Work in a crisscross pattern, similar to tightening lug nuts on a car tire, to ensure even pressure.
Tighten bolts gradually. Go around the rack multiple times, tightening each bolt a little more each time until all are securely fastened according to the manufacturer’s specifications.
Do not overtighten, as this can strip threads or damage components.7. Install Any Accessories or Tie-Down Points
If your rack came with specific mounts for accessories (like for a spare tire or fuel cans), install them now.
Ensure all tie-down points are accessible and secure.
8. Final Inspection
Give the entire rack a good shake and push. It should feel solid and not move independently of the vehicle.
Double-check that all bolts are tightened.
Perform a test drive at low speeds in a safe area. Listen for any unusual noises and check for any instability before heading out on a longer trip.
Table: Roof Rack Installation Checklist
This checklist helps ensure you don’t miss any crucial steps during installation.
| Step | Action | Notes |
|---|
| 1 | Unpack and verify all parts and hardware. | Crucial to avoid mid-installation surprises. |
| 2 | Read the manufacturer’s installation manual thoroughly. | Every rack is different; follow specific instructions. |
| 3 | Gather all necessary tools. | Ensure you have the right sizes and types. |
| 4 | Prepare mounting locations on the X3. | Cleanliness ensures a secure fit. |
| 5 | Install any base mounts or brackets loosely. | Allows for adjustment and alignment. |
| 6 | Position the main rack and loosely attach hardware. | Get everything roughly in place. |
| 7 | Align the rack properly. | Ensure it sits evenly and straight. |
| 8 | Tighten all hardware securely in a pattern. | Gradually and evenly, don’t overtighten. |
| 9 | Install any additional accessory mounts. | As needed for your gear. |
| 10 | Perform a final inspection and test drive. | Safety first! |
Maintenance and Care for Your Roof Rack
To keep your roof rack in top condition and ensure it lasts for many adventures, a little regular maintenance goes a long way.
Regular Cleaning
Wash your rack with mild soap and water whenever you wash your X3.
Rinse thoroughly to remove any soap residue.
For stubborn dirt or mud, a gentle brush can be used.
Inspect Hardware Regularly
Periodically (e.g., every few months or before a long trip), check that all bolts and nuts are still tight. Vibrations from off-roading can cause them to loosen over time.
Look for any signs of wear, corrosion, or damage on the hardware.
Check for Rust or Corrosion
If your rack is steel, inspect for any developing rust spots. Address them promptly by cleaning the area and applying a touch-up paint or rust inhibitor spray.
Aluminum racks are less prone to rust but can oxidize; keep them clean.
Protect the Finish
Avoid using harsh chemicals or abrasive cleaners that could damage the powder coating or paint.
Consider applying a protectant or wax to the finish to help repel dirt and UV damage.
Weight Limits are Crucial
Always be mindful of the rack’s weight capacity and your X3’s roof load limit. Exceeding these can lead to premature failure of the rack or damage to your vehicle.
Safety Tips for Using Your Can-Am X3 Roof Rack
Safety should always be your top priority when using any aftermarket accessory, especially one that adds weight and affects your vehicle’s aerodynamics.
Know Your Weight Limits
Rack Capacity: Never exceed the maximum weight specified by the rack manufacturer.
Vehicle Capacity: Understand your X3’s roof load capacity (if specified by the manufacturer) and overall vehicle payload capacity. Adding weight to the roof raises the center of gravity.
Distribution: Distribute weight as evenly as possible and secure it properly.Secure Your Cargo Properly
Use high-quality tie-down straps, ratchets, or cargo nets.
Ensure straps are attached to strong points on the rack and the cargo.
Check straps frequently during your journey, especially after rough terrain or changes in speed.
For oddly shaped items, consider using a cargo net to prevent shifting.
Consider Vehicle Dynamics
A loaded roof rack will change your X3’s handling. It will have a higher center of gravity, making it more susceptible to rollovers, especially on uneven terrain or during sharp turns.
Drive more cautiously, reduce speed on rough trails and curves, and be aware of the increased height when navigating obstacles or undergound structures.
Check for Obstructions
Always be aware of the increased height of your X3 with a loaded roof rack. This is especially important when driving under:
Low bridges
Tree branches
Parking garage entrances
Drive-throughs
Aerodynamics and Fuel Economy
An empty roof rack can affect aerodynamics and slightly reduce fuel efficiency. A loaded rack will have a more significant impact.
Plan your routes accordingly and be prepared for changes in performance.
When in Doubt, Leave It Out
If you’re unsure about the security of your load or the capacity of your rack, it’s better to err on the side of caution. Leave non-essential items behind or find an alternative way to transport them.
Pros and Cons of a Can-Am X3 Roof Rack
Here’s a quick rundown to help you weigh the decision.
Pros
Increased Cargo Capacity: Carry more gear comfortably.
Versatility: Adaptable for various outdoor equipment.
Improved Vehicle Utility: Makes your X3 ready for longer trips or specific activities.
Efficient Space Utilization: Frees up bed and cabin space.
Convenience: Easier packing and access to gear on the trail.
Customization Options: Can be outfitted with many accessories.Cons
Cost: Can be a significant investment.
Installation: May require basic DIY skills or professional help.
Weight: Adds extra weight to your X3.
Center of Gravity: Can raise the vehicle’s center of gravity, affecting handling.
Aerodynamics: Impacts fuel efficiency and can create wind noise.
Vehicle Height:** Increases overall vehicle height, posing clearance risks.