Quick Summary: Installing a roof rack on your Can-Am X3 is straightforward! With the right steps and tools, you can securely mount your rack in under an hour, significantly expanding your cargo-carrying options for any adventure. This guide makes it easy for beginners.
Can-Am X3 Roof Rack: Your Key to Effortless Installation and Adventure
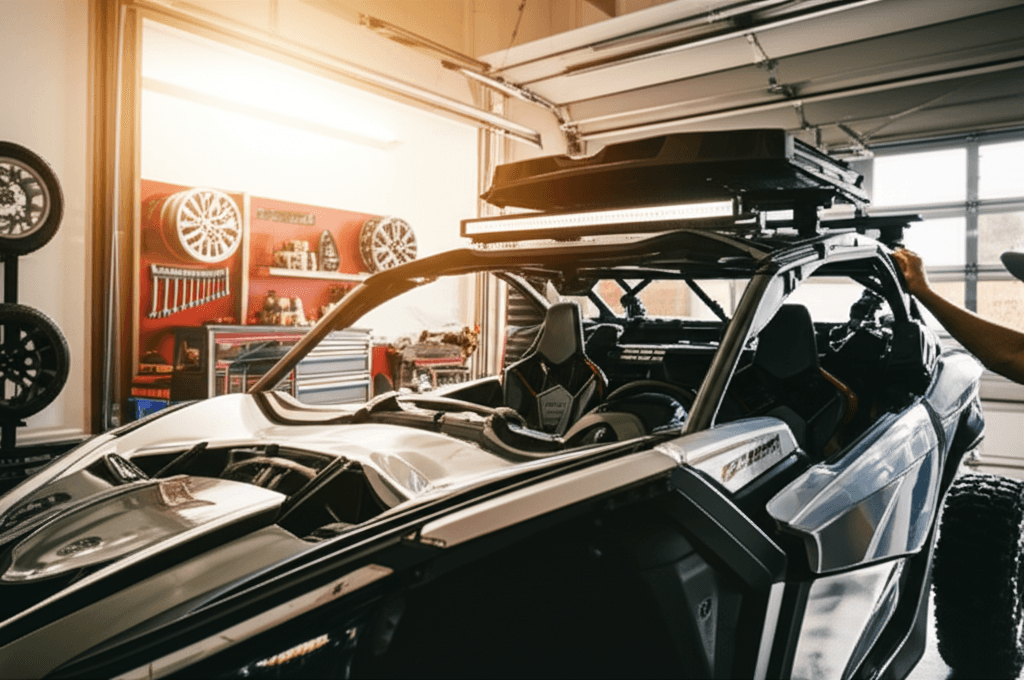
Dreaming of hitting the trails with more gear? A roof rack for your Can-Am X3 is a game-changer, letting you bring along bikes, kayaks, extra supplies, or anything else your adventure demands. But if you’re new to vehicle accessories, the thought of installation can seem a bit daunting. Don’t worry! We’re here to make it super simple.
This guide is all about getting that roof rack securely attached to your Can-Am Maverick X3 so you can focus on the fun. We’ll break down the process into easy-to-follow steps, highlighting what you need and what to look out for. You don’t need to be a master mechanic to do this. Let’s get your X3 adventure-ready!
Why a Roof Rack for Your Can-Am X3?
Your Can-Am X3 is a powerhouse designed for fun. But sometimes, you need more than just what fits inside the cab. A roof rack isn’t just an accessory; it’s an expansion of your vehicle’s capability. It frees up space inside your UTV, making your ride more comfortable, especially on longer trips. Plus, it often provides a more secure way to transport bulky items, keeping them out of the way and protected.
Think about it: no more struggling to fit that extra cooler, spare tire, or camping gear. With a roof rack, you can:
- Carry bikes for exploring new trails.
- Transport kayaks or paddleboards for watery adventures.
- Add extra storage boxes for tools and supplies.
- Securely mount spare tires.
- Pack more camping or hunting equipment.
Choosing the right roof rack and installing it properly means less hassle and more enjoyment on your off-road excursions. Let’s dive into how you can achieve just that.
Choosing the Right Roof Rack for Your Can-Am X3
Not all roof racks are created equal, and the “best” one often depends on what you plan to carry. For the Can-Am Maverick X3, you’ll find several types designed to fit its specific frame. The most common and beginner-friendly options are usually bolt-on or clamp-on systems that utilize the existing roll cage or frame points.
Types of Roof Racks for the X3
- Direct Bolt-On: These racks are designed to bolt directly into pre-drilled holes or specific mounting points on your X3’s frame or cage. They often offer the most secure and robust mounting.
- Clamp-On/Wrap-Around: These racks typically use strong clamps or straps that wrap around the roll cage tubes. They are often adjustable and don’t require drilling, making installation very straightforward.
- Universal Systems with Vehicle-Specific Mounts: Some brands offer universal crossbars and then provide vehicle-specific mounting kits. This can provide flexibility if you ever switch vehicles.
Key Features to Consider
When you’re shopping, keep these features in mind:
- Material: Most quality racks are made from durable aluminum or steel, often powder-coated for rust and corrosion resistance.
- Weight Capacity: Check the rack’s maximum weight limit. Make sure it can safely support the gear you intend to carry, plus the weight of the rack itself.
- Mounting System: How does it attach? For beginners, clamp-on or systems with clear instructions and minimal parts are ideal.
- Compatibility: Ensure the rack is specifically designed for your Can-Am Maverick X3 model and year.
- Accessory Mounts: Does it have points for adding lights, grab handles, or specialized carriers?
Pro Tip: Always check reviews from other Can-Am X3 owners. They can offer valuable insights into the ease of installation and real-world performance.
Essential Tools for Installation
The beauty of most Can-Am X3 roof rack installations is that they require minimal tools. You likely already have most of what you need in your garage or toolbox. Here’s a typical rundown:
Gather Your Tools
- Socket Wrench Set: You’ll need various socket sizes, likely including metric sizes like 10mm, 13mm, 14mm, and 17mm.
- Wrenches: Again, metric sizes will be common. Open-end or box-end wrenches may be needed.
- Allen Wrenches (Hex Keys): Many racks use Allen bolts. A set with various sizes is crucial.
- Torque Wrench: This is highly recommended for ensuring bolts are tightened to the manufacturer’s specifications. Overtightening can damage components, while undertightening can lead to a loose rack. You can find affordable ones specifically for automotive use. For instance, a good quality torque wrench is a wise investment for any DIYer.
- Measuring Tape: Useful for ensuring even spacing or alignment during installation.
- Level: To ensure your rack is mounted straight and even.
- Safety Glasses: Always protect your eyes when working on your vehicle.
- Gloves: To protect your hands and improve grip.
- A Friend: While some installations can be a one-person job, having a helper makes handling larger rack components much easier and safer.
Always consult the specific installation manual that comes with your chosen roof rack. It will list the exact tools and hardware required for that particular model.
Step-by-Step: Effortless Can-Am X3 Roof Rack Installation
Let’s get down to business. While specific models vary, the general process for installing a roof rack on a Can-Am X3 follows a logical flow. This guide assumes you have a common clamp-on or bolt-on style rack designed for the X3 roll cage.
Preparation is Key
Before you unscrew a single bolt, take these preparatory steps:
- Read the Manual: Seriously, read it twice. Understand the diagrams and the order of operations.
- Unpack and Inspect: Lay out all the parts and hardware. Check them against the packing list. Make sure nothing is missing or damaged.
- Clean Your X3: Wipe down the areas where the rack will mount. This ensures a clean surface for any seals or clamps and makes it easier to see what you’re doing.
- Gather Tools: Have all your tools readily accessible.
Installation Process
Here’s a breakdown of the typical installation steps:
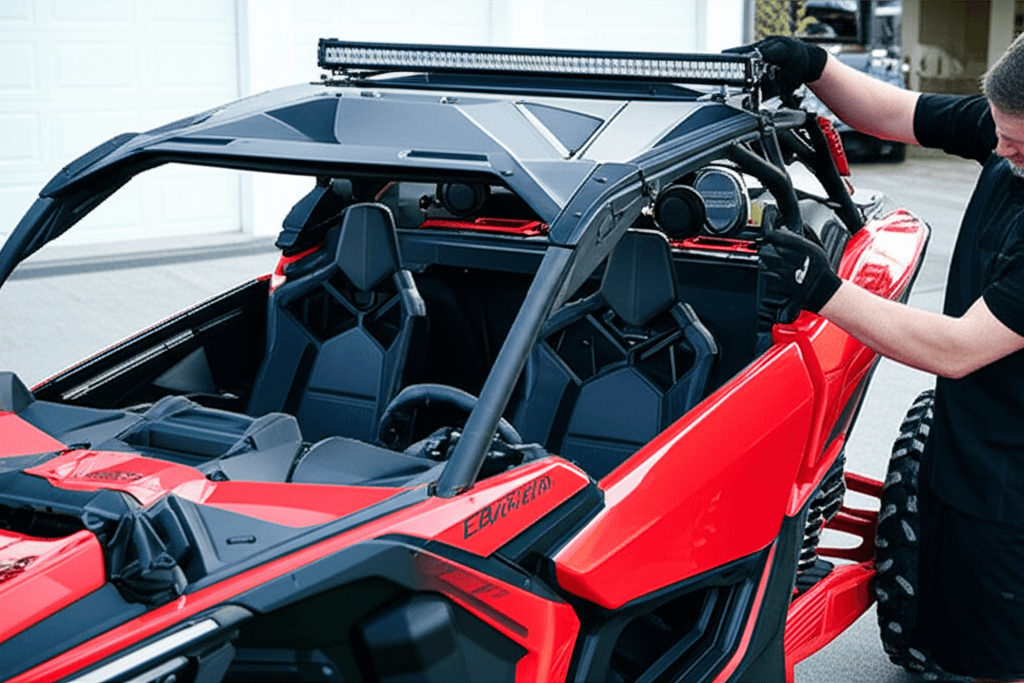
- Attach Mounting Brackets/Clamps to the Roll Cage:
- Most X3 roof racks will come with specific mounting brackets or clamps designed to grip the stock roll cage.
- Position these brackets at the designated points on your roll cage. These are often indicated in the manual and might be near existing bolts or specific tube sections.
- Loosely attach them using the provided hardware (bolts, washers, nuts). Do not tighten them fully yet. This allows for adjustments later.
- Assemble the Roof Rack Frame:
- If your rack comes in pieces, you’ll need to assemble the main frame or platform.
- This usually involves bolting together side rails and crossbars. Again, keep these bolts slightly loose to allow for alignment.
- Mount the Rack onto the Brackets:
- With a helper, carefully lift the assembled rack and position it onto the loosely attached mounting brackets or directly onto the roll cage if it’s a clamp-on style.
- Align the rack’s mounting holes with the holes in the brackets or ensure the clamps are properly positioned around the cage tubes as per the manual.
- Secure the Rack (Initial Tightening):
- Once the rack is in place and roughly aligned, start tightening the bolts that attach the rack to the brackets, or the clamp bolts.
- Tighten them evenly. Go around the rack several times, gradually tightening each fastener.
- Use a level to ensure the rack is sitting straight and is parallel to the ground or your desired orientation.
- Final Tightening and Torqueing:
- This is where the torque wrench comes in handy. Refer to your rack’s manual for the specific torque values for each bolt.
- Tighten all bolts to the specified torque. This ensures a secure mount without stressing the materials.
- A great resource for understanding torque specifications can be found through general automotive engineering guidelines, such as those found on many NHTSA (National Highway Traffic Safety Administration) standards, which emphasize component safety and integrity.
- Attach Any Accessories (Optional):
- If your rack came with any secondary accessories, like a front wind deflector or specific mounts for gear, install them now according to their instructions.
- Final Inspection:
- Give the whole rack a good shake. Does it feel solid?
- Double-check that all bolts are tightened and that there are no loose parts.
- Confirm that the rack doesn’t interfere with any of your X3’s controls, lights, or suspension movement.
Congratulations! You’ve successfully installed your Can-Am X3 roof rack. Now you’re ready to load up and hit the trails.
Maintenance Tips for Your Roof Rack
To ensure your roof rack stays in top condition and remains a safe addition to your X3, a little regular maintenance goes a long way.
Keep it Clean and Tight
- Regular Cleaning: Wash your roof rack with mild soap and water along with your Can-Am. Rinse thoroughly and dry. This prevents dirt and grime from building up and potentially causing corrosion, especially on metal components.
- Inspect Hardware: Periodically (every few months, or before and after a major trip) check all bolts and clamps. Re-tighten any that might have loosened due to vibrations from off-roading.
- Check for Damage: Look for any signs of stress, cracks, or corrosion on the rack itself, and on the mounting points. Address any issues promptly.
- Lubricate Movable Parts: If your rack has any hinges or adjustable components, a light application of a suitable lubricant can keep them working smoothly.
Proper maintenance not only extends the life of your roof rack but also guarantees its safety and reliability.
Troubleshooting Common Installation Hiccups
Even with the best instructions, sometimes things don’t go exactly as planned. Here are a few common issues and how to resolve them:
When Things Get Tricky
- Holes Don’t Align: This usually happens if the rack components or mounting brackets aren’t seated correctly. Loosen all fasteners for that section, reposition the parts, and then try re-aligning and tightening again. Sometimes, slightly flexing the rack frame can help line up stubborn holes.
- Missing Hardware: Double-check the packaging and instruction manual’s hardware list. If something is genuinely missing, contact the manufacturer’s customer support immediately.
- Rack Feels Loose: This almost always means bolts aren’t tight enough or haven’t been torqued correctly. Go back and meticulously retighten everything, using your torque wrench if possible.
- Interference with Other Accessories: If the rack is preventing a door from opening fully or hitting another accessory, you might need to slightly reposition the rack on the roll cage (if adjustable) or consider a different mounting solution. Refer to the manual for adjustment options.
Remember, patience is key. If you get frustrated, take a break and come back with fresh eyes. Most installation issues are solvable with a bit of careful work.
Can-Am X3 Roof Rack Installation by the Numbers
To give you a clearer picture, here’s a quick comparison of typical installation times and complexity:
| Rack Type | Estimated Installation Time | Tool Complexity | Skill Level |
|---|---|---|---|
| Clamp-On (No Drilling) | 30-60 minutes | Low (Allen keys, socket set) | Beginner |
| Bolt-On (Utilizing existing holes) | 45-90 minutes | Medium (Socket set, torque wrench, possibly specialized adapters) | Beginner to Intermediate |
| Custom/Welded Fabrication | Several hours or more | High (Welding equipment, fabrication tools) | Advanced |
For the vast majority of Can-Am X3 owners, a clamp-on or bolt-on rack is the most practical and beginner-friendly choice.
Frequently Asked Questions (FAQ)
Q1: Do I need to drill holes in my Can-Am X3 for a roof rack?
Most aftermarket roof racks for the Can-Am X3 are designed to mount using the existing roll cage or frame points. Many are clamp-on systems that don’t require any drilling, making installation much easier and reversible.
Q2: How much weight can a Can-Am X3 roof rack safely hold?
The weight capacity varies significantly by rack model and manufacturer. Always check the product specifications. A typical range for a sturdy X3 roof rack might be anywhere from 50 lbs to over 200 lbs. Ensure your rack’s capacity exceeds the weight of the gear you plan to carry.
Q3: Can I install a roof rack on my X3 by myself?
While some smaller, lighter racks might be manageable alone, it’s highly recommended to have a second person assist with lifting and positioning the rack. This makes the process safer and prevents potential damage to your vehicle or the rack itself. Some steps, like tightening bolts, can be done solo.
Q4: How often should I check the tightness of my roof rack bolts?
It’s a good practice to check your roof rack’s mounting hardware periodically. We recommend inspecting and re-tightening bolts every few months, before and after long trips, or after particularly rough off-roading experiences. Vibrations from the trail can loosen fasteners over time.
Q5: What if my roof rack seems to make noise?
Rattling or wind noise can occur. Ensure all fasteners are properly tightened. Sometimes, adding rubber padding or weather stripping between rack components or between the rack and the cage can help dampen vibrations and reduce noise. Always check the manufacturer’s troubleshooting guide.
Q6: Can a roof rack affect my X3’s handling or rollover risk?
Yes, adding weight to the roof of any vehicle, including an X3, raises the center of gravity. This can affect handling, particularly during sharp turns or when on uneven terrain. Always distribute weight evenly and avoid overloading the rack. Drive cautiously, especially with a loaded rack.
Q7: Where can I find official installation instructions for my specific roof rack?
The best place to find official instructions is directly from the manufacturer of your roof rack. They are usually included in the box with the product. If you lost them, you can often download a PDF version from the manufacturer’s website by searching for your specific rack model.
Conclusion
Adding a roof rack to your Can-Am X3 is one of the most practical upgrades you can make for your adventures. As you’ve seen, the installation process is typically very manageable, even for those new to DIY vehicle modifications. By choosing the right rack for your needs, gathering the necessary tools, and following these step-by-step instructions, you can confidently install your new cargo solution.
Remember to always prioritize safety—read your rack’s manual, torque bolts correctly, and be mindful of the added weight affecting your vehicle’s center of gravity. With your new roof rack securely in place, you’re all set to carry more gear, explore further, and make every adventure count. Happy trails!