
As an Amazon Associate, RackReveal earns from qualifying purchases. Some links on this page are affiliate links, at no extra cost to you.
Removing roof racks is easier than you might think. With the right tools and steps, you can do it quickly and safely.
Roof racks are great for carrying extra luggage, bikes, or kayaks. But what if you no longer need them? Maybe they are creating extra wind noise or affecting your car’s fuel efficiency. Removing unused crossbars can reduce that wind noise and drag; if you would rather keep it on, see how to make roof racks quieter. This guide will show you how to take them off without damaging your vehicle.
Prime Big Deal Days is October 6–7. The deals are for Prime members, and eligible new members can start with a free trial.
Try Amazon Prime freeWe will cover the tools you need and the steps to follow. Check your rack maker’s manual as well: it lists the tool and the order of steps for your exact feet.
First: Identify Your Roof Rack Type
How you remove a rack depends on how it is attached. Check this before you pick up a tool:
| Rack type | How it attaches | DIY removal? | Watch out for |
|---|---|---|---|
| Crossbars on raised side rails | Feet clamp around the rails | Easy, 10-20 minutes | Lock cores on the feet; unlock them before loosening |
| Crossbars on flush rails | Feet grip a slot or lip in the rail | Easy | Keep the fit-kit parts together for refitting |
| Fixed-point rack | Bolts into threaded points under roof covers or trim strips | Easy to moderate | Refit the covers or plugs so water cannot get in |
| Bare-roof (clip) rack | Clips hook into the door frames | Easy | Open the doors slowly; check the rubber pads have not marked the paint |
| Factory side rails | Often bolted through the roof; access may be under the headliner | Usually a body shop or dealer job; check the service instructions | Leftover holes must be sealed properly or the roof can leak |
Seasonal tip: if you only carry bikes or kayaks in summer, taking the crossbars off for the colder months cuts wind noise and drag. See how much a rack costs you in fuel economy, and if you keep the bars on, how to stop roof bars whistling.
Tools And Materials Needed
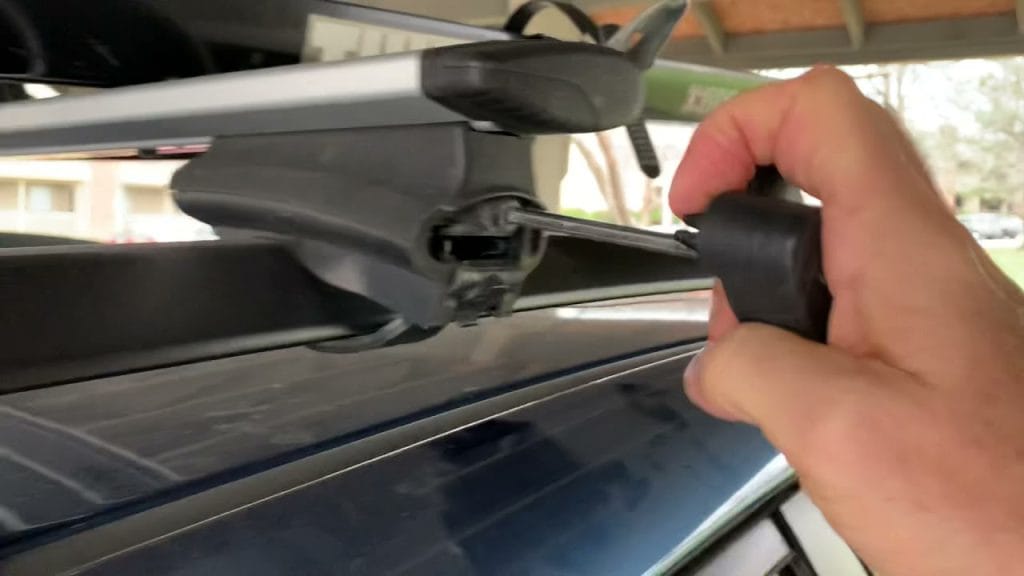
Use the tools your rack’s manual lists. Depending on the rack, that may be a hex key, a Torx bit, a socket or the tightening tool supplied with the rack, plus the lock key. Some feet use a lever or knob and need no tools. Don’t force stuck parts. Gloves protect your hands.
Some accessories make the job smoother. Lubricant spray helps loosen tight parts. Microfiber cloths are good for cleaning. A step stool can give extra height. Magnetic trays hold screws and bolts. They keep small parts from getting lost. Storage bags help keep tools organized. Use them to store your gear.

For cover caps and trim strips: a nylon trim-tool kit is gentler than a metal screwdriver on covers that are designed to be pried off. Check the removal instructions and protect the paint.

- Non-Scratch Pry Tools: Made from durable nylon, this auto trim removal tool kit protects your car’s surfaces from scratc…
- Essential for Panel Jobs: This car panel removal tool set makes removing dashboards, door panels, and plastic trim fast …
- Flexible and Durable Build: Designed to last, each car trim removal tool is sturdy yet flexible enough to handle tight a…
For stuck or rusty bolts: use a penetrant on rusty metal fasteners (only where the rack maker allows it) and follow the product’s directions, rather than forcing the bolt and rounding it off.
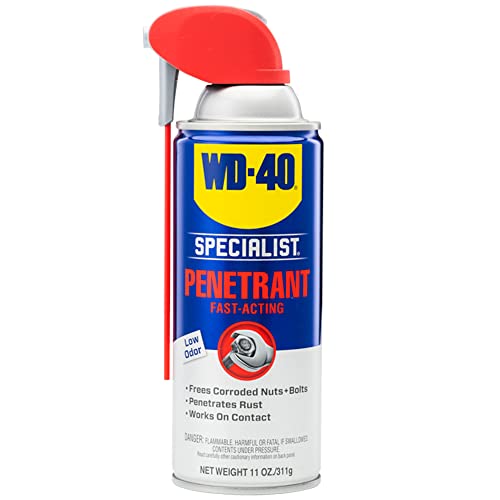
- Everything you need in a professional-grade Penetrating Lubricant: Low-odor, Strong, Fast, and Targeted. WD-40 Specialis…
- Fast-acting formula breaks rust and corrosion that jam up parts and leaves behind a protective layer that prevents futur…
- If it’s stuck, WD-40 Specialist Penetrant can help – nuts, bolts, threads, locks, chains, and more
Safety Precautions
Wear gloves to protect your hands. Safety glasses can shield your eyes from dust. Non-slip shoes are important for grip. Avoid loose clothing; it can get caught. Make sure to have a stable ladder. Check it doesn’t wobble.
Park your car on a flat surface. Engage the parking brake. Turn off the engine before you start. Remove any items from the roof rack. This makes the job easier and safer. Check the roof rack for loose parts. Ensure it’s safe to remove.
Preparation Steps
Begin by gathering the necessary tools such as wrenches and screwdrivers. Ensure the car is parked on a flat surface.
Inspect The Roof Rack
Check the roof rack for damage. Look at the screws and bolts. Ensure they are not rusty. If they are rusty, get new ones. Make sure all parts are there. Missing parts can make removal hard. You may need tools. A wrench and screwdriver are usually enough.
Clear The Area
Move any items near the car. Make space around the vehicle. A clear area helps you work safely. It also avoids damage to your car or belongings. Keep the tools close. You will need them soon.
Removing Roof Rack Crossbars
Follow the removal order in your rack’s manual. Unlock the feet, then fully release the clamps or retaining bolts on both sides. On many racks the bar and feet come off together as one assembly.
Lift the bars straight up, ideally with a helper. Take care not to drop them. Place the crossbars in a safe spot. Make sure no parts are lost. Check the roof for any damage.
Removing Roof Rack Feet
First, find where the roof rack connects to the car. These are the attachment points. You might need to lift a cover or cap. Use a small tool to lift it gently. Once you see the bolts or screws, you are ready for the next step.
Use a wrench or screwdriver to remove the bolts or screws. Turn them counterclockwise to loosen. Keep the screws safe for later. Once loose, you can lift the feet off the car. Be careful not to scratch the paint. Now, the roof rack feet are removed.
Lost the key to a Thule lock? Find the key code on a spare key or your saved key record (many Thule cylinders also show it on the lock face) and order a replacement key from Thule or a dealer; if you cannot find the code, contact Thule. The set below is for a different job: re-keying your Thule gear so every lock uses one key. It is a set of 4 cylinders on one key, so count your locks first, and follow Thule’s cylinder-swap steps: the old cylinder must be unlocked, and the swap uses a Thule change key (check whether the listing includes one).

- Replace The Locks In Your Thule Product In A Few Easy Steps
- Including Grip-Friendly Thule Comfort Key
- Set Of 4 Locks, All Using The Same Key
Cleaning The Roof Surface
Start by clearing off any leaves, twigs, and dirt. Use a soft brush to avoid scratching the surface. Ensure the roof is free from large particles. This helps in better inspection and cleaning.
Next, spray the roof with water. Use a mild detergent to remove any sticky residue. Gently scrub with a soft cloth or sponge. Rinse thoroughly to ensure no soap remains. Dry the surface with a clean towel.
Storing The Roof Rack
Start by removing all loose parts from the roof rack. This includes crossbars and clamps. Carefully unscrew any bolts or screws. Keep these small parts in a safe place. Separate the main frame from the car roof. Make sure to label each part if needed.
Clean all parts before storing. Use a dry cloth to wipe them. Store the roof rack in a cool, dry place. Avoid direct sunlight to prevent damage. Place small parts in a marked box. Keep the main frame on a shelf or in a corner. Check the rack periodically for any dust or rust.
For the wall: a fold-down wall rack keeps a cargo box, kayak or board off the floor. The listing rates it at 50 kg; screw it into studs or masonry, not drywall alone.

- Versatile Application : This wall mount rack is for car top boxes, kayaks, canoes, surfboards, and snowboards, ensuring …
- Robust Support : With a powerful 50KG weight capacity, this rack provides strong support to keep your kayak secure and s…
- & Long-lasting : Crafted from sturdy aluminum alloy, this rack is high-strength, , and built to last, ensuring durabilit…
Storing a cargo box as well? A ceiling pulley hoist lifts the box up and out of the way; this one is listed for loads up to 150 lb. Follow its mounting instructions and make sure the ceiling structure and fasteners can carry the loaded box.

- Maximize garage space: Free up valuable floor space and keep your garage organized with this garage hoist ceiling mount….
- Heavy-duty & reliable design: Engineered with industrial-grade alloy steel and a high-strength rope system, this garage …
- Adjustable straps for a secure fit: Our pulley hoist includes 8 ft adjustable straps designed to accommodate various siz…
Reinstalling The Roof Rack
Align the roof rack with the mounting points on the roof. Ensure each part fits correctly. Double-check the alignment for a secure fit. Proper positioning avoids issues later.
Tighten all bolts with a wrench. Make sure each bolt is tight and secure. Loose bolts can cause the rack to shift. Recheck all bolts once more to ensure safety.
For hex bolts: many rack feet and fit kits use metric hex (Allen) bolts. A ball-end hex key set reaches them at an angle; your manual lists the size.
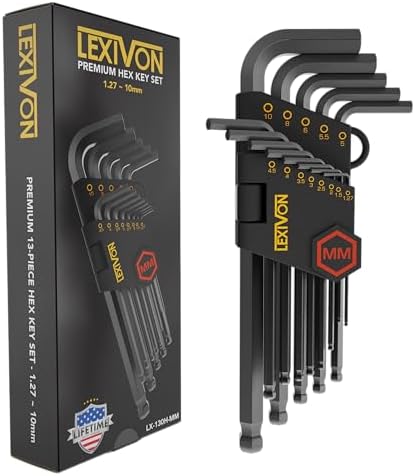
- DURABILITY AND PRECISION: Made from industrial-grade, heat-treated S2 alloy steel and CNC-machined, our Allen wrenches o…
- SUPERIOR PROTECTION: The Manganese Phosphate coating protects against rust and corrosion, ensuring our hex keys outlast …
- ANGLED REACH: The ball end design allows easy access to tight spaces at up to a 25-degree angle, while the chamfered edg…
For refitting: rack makers list a tightening torque for the feet in the manual. If a torque wrench suits your rack, check its range and bit fit, set the specified torque and stop at the click; over-tightening can crack plastic feet or dent the roof.

- Accurate within ±3% for Both Directions – The actual calibration accuracy will be stated on the certificate for your wre…
- Full-Range Calibration Using the ISO Standard – Since this torque wrench is calibrated to the ISO standard, it also meet…
- Serialized Certificate of Calibration – Includes serial number, test results, and test equipment and conditions
Black Friday Tip and Gift Idea
Black Friday tip: if you are taking the old rack off because you plan to replace it, look up the exact fit for your car (feet, fit kit, bar length) before Black Friday 2026 (November 27) and Cyber Monday 2026 (November 30), so on the day you only compare the right part numbers. Use the maker’s fit guide (our Thule fit guide shows how) and the crossbar guide for the parts. Skip “fits most cars” bars, and check the current price on Amazon rather than trusting a “was” price.
Gift idea: a nylon pry-tool kit, a ball-end hex key set or a small 1/4 inch torque wrench is a practical stocking stuffer for anyone who takes a rack on and off every season.
Frequently Asked Questions
How do I remove roof racks?
Unlock the feet, loosen the foot bolts or levers evenly on both sides, then lift each crossbar off with a helper so it does not scrape the roof. On fixed-point roofs, refit the covers over the mounting points afterwards.
Can I remove roof racks myself?
Yes, for crossbars on raised rails, flush rails, fixed points or door clips. Factory side rails bolted through the roof are usually a body shop or dealer job.
Do I need tools to remove roof racks?
Usually a hex key, Torx bit or socket, or the tool that came with the rack, plus the lock key. Some feet use a lever or knob and need no tools.
Will removing roof racks damage my car?
Careful removal that follows the rack and vehicle instructions keeps the risk low: fully release the attachments, lift rather than slide the bars, protect the paint and refit any covers on fixed points.
How do I remove the factory crossbars on an SUV?
It depends on the model. Some factory crossbars unbolt from the side rails under end covers; others stow or slide on the rails. The roof rack section of your owner’s manual shows the method and the tool.
Should I remove factory roof rails?
Usually not. Some factory side rails bolt through the roof, and removal may need headliner access and proper sealing of the holes; check the vehicle’s service instructions first. If you want less noise, remove the crossbars and leave the rails in place. If the rails must come off, have a body shop or dealer do it so the roof stays watertight.
Conclusion
Removing roof racks can be simple with the right steps. Follow the instructions carefully. Gather your tools and take your time. Store the racks safely for future use and check the roof where the feet sat.
Keep the bolts, keys and fit-kit parts together in one labelled bag, to make refitting easier next season.
Further reading: roof rack (Wikipedia)

🛠️ Buying Gear for Your Work Truck?
A free Amazon Business account gets you bulk pricing, tax-exempt purchases, and business-only deals on tools, racks, and truck accessories.
Create Free Amazon Business AccountAs an Amazon Associate we earn from qualifying purchases.