Building your own roof rack is easier than you think. With the right materials and tools, you can create a custom solution for your storage needs.
A roof rack can be a game-changer for outdoor enthusiasts. Whether you’re planning a road trip or need extra cargo space, a roof rack offers flexibility. Making your own can save money and allow for customization. Follow this guide to learn how to craft a sturdy, reliable roof rack.
You’ll gain the skills to tailor it to your exact needs. Plus, it’s a fun project that can be completed over a weekend. Ready to get started? Let’s dive into the essentials and steps needed to build your very own roof rack.
Introduction To Diy Roof Racks
Building your own roof rack can be fun. It saves money. It also adds a personal touch to your vehicle. A DIY roof rack can fit your needs better. You can make it strong or light. It can be made to carry bikes, kayaks, or luggage. Plus, making your own rack teaches you new skills. It can also be a project to bond with family or friends.
Creating a roof rack by yourself brings many benefits. It is cheaper than buying one. You can also customize it. This way, it fits your needs. Building it yourself means you can choose the best materials. It also gives you a sense of achievement. Your DIY rack can be unique. It can stand out from the rest. Plus, it is a great way to learn new skills.
| Tools | Materials |
|---|---|
| Saw | Metal or wood bars |
| Drill | Bolts and nuts |
| Wrench | Brackets |
| Measuring tape | Paint (optional) |
| Screwdriver | Rubber pads |
Choosing The Right Materials
Selecting the right materials ensures your roof rack is strong and durable. Choose weather-resistant metals and sturdy wood for longevity. Proper materials will keep your cargo secure.
Types Of Metals And Woods
Metals like aluminum and steel are common for roof racks. Aluminum is lightweight but strong. It is also rust-resistant. Steel is stronger than aluminum but can rust. It is also heavier. Aluminum can be more costly.
Woods like oak and pine are also used. Oak is strong and durable. It can last long. Pine is cheaper but not as strong. It can bend or break easier. Woods need treatment to resist water.
Pros And Cons Of Each Material
| Material | Pros | Cons |
|---|---|---|
| Aluminum | Lightweight, Rust-resistant, Strong | Expensive |
| Steel | Very strong, Durable | Heavy, Can rust |
| Oak Wood | Strong, Durable | Needs treatment, Expensive |
| Pine Wood | Cheap, Easy to find | Not as strong, Needs treatment |
Measuring And Planning
Start by measuring your car’s roof. Use a tape measure. Note the length and width. Measure twice to be sure. These numbers must be exact. Write them down. They will guide your design.
Draw your roof rack on paper. Use the measurements you took. Make sure the design fits your car. Sketch a few ideas. Choose the best one. This step helps you see what you need. It also prevents mistakes later.
Cutting And Preparing Materials
Start by measuring and cutting the metal or wood for the roof rack frame. Ensure all pieces fit together perfectly. Carefully prepare the materials for assembly.
Cutting Techniques
Use a saw to cut materials. Measure and mark where to cut. Follow the lines closely. Use a clamp to hold materials steady. This keeps cuts straight. Always wear safety goggles. Work slowly for clean cuts.
Sanding And Smoothing Edges
After cutting, edges may be rough. Use sandpaper to smooth them. Start with coarse grit sandpaper. Sand until edges are even. Switch to fine grit for a smooth finish. Sand in the same direction. Wipe off dust with a cloth.
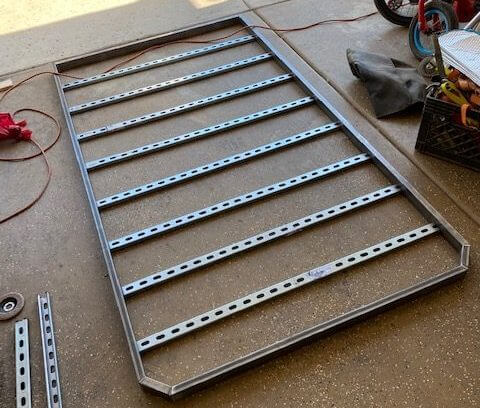
Assembling The Roof Rack
First, gather all parts of the roof rack. Place them on a flat surface. Align the pieces properly. Use nuts and bolts to join them. Ensure the bolts are tight. Loose bolts can cause problems. Check each connection twice. Proper alignment is key for strength.
After joining, secure all joints well. Use a wrench to tighten the bolts. Double-check all connections. Make sure no part is loose. Tighten screws and nuts firmly. Use washers for extra security. This helps in holding parts together. Check the rack’s stability by gently shaking it. It should not wobble. Safety first always.
Credit: xplrcreate.com
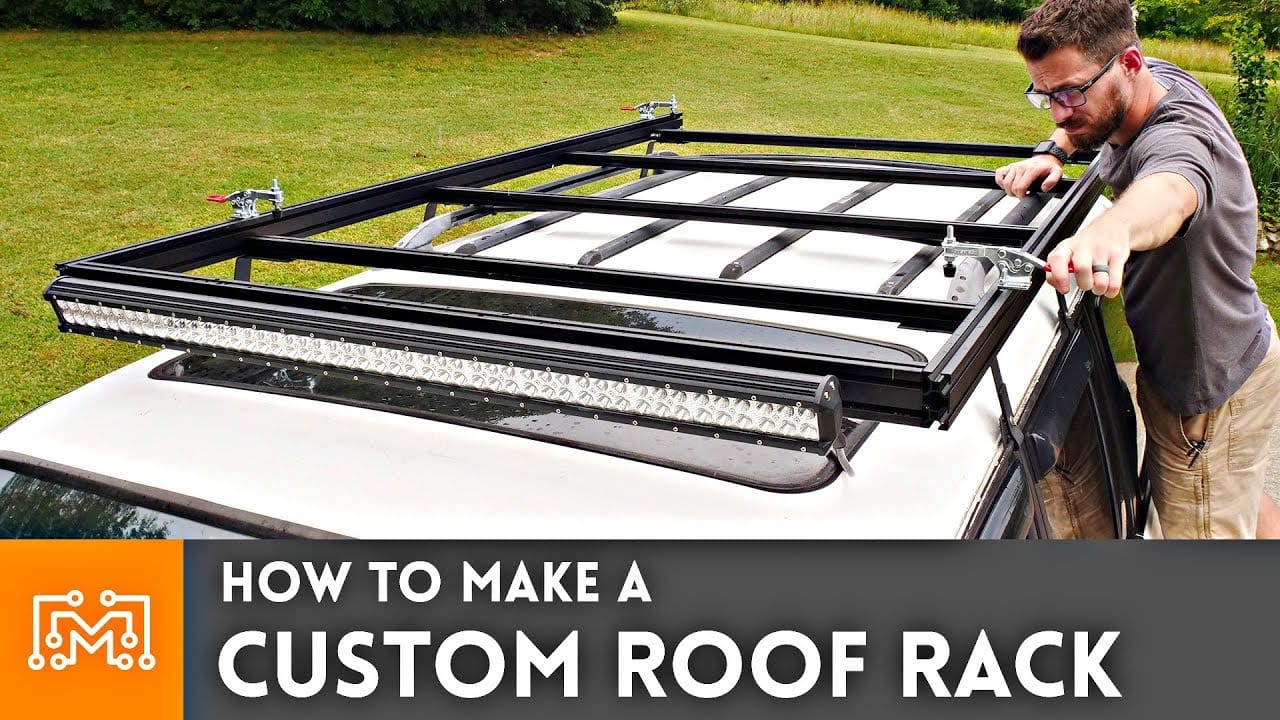
Installing The Roof Rack
Start by reading the vehicle manual. This tells you if the car has pre-drilled holes. If it does, use those to attach the roof rack. If not, you will need to drill new holes. Ensure the holes align with the rack. Secure the rack with bolts and screws. Use a wrench to tighten them. Check that all parts are firmly attached. Different vehicles may need different racks. Always double-check compatibility before buying.
Test the roof rack before driving. Give it a good shake. It should not move or wobble. Check all bolts and screws are tight. Add extra straps for safety if needed. Do not overload the rack. Follow the weight limit. This helps in preventing accidents. Regularly check the rack for any signs of wear. Replace any damaged parts immediately.
Testing Your Roof Rack
Place a heavy item on the roof rack. Check if the rack holds the weight. Ensure the item does not move or slide. Drive a short distance. Listen for any strange sounds. If the rack creaks, it may need adjustments.
Tighten any loose bolts. Use a wrench for better grip. Add extra support if needed. Check if the rack feels stable. Test again with weight. Repeat these steps until the rack is secure.

Credit: makerpipe.com
Maintenance Tips
Check the roof rack often. Look for any loose bolts or screws. Tighten them as needed. Ensure all parts are secure. Rust can weaken the rack. Remove rust spots promptly. Use a wire brush to clean rusted areas. Apply rust-resistant paint afterward. This helps in keeping the rack strong.
Small damage can grow over time. Fix any cracks or dents quickly. Use a metal filler for small cracks. Sand the area smooth after it dries. For larger damage, consider replacing the part. Always use high-quality materials. This ensures the roof rack lasts longer. Regular care keeps your roof rack safe.

Credit: www.youtube.com
Frequently Asked Questions
What Materials Are Needed For A Roof Rack?
To make a roof rack, you need metal bars, brackets, screws, and a drill. You may also need a measuring tape and a wrench.
How To Measure For A Roof Rack?
Measure the width and length of your car’s roof. Ensure your measurements are accurate to fit the roof rack securely.
Can I Install A Roof Rack By Myself?
Yes, you can install a roof rack by yourself. Follow the instructions carefully and ensure all components are securely fastened.
How Much Weight Can A Roof Rack Hold?
The weight a roof rack can hold depends on its design. Check the manufacturer’s specifications for the maximum weight capacity.
Conclusion
Building your own roof rack can be a rewarding project. It’s practical, cost-effective, and customizable. Follow the steps carefully and use the right materials. Ensure all parts fit securely for safety. Regularly check your roof rack for wear and tear.
Enjoy the convenience and extra storage space it provides. Feel free to personalize it to fit your needs. Happy building and safe travels!