Quick Summary
A roof rack and crossbar system is essential for expanding your vehicle’s cargo-carrying capacity. This guide simplifies choosing, installing the right system for your car, safely using it for outdoor gear, and regular maintenance, ensuring you travel smarter and more adventurously.
Hitting the open road with all your gear can be a challenge. Whether it’s a weekend camping trip, a family ski vacation, or just bringing home a bulky purchase, your car’s interior easily gets maxed out. That’s where a roof rack and crossbar system comes in handy. Think of it as giving your vehicle a superpower to carry more! It might seem a bit technical at first, but with a few simple steps, you’ll be ready to pack up and explore without leaving anything behind.
This guide is designed to make choosing and using a roof rack system easy. We’ll break down what you need, how to get it set up, and tips for keeping it in great shape. You’ll learn everything from identifying the right type of rack for your car to understanding how much weight it can safely hold. Let’s get your adventure started!
What Are Roof Racks and Crossbars?
Imagine your car’s roof as a blank canvas. A roof rack and crossbar system turns that canvas into a useful space for carrying extra items. It’s basically an added structure that attaches to your vehicle’s roof, allowing you to mount various carriers and transport gear that won’t fit inside your car.
Roof Racks Defined

A “roof rack” usually refers to the entire system. However, it’s often broken down into two main parts that work together: the base rack (which attaches to your car) and the accessories (which carry your specific gear).
Crossbars Explained
Crossbars are the horizontal bars that run across the width of your vehicle’s roof. They are the backbone of your roof rack system. Most vehicles don’t come with crossbars pre-installed, and they are typically the components you purchase to create a base for attaching other accessories like bike racks, ski carriers, or cargo boxes.
Without crossbars, you can’t really attach much to your roof. They provide the platform. Think of them like the shelves in a bookcase; the rack itself might hold the books, but the shelves are what the books actually rest on.
Why You Need a Roof Rack and Crossbar System
For anyone looking to maximize their vehicle’s utility, a roof rack and crossbar system is a game-changer. They’re not just for hardcore adventurers; they can make everyday life and occasional trips much more convenient. Here’s why you might want one:
- Increased Cargo Space: This is the most obvious benefit. Free up valuable interior space for passengers and comfort. No more Tetris-ing luggage into every nook and cranny.
- Transporting Bulky Gear: Oversized items like kayaks, skis, surfboards, bicycles, or even lumber for a DIY project are easily transported. Try fitting a kayak inside your SUV – it’s usually not pretty!
- Enhance Your Vehicle’s Aesthetics: Many people find that a sleek, well-fitted roof rack system can give their car or SUV a more rugged, ready-for-adventure look.
- Versatility: With different accessories, your roof rack can adapt to almost any gear hauling need. Switch from a bike rack to a ski carrier with ease.
- Future-Proofing Your Adventures: Even if you don’t plan a big trip soon, having the capability means you can spontaneously decide to go camping, biking, or kayaking without worrying about gear logistics.
It’s about making your vehicle more capable and your life easier when it comes to transporting your passions and necessities.
Types of Roof Rack Systems
Choosing the right roof rack system can feel overwhelming because there are different types. The best system for you depends on your vehicle and what you plan to carry. Let’s break down the common types.
1. Factory-Installed Racks
Some vehicles come with side rails or mounting points already built into the roof by the manufacturer. These are often the easiest to work with, as they are designed specifically for your car model. You’ll typically need to buy crossbars that fit these existing points.
- Pros: Usually a perfect fit, often less complex to install, can look very integrated with the vehicle’s design.
- Cons: Limited options if you want to upgrade later, may not be as robust as aftermarket systems for heavy-duty use.
2. Aftermarket Roof Racks
These are racks you buy separately from your car manufacturer. They offer more options and are often more versatile and durable for specific needs. Aftermarket racks generally fall into a few categories based on how they attach to your vehicle:
a) Racks for Vehicles with Factory Side Rails:
If your car has raised side rails running from front to back, you’ll likely need crossbars designed to clamp onto these rails. These are very common on SUVs and wagons.
b) Racks for Vehicles with Flush or Recessed Side Rails:
Some modern cars have side rails that sit almost flat against the roof. These can be trickier, as the attachment method might involve a specific clip designed for the space between the rail and the door frame.
c) Racks for Vehicles with Fixed Points:
Certain cars have small screw-in points, often covered by small flaps or panels in the roof. These are designed for a secure, permanent mounting of a roof rack system with specialized feet.
d) Racks for Vehicles with Rain Gutters:
Older vehicles, and some trucks, might have a “rain gutter” – a lip on the edge of the roof where the door opening meets the roof. Racks for these often use clamps that hook under this gutter.
e) Bare Roof Racks (Clamp-On):
For vehicles with absolutely no rails or mounting points, there are clamp-on systems. These use special clips that wrap around the edge of your door frame and a rubber pad that rests on the roof. While convenient, they can sometimes affect door seals or paint if not installed correctly or if used heavily.
For detailed information on measuring and fitting bare roof racks, consider checking out resources like the Tacoma World forums for practical DIY advice.
3. Different Types of Crossbars
Crossbars themselves come in various materials and shapes, affecting their weight capacity, noise, and aerodynamics:
- Steel Square Bars: The classic, robust option. Durable and affordable but can be noisier and less aerodynamic.
- Aluminum Oval/Wing Bars: More aerodynamic and quieter than steel bars. Often have a T-slot channel on top for easily attaching accessories with T-bolts.
- Round Bars: Similar to steel square bars but rounded. Some accessories might not fit as securely as on square or wing bars.
Choosing the Right Roof Rack and Crossbar System For Your Vehicle
Now that you know the types, let’s get down to choosing the best system for your car and your needs. This is where careful consideration pays off.
Step 1: Identify Your Vehicle’s Roof Type
This is the most crucial first step. Look at your car’s roof carefully. Does it have:
- Raised side rails?
- Flush side rails?
- Fixed mounting points (often under plastic covers)?
- No rails or mounting points at all (a “bare roof”)?
- Rain gutters?
Knowing this will immediately narrow down your options to specific types of racks and feet.
Step 2: Determine Your Carrying Needs
What will you be carrying most often? This dictates the kind of accessories you’ll need and the strength of the rack system.
- Bicycles: Fork-mount or frame-mount racks.
- Kayaks/Canoes: J-cradles, simple saddles, or roller systems.
- Skis/Snowboards: Ski/snowboard carriers that clamp down.
- Cargo Storage: Cargo boxes (hardshell or soft bags) or cargo baskets.
- General Luggage/Gear: Can often use a cargo basket or just tie down items directly to crossbars (ensure they are secured properly).
Step 3: Consider Weight Capacity
Every vehicle and roof rack system has a maximum weight limit. This includes the weight of the rack, the crossbars, and the cargo itself. Check your vehicle’s owner’s manual for its specific roof load limit – this is often lower than the rack’s capacity. For instance, your car might have a roof load limit of 100 lbs, even if the rack is rated for 165 lbs. It’s always best to adhere to the vehicle’s limit.
Visit the National Highway Traffic Safety Administration (NHTSA) for general towing and hauling safety recommendations, which also apply to roof loads.
Step 4: Research Brands and Models
Popular and reputable brands include Thule, Yakima, Rhino-Rack, and Inno. Each offers various systems to fit different vehicle types and needs. Read reviews, compare features, and check compatibility charts on their websites.
Step 5: Check for Vehicle-Specific Fit Kits
For many aftermarket bare-roof and flush-rail systems, you’ll need a specific “fit kit” or “clip” designed for your exact car make, model, and year. These kits ensure a secure and custom fit.
Step 6: Factor in Budget
Roof rack systems can range from a few hundred dollars to over a thousand, depending on the brand, materials, and complexity. Balance your budget with the quality and durability you need. Sometimes, investing a bit more upfront means a more secure, quieter, and longer-lasting system.
Table: Common Rack System Components
Here’s a quick look at the typical parts of a roof rack system:
| Component | Description | Function |
|---|---|---|
| Feet/Mounts | Part that attaches directly to your car’s roof. | Connects the entire rack system to the vehicle’s structure. |
| Fit Kit/Clip | Vehicle-specific part for custom fit, especially for bare roofs. | Ensures secure and proper mounting to a specific car model. |
| Crossbars | Horizontal bars spanning the vehicle’s width. | Provide the base for attaching accessories. |
| Accessories/Carriers | Add-ons for specific gear (bike racks, cargo boxes, etc.). | Transport specific types of items securely. |
| Locking Knobs/Cores | Optional security feature. | Prevents theft of the rack system or accessories. |
Installation Guide: Attaching Your Roof Rack and Crossbars
Installing a roof rack system can seem daunting, but most systems are designed for DIY installation. Always refer to the manufacturer’s instructions specific to your rack model and vehicle. This is a general overview.
Tools You Might Need:
- Measuring tape
- The included Allen wrench or hex key for your rack system
- A small, flathead screwdriver (sometimes for removing trim pieces)
- A soft cloth or towel
- A helper (especially for longer vehicles or heavier racks)
General Installation Steps:
- Read All Instructions: Seriously, this is the most important step. Every rack and car is different. Page through them before you start unscrewing anything.
- Layout Your Parts: Identify all the pieces that came with your rack system and your vehicle-specific fit kit.
- Install the Feet/Mounts and Fit Kit:
- For Side Rails: If you have raised side rails, the feet will typically clamp onto the rails. You might need to adjust their position based on the recommended distance in your instructions.
- For Fixed Points: Remove the plastic covers over the fixed points. The feet will then screw directly into these points.
- For Bare Roofs: This is where the fit kit is crucial. The feet will attach to the car’s roof, and the specialized clips will hook into the door jamb. Place the rubber padding carefully, and ensure the clips are seated correctly against the door frame.
- Attach the Crossbars:
- Most systems allow you to place the crossbars onto the feet. Many feet have a channel or slot for the crossbar to slot into.
- Ensure the crossbars are oriented correctly (some have a specific front/back or top/bottom).
- Crucially: Ensure the crossbars are parallel and the correct distance apart! The manufacturer’s instructions will specify this, or you’ll have a recommended range. Too close or too far apart, and your accessories might not fit, or your cargo could be unstable.
- Tighten Everything Securely:
- Start by hand-tightening all bolts.
- Then, use the provided tool to tighten them further. Follow torque recommendations if provided.
- Important: Install locking mechanisms if your rack has them. This deters theft.
- Check for Stability: Once installed, gently push and pull on the rack and crossbars. They should feel solid with minimal wiggle.
- Test with Doors: If you have a bare-roof system, open and close your car doors to ensure the rack doesn’t interfere with them and that the seals are still making good contact without being pinched or damaged.
- Final Check: Drive a short distance (e.g., around the block) at low speed and listen for excessive noise or vibrations. Pull over and re-check tightness if you notice anything concerning.
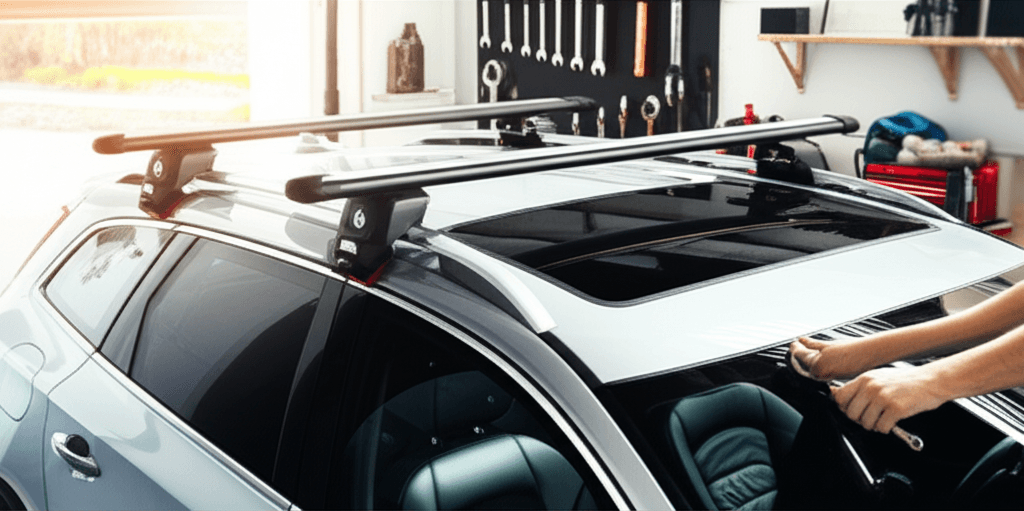
Pro Tip: If your car has a sunroof, double-check the instructions. Some roof rack systems cannot be used when the sunroof is open, or may even require the sunroof to be in a specific position for installation or use.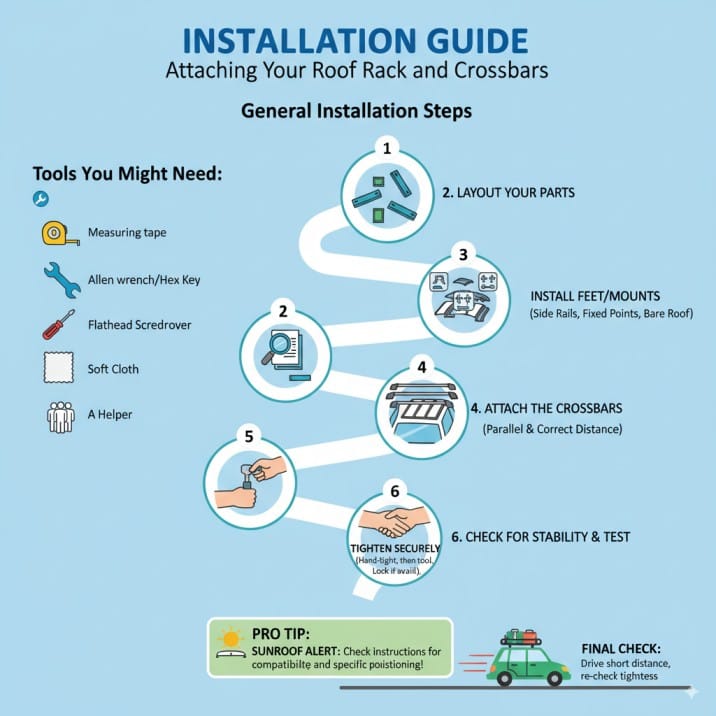
Using Your Roof Rack and Crossbars Safely
You’ve got your rack installed – now it’s time to load up! Safety is paramount when carrying anything on your roof. A poorly secured load can be dangerous for you and other drivers.
Key Safety Considerations:
- Know Your Limits: Always respect the maximum weight capacity of your rack system and your vehicle’s roof. Overloading can damage your car, the rack, and be a significant safety hazard.
- Secure Your Load Properly:
- Use appropriate tie-down straps, bungee cords, or specialized carriers.
- Ensure straps are taut and not frayed.
- Tie down items to both the crossbars and the vehicle anchors if available.
- For long or bulky items, consider using bow and stern tie-downs to secure the item to your vehicle’s front and rear bumpers.
- Distribute Weight Evenly: Try to distribute the weight of your cargo as evenly as possible across the crossbars. Avoid loading too much weight on one side or at the very front/back of the rack.
- Check Load While Driving: After loading, perform a final check. While driving, stop periodically (especially after the first 15-30 minutes of driving) to re-check that everything is still secure. Straps can loosen over time.
- Consider Aerodynamics: Tall loads can catch more wind, affecting your vehicle’s handling. Be extra cautious driving in strong crosswinds.
- Height Clearance: Be very aware of your vehicle’s new height with the load on top. Overpasses, parking garages, drive-throughs, and even low-hanging tree branches can be a hazard. A common mistake is forgetting the extra height, especially when returning from a trip with a lower vehicle. Measure your total height!
Loading and Securing Different Gear:
Bicycles: Use a dedicated bike rack. Ensure the wheels and frame are secured to the rack. Check that the bike doesn’t wobble excessively.
Kayaks/Canoes: Use cradles or straps designed for watercraft. Ensure the kayak is centered on the crossbars and securely strapped down. If carrying a long kayak, use tie-downs to the front and rear of the vehicle.
Skis/Snowboards: Use a ski/snowboard carrier. Make sure bindings and the boards themselves are held firmly. Ensure