Seamless Journeys: Mastering Roof Rack Tie Downs for Ultimate Security
Embarking on an adventure often means bringing along more gear than your vehicle’s interior can comfortably accommodate. This is where a reliable roof rack system and, crucially, effective roof rack tie downs come into play. Whether you’re a seasoned outdoor enthusiast heading for the mountains or a family planning a road trip, securely fastening your cargo is paramount for both your safety and the preservation of your equipment. Improperly secured items can shift, leading to damage, or worse, detach from your vehicle, posing a serious hazard to other road users. This guide will equip you with the expert tips needed to master the art of using roof rack tie downs, ensuring your journeys are as secure as they are enjoyable.
Understanding Your Roof Rack Tie Down Options
The world of roof rack tie downs offers a variety of solutions, each suited to different types of cargo and rack systems. Familiarizing yourself with these options is the first step towards secure transport.
Straps and Ratchets: The Workhorses of Roof Rack Tie Downs
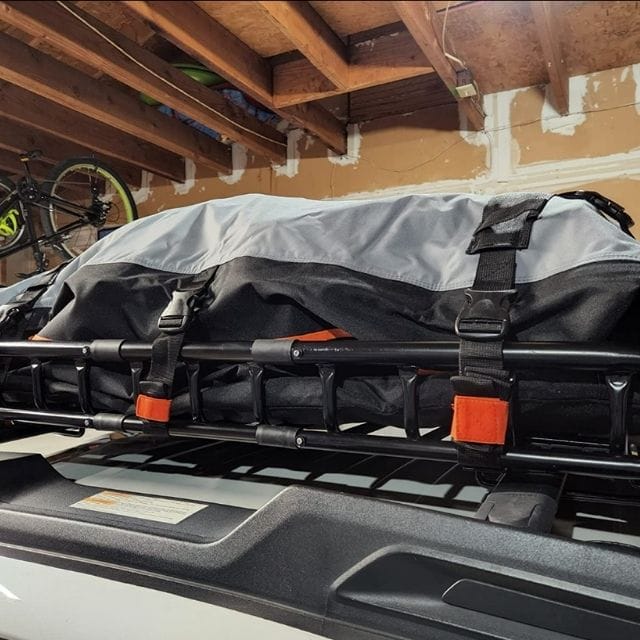
Often the go-to choice for their versatility and strength, cam buckle straps and ratchet straps are indispensable tools for securing bulky items like kayaks, surfboards, luggage boxes, and lumber.
Cam Buckle Straps: These are generally the simplest to use. They feature a cam mechanism that grips the strap, creating tension. They’re excellent for items that don’t require extreme tension, such as securing a surfboard or bicycle to a roof rack. The key to using them effectively is to ensure the cam is fully engaged before tightening and to double-check the tension. Avoid overtightening cam straps, as this can damage the cargo or the strap itself.
Ratchet Straps: For heavier or more demanding loads, ratchet straps are essential. They utilize a ratcheting mechanism to achieve very high levels of tension, creating a vice-like grip on your cargo. These are perfect for securing heavy items like motorcycles, ATVs, or large, unwieldy gear. When using ratchet straps, it’s vital to ensure the working load limit (WLL) of the strap is sufficient for the weight of your cargo. Overloading straps can lead to failure. Always crank the ratchet until it’s firmly tightened, but be mindful not to overtighten to the point of crushing your cargo or damaging the rack.
Bungee Cords and Elastic Straps: For Lighter Loads
While not typically recommended for primary cargo securing due to their elastic nature, bungee cords and elastic straps can be useful for lighter, non-critical items like tarps or securing a spare tire to a rack. However, their elasticity means they can loosen over time as they stretch and compress with road vibrations. For anything valuable or potentially dangerous if it were to come loose, always opt for non-elastic tie-down methods.
Specialized Tie-Downs
Beyond the common straps, you’ll find specialized tie-downs designed for specific activities:
Kayak/Canoe Straps: These often feature protective sleeves or padding to prevent scratching delicate hull materials. They may also have specific attachment points for added security.
Tire Straps: Used for securing vehicles or large, heavy items that require a strong, distributed point of attachment.
The Art of Applying Roof Rack Tie Downs: Step-by-Step
Mastering the technique of using roof rack tie downs is crucial. A few key principles will ensure everything stays put.
Step 1: Assess Your Cargo and Rack
Before you even pick up a strap, take a moment to evaluate what you’re carrying and how your roof rack is configured.
Weight Distribution: Aim to place the heaviest items in the center of the rack, as close to the vehicle’s roofline as possible, to maintain a lower center of gravity.
Rack Type: Understand the connection points on your specific roof rack. Does it have crossbars, and where are the most secure points to attach your tie-downs? Some racks have integrated tie-down points, while others require straps to be looped around the crossbars themselves.
Step 2: Choose the Right Tie-Downs
As discussed, select the appropriate type and strength of tie-down for your cargo. Always err on the side of caution and use straps with a higher weight capacity than you think you need.
Step 3: Secure the Straps
This is where proper technique makes all the difference.
Looping Around Crossbars: For most standard roof racks with crossbars, the most secure method is to loop the strap around the crossbar, not just over it. This prevents the strap from sliding sideways. Ensure the strap passes through the rack’s channel or around the entire bar.
Attachment Points: If your rack has dedicated tie-down loops or eye bolts, utilize these. They are engineered to provide the most secure connection.
Crossing Straps (for long items like kayaks): For longer items, consider using two separate sets of tie-downs and crossing the straps over the cargo in an ‘X’ pattern. This provides superior stability and prevents rotation.
Preventing Rubbing and Abrasion: Protect both your cargo and your tie-downs from rubbing against each other or the rack. Use padding where necessary – old towels, foam pieces, or specialized strap protectors can prevent damage.
Step 4: Achieving Optimal Tension
Tightness is key, but over-tightening can be detrimental.
Cam Buckles: Pull the loose end of the strap firmly through the buckle until it’s snug. Give it a gentle tug to ensure it’s locked.
Ratchet Straps: Hand-tighten the strap first to remove slack. Then, use the ratchet mechanism to cinch down the load. Listen for the clicking sound and feel the strap becoming taut. Stop when the cargo is firmly held and doesn’t wiggle, but avoid crushing the item.
Step 5: The Double-Check and Periodic Re-tightening
This is a critical step often overlooked.
The Shake Test: Once everything is tightened, give your cargo a firm shake. It should not move independently of the vehicle. Check that the straps themselves aren’t twisted, which can weaken them.
Inspect Regularly: During your journey, especially after the first 50-100 miles, pull over safely and re-check the tension on all your roof rack tie downs. Straps can stretch or loosen due to road vibrations. Continue to check them periodically throughout longer trips.
Safety First: What to Avoid with Roof Rack Tie Downs
To ensure the safety and longevity of your equipment and peace of mind on the road, be aware of common pitfalls:
Never use worn or damaged straps: Check for nicks, fraying, sun degradation, or damage to the buckles/ratchets.
Don’t overtighten: This can damage your cargo, your roof rack, or even the straps themselves, reducing their strength.
Avoid bungee cords for primary securing: Their elasticity makes them unreliable for critical loads.
Don’t rely on just one strap: Always use multiple tie-downs for substantial cargo.
Ensure straps are not rubbing: This causes wear and can weaken the strap over time.
Check weight limits: Always respect the Working Load Limit (WLL) of your tie-downs.
By understanding the different types of roof rack tie downs, applying them with proper technique, and prioritizing regular checks, you can confidently transport your gear. Safe travels await when your cargo is as secure as the road beneath you.