

As an Amazon Associate, RackReveal earns from qualifying purchases. Some links on this page are affiliate links, at no extra cost to you.
Make your roof racks quiet and enjoy your drive! Reduce wind noise and hum by securing loose parts, refitting T-slot strips and end caps, and adding a fairing made for your bars. These simple fixes will bring peace back to your car.
Ah, the open road! Ready for an adventure with your bikes, kayaks, or maybe just some extra luggage on your car’s roof? That’s where roof racks shine. But sometimes, as you pick up speed, a new sound joins your road trip playlist: a distracting, whistling, or humming wind noise coming from your roof rack. It can turn an exciting journey into an annoying one, and it’s a common frustration for many car owners.
Don’t worry, you’re not alone, and it’s usually an easy fix! This guide is here to help you silence that unwanted noise and reclaim the peaceful cabin experience you deserve. We’ll walk through simple, effective ways to make your roof racks quieter, so you can focus on the drive and the destination.
Why Do Roof Racks Make Noise?
Wind noise from roof racks is a lot like the sound you hear when you blow over the top of a bottle. As air flows over and around the bars and accessories, it creates turbulence. This turbulence can cause vibrations and a variety of sounds, from a low hum to a high-pitched whistle. The shape, size, and speed of your vehicle, as well as the type and condition of the roof rack, all play a role in how much noise is generated.
Think of it this way: the smooth profile of your car’s roof doesn’t easily accommodate the extra structures of a roof rack. The rack disrupts the natural flow of air, forcing it to do tricky maneuvers around the bars. This disruption is what causes the noise. The faster you go, the more significant these disruptions become, and the louder your rack will be.
Common Causes of Roof Rack Noise
- Aerodynamics: The basic shape of most roof rack bars creates turbulence as air passes over them.
- Loose Components: Any part of the rack that isn’t tightly secured can vibrate in the wind, creating rattling or buzzing sounds.
- Improper Installation: If the rack isn’t fitted correctly to your vehicle, gaps can form, allowing wind to enter and create noise.
- Accessory Interference: Sometimes, accessories attached to the rack (like bike mounts or kayak carriers) can also cause or amplify noise.
- Gap Between Bar and Rack Feet: Small spaces where the rack feet connect to your car’s roof can also be a source of whistling.
Find the Noise Source First
The sound can help narrow the search, but it doesn’t prove the cause. Before a test drive, park safely and check the rack and accessories as their manuals say, and fix any loose, damaged or wrongly fitted part first. If everything is secure, listen during normal driving at a legal speed that suits the conditions and your rack’s limits, and stop somewhere safe before you inspect again.
Also confirm with the rack maker’s fit guide that your bars, feet and fit kit are approved for your vehicle’s year, model and roof type. If the fit is uncertain, contact the maker before driving; don’t improvise shims or padding.
| What you hear | Likely source | Where to look first |
|---|---|---|
| High-pitched whistle | Air through a small opening | Open or torn T-slot strip, missing end cap, gap at the feet |
| Steady hum or drone | Air flowing over the bars | Bar shape and position; a fairing made for your bars |
| Rattle, clunk or buzz | Loose or rubbing parts; a buzz can also be the bar vibrating in the airflow | Feet, clamps, end caps and accessory mounts |
| Squeak or creak | Parts rubbing | Clamps and accessory mounts; check fit, don’t just lubricate |
Tip: have a passenger record a short clip on a phone during the drive (never handle the phone while driving). Play it back at home to hear what kind of noise it is, and record again after each fix so you can tell what changed. Change one thing at a time.
If an end cap or T-slot strip lifts, flaps or won’t stay seated at speed, replace it with the part made for your bars rather than taping it down.
Proven Solutions: How to Make Roof Racks Quieter
The good news is that you don’t need to be a mechanic to significantly reduce or eliminate roof rack noise. We’ve put together a list of the most effective, beginner-friendly solutions. You can often tackle most of these with basic tools or even no tools at all!
1. Install a Wind Fairing
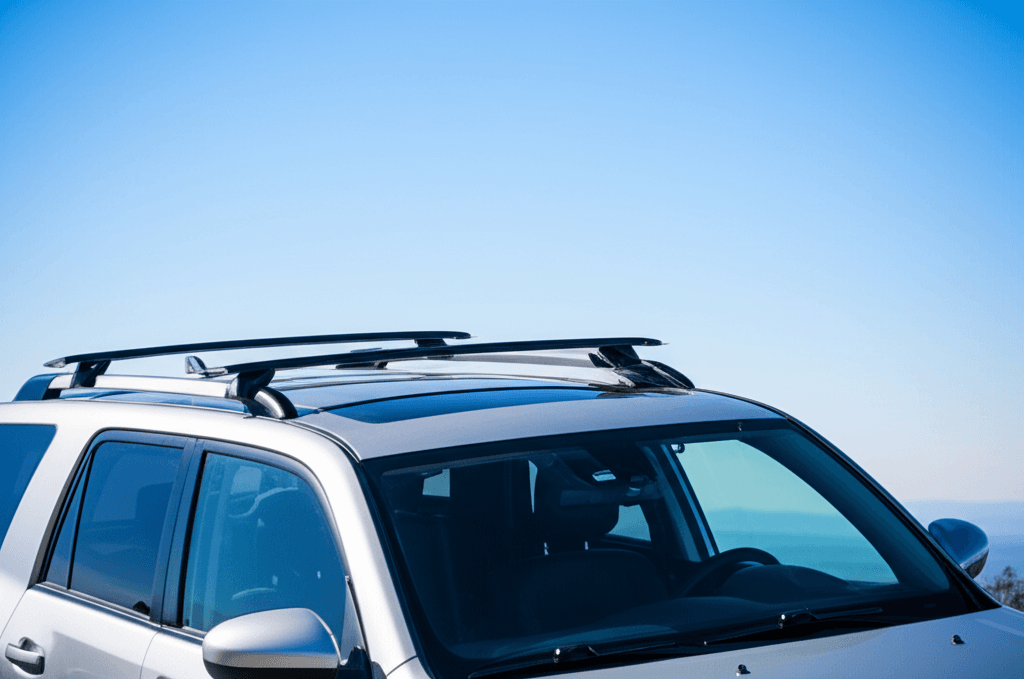
This is often the most impactful solution. A wind fairing is like a small spoiler for your roof rack. It’s usually a curved piece of plastic or metal that attaches to the front of your roof rack bars.
How it works: The fairing deflects the air over the rack bars instead of allowing it to flow directly into them. A fairing that fits your bars and car may reduce wind noise, though results depend on the vehicle, the bars and what’s mounted on them. Think of it as a way to make your roof and rack act more like a single, aerodynamic unit.
What to look for:
- Size: Make sure the fairing is appropriately sized for your rack and vehicle.
- Material: Most are made from durable plastic.
- Mounting: Easy-to-use clamps or straps are common.
Many roof rack manufacturers offer specific fairings for their systems. If yours doesn’t, universal options are available. A quick search for “[Your Roof Rack Brand] wind fairing” should get you started. For example, Thule’s AirScreen XT listing says it attaches to Thule WingBar Evo, WingBar Edge, AeroBlade, AeroBlade Edge and SquareBar Evo bars, and Thule says to check its fit guide for the right size.
Safety note: don’t make a homemade fairing from plastic sheeting and ties. A part that comes loose at speed is a hazard to you and to drivers behind you; use a fairing made for your bars.
2. Secure Loose Components and Check Fittings
Noise can often be caused by parts of your roof rack that have vibrated loose over time. This includes the crossbars themselves, the feet that attach to your car, and any attached accessories.
What to check:
- Crossbar Clamps: Ensure the bars are firmly clamped down and aligned.
- Foot Pack Screws: Check the screws or bolts that hold the rack feet to your vehicle’s mounting points, and tighten them only as the manual says.
- Accessory Mounts: Double-check that bike racks, kayak carriers, or cargo boxes are securely attached to the crossbars.
Tools you might need:
- A basic toolkit with screwdrivers and wrenches.
- A torque wrench (if specified by your rack manufacturer for precise tightening).
How to do it:
- Park your car safely: Find a level spot, turn off the engine, and engage the parking brake.
- Visual Inspection: Look for any parts that seem loose or out of place.
- Gentle Wiggling: Try to gently wiggle each component. Movement can mean a loose fastener, but also a part fitted wrong, damaged or not locked.
- Fix it by the manual: Reinstall or tighten each part as the rack manual says, using the specified torque or the torque tool supplied with the rack. Don’t overtighten, and don’t drive while something still moves.
3. Check T-Slot Strips and End Caps
Many aero crossbars have an open T-slot on top for accessories, closed by a rubber strip. If the strip is missing, torn or pushed out, the open slot can whistle. Refit or replace it with the strip made for your bars, trimming it only as the maker says. Some crossbar listings say their T-slot strip is there to cut wind noise.
On square bars, check the end caps. Thule’s EC1 end caps listing says they help reduce wind noise and cover the bar’s sharp edges (see below). Skip generic tapes and wraps: anything that isn’t made for your bars can peel or come loose at speed.
4. Use Only Pads and Strips Made for Your Rack
Pads and strips can stop small rattles, but only use the ones your rack or accessory maker supplies or approves, installed as their instructions say. Don’t wrap bars in loose foam or pipe insulation, and don’t add padding under the rack’s feet, clamps or accessory mounts: it can compress, loosen or change how they grip.
5. Ensure Proper Alignment and Placement
The way your crossbars are positioned can affect wind noise. Manufacturers often recommend specific spacing for their crossbars.
How it works: Misaligned or improperly spaced bars can create pockets of turbulence or allow air to get under the bars more easily, leading to noise. Correct placement ensures the rack integrates more cleanly with the car’s overall aerodynamic profile.
What to do:
- Consult your roof rack manual: It will have diagrams and recommendations for bar placement on your specific vehicle.
- Measure carefully: Set the bar positions and spacing your rack’s fit instructions give for your vehicle, and keep any accessory within the crossbar spacing it allows.
- Check alignment: Make sure the bars sit the way the instructions show, including which way aero bars face.
This is especially important if you’ve removed and reinstalled your rack. Even a slight change in position can sometimes introduce noise.
6. Understand Your Rack Type and Its Aerodynamics
Not all roof racks are created equal when it comes to noise. Some designs are inherently quieter than others.
Aerodynamic vs. Square Bars:
- Aerodynamic (Wing, Blade, etc.): These are typically flatter and shaped differently to reduce drag and noise. They are often quieter but can be more expensive.
- Square Bars: These are the classic, budget-friendly option. They are more prone to wind noise but can be made quieter with the solutions mentioned above.
If you’re in the market for a new roof rack and noise is a major concern, consider investing in a more aerodynamic design. Many modern racks have been engineered with quiet operation as a key feature.
7. Consider Accessories That Can Reduce Noise
Sometimes, noise isn’t solely from the bars but from accessories attached to them.
Bike Racks: Fork-mount racks can sometimes create wind noise that’s different from bare bars. Ensure the skewers are tight and that any plastic components are securely in place. Frame-mount racks can also whistle if not aligned properly or if certain parts are loose.
Kayak/Canoe Carriers: These can catch a lot of air. Ensure the straps are tight, and if the carriers have any articulating parts, make sure they are locked down. Some carriers have integrated fairing-like elements. For kayak carriers, look for systems that lie relatively flat against the crossbars.
Cargo Boxes: While generally designed to be aerodynamic, older or poorly sealed cargo boxes can still create noise. Check that all latches are secure and that the box is properly seated on the crossbars. Mount the box only with its own hardware, as its instructions say.
When to Seek Professional Help or Replace Parts
While most roof rack noise issues are DIY-friendly, there are times when the problem might be more complex, or your rack might be past its prime.
Signs you might need professional help or a replacement:
- Persistent, loud noise: After trying several solutions, if the noise is still unbearable, there might be a more fundamental issue with the rack or its fit.
- Visible damage: Cracks, significant rust, or bent bars indicate that the rack might be compromised and should be replaced for safety.
- Missing or broken hardware: If you can’t find replacement parts for crucial components, it might be time for a new rack.
- Constant rattling or buffeting: This could indicate a structural problem with the rack or the vehicle’s mounting points.
If your rack is old or has been heavily used, consider if it’s still safe and effective. Newer racks often incorporate advanced aerodynamic designs specifically to combat noise.
Roof Rack Noise Reduction: A Quick Comparison Table
Here’s a handy table to help you decide which solution might be best for you:
| Solution | Ease of Installation | Effectiveness for Noise Reduction | Best For |
|---|---|---|---|
| Wind Fairing | Easy to Moderate | Varies by vehicle and bars | Hum and whistle from air hitting the bars. |
| Secure Loose Parts | Very Easy | Low to Moderate | Rattling, buzzing, or whistling from loose components. |
| T-Slot Strips / End Caps | Easy | Moderate | Whistling from open T-slots or bar ends. |
| Maker-Approved Pads | Easy | Low to Moderate | Small rattles, using only parts approved for your rack. |
| Proper Alignment | Moderate | Low to Moderate | Noise caused by poor bar positioning. |
FAQ: Your Roof Rack Noise Questions Answered
Q1: Will all roof racks make noise at higher speeds?
Not necessarily, but most will produce some level of wind noise, especially at highway speeds. The design, size, and how well they are installed all contribute to how much noise is generated.
Q2: Will a wind fairing fit my roof rack?
Only if it’s made for your bars and the right width for your car. For example, the Thule AirScreen XT lists the Thule bars it fits, and Thule says to check its fit guide for the best size. Check the current price on the product page.
Q3: Can I use regular duct tape to silence my rack?
While duct tape might temporarily help by covering gaps, it’s generally not recommended. It’s not designed for the constant wind and weather exposure your roof rack experiences and will likely peel off quickly. It can also leave sticky residue. Fix the cause instead: refit the T-slot strip or end caps made for your bars.
Q4: What if I have an older, square-shaped roof rack? Are there solutions for those?
Absolutely! Older, square-shaped racks are often the noisiest. A fairing made for your bars may help, and so can making sure the end caps are in place (Thule’s EC1 caps fit its original square bars). Don’t wrap the bars in foam or tape.
Q5: Should I remove my roof rack when I’m not using it?
Yes, if noise is a big concern and you frequently drive without carrying anything, removing your roof rack when not in use is the most effective way to eliminate wind noise. FuelEconomy.gov also says roof cargo adds wind resistance and suggests removing an external cargo container when you’re not using it. Our how to remove roof racks guide shows how.
Q6: I hear a whistling noise. What’s the most likely cause?
Whistling noises are often caused by air passing through small, consistent openings. This could be at the connection points between the crossbars and your car’s roof (where the feet attach), or sometimes from the T-slots on aerodynamic bars if they aren’t covered. For a step-by-step fix, see how to stop roof bars whistling.
Q7: Will any of these solutions affect my car’s fuel economy?
A quieter rack isn’t proof of better fuel economy. FuelEconomy.gov says roof cargo adds wind resistance and lowers fuel economy, and suggests removing an external cargo container when you’re not using it.
Q8: Can a brand-new roof rack be noisy?
Yes. Check that it was installed exactly as the instructions say: bar position and spacing, which way aero bars face, T-slot strips fully seated and end caps on. Recheck the fit after your first drive if the instructions call for it.
Conclusion: Enjoying a Quieter Ride
Dealing with a noisy roof rack doesn’t have to be a constant battle. By understanding why the noise happens and applying the right solutions, you can transform your driving experience. From a fairing made for your bars to ensuring all your rack’s components are snug and secure, there are practical steps for every budget and skill level.
Remember, a quiet roof rack means a more enjoyable journey. You can finally hear your music again, have conversations without shouting, and focus on the beautiful scenery. So, take a little time, try out these tips, and get ready to hit the road in peace. Happy travels!
Gear Worth Considering
Two products that match the fixes above. Both were in stock on Amazon US when we checked (the AirScreen XT was low); details come from the listings, and we haven’t tested them hands-on.
Thule AirScreen XT Wind Fairing
A clip-on fairing for Thule bars. The listing says it attaches to Thule WingBar Evo, WingBar Edge, AeroBlade, AeroBlade Edge and SquareBar Evo with included hardware, needs no tools, and mounts around the bar so you keep T-track access. Check Thule’s fit guide for the size.

- Attaches to Thule WingBar Evo, WingBar Edge, AeroBlade, AeroBlade Edge and SquareBar Evo with included hardware
- Around the bar tool-free mounting allows for quick T-track access
- Clip-on design requires no tools for assembly or installation
Thule EC1 Load Bar End Caps (4-Pack)
Replacement end caps for Thule’s original square load bars. The listing says they help deter rust inside the bar, reduce wind noise and cover the bar’s sharp edges, and that they don’t fit the Thule Evo roof rack system.

- Ec1 Contains 4 Replacement End Caps For Thule Original Square Load Bars
- Helps To Deter Rust Inside Load Bar, And Reduce Wind Noise, And Cover Sharp Edges Of Bar
- Not Compatible With The Thule Evo Roof Rack System
As an Amazon Associate, we earn from qualifying purchases at no extra cost to you.
Black Friday Tip and Gift Idea
Black Friday tip: if you plan to buy a fairing or a quieter set of bars on Black Friday 2026 (November 27) or Cyber Monday (November 30), note your rack brand, bar model and bar length now, and run the maker’s fit guide so you know the right fairing size. Check the current price on Amazon on the day rather than a “was” price.
Gift idea: a fairing or a set of end caps is a small, useful gift for someone with a noisy rack, if you know their bar model.

🛠️ Buying Gear for Your Work Truck?
A free Amazon Business account gets you bulk pricing, tax-exempt purchases, and business-only deals on tools, racks, and truck accessories.
Create Free Amazon Business AccountAs an Amazon Associate we earn from qualifying purchases.