Building a bike rack can seem like a challenging task. But with the right guidance, it’s quite doable.
A homemade bike rack not only saves money but also provides a personalized solution to your storage needs. In this blog post, we will guide you through the steps to build a sturdy and functional bike rack. Whether you need a rack for your garage, backyard, or even for your vehicle, we’ve got you covered.
You don’t need to be a professional carpenter or have specialized skills. With simple tools and materials, you can create a bike rack that keeps your bikes organized and secure. Let’s explore how you can turn this DIY project into a fun and rewarding experience.
Credit: www.youtube.com
Materials Needed
A bike rack needs some basic tools. You will need a drill. Get a set of screwdrivers too. A wrench set is also important. You might need a saw. A measuring tape helps a lot. Don’t forget safety gear. Gloves and goggles are a must.
You need wood or metal pipes. Screws and bolts are essential. Get brackets for support. Sandpaper is good for smooth edges. You may need paint for finishing. Hinges are useful for moving parts. Choose strong materials for a durable rack.

Credit: wilkerdos.com
Planning Your Bike Rack
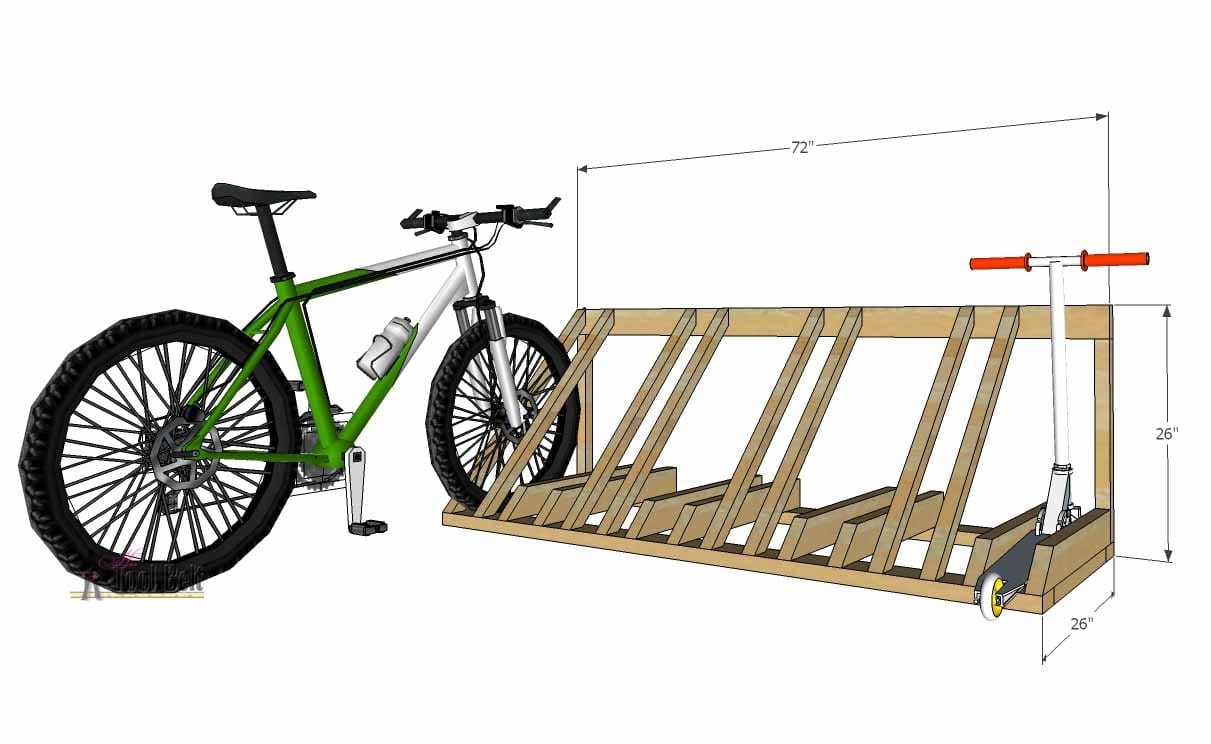
Think about how many bikes you need to store. Consider the space available. Vertical racks save space. Horizontal racks are easier to use. Think about the materials. Metal is strong. Wood looks nice. Both can work well. Think about the style. Simple designs are easy to build. Fancy designs look cool. Think about the weather. If the rack is outside, it must be weatherproof. Plan the design carefully.
Measure your bikes. Measure the space where the rack will go. Write down these measurements. Make sure the rack will fit your bikes. Allow extra space for easy access. Make sure you have room to maneuver your bikes. The rack should be stable. It should not tip over. Measure twice to be sure.
Building The Frame
Start by measuring the wood. Mark where you need to cut. Use a saw to cut the wood. Make sure cuts are straight. This will help the frame fit well. Double-check your measurements before cutting. It’s better to cut a bit longer. You can always trim off extra wood later.
Lay out the wood pieces on the ground. Arrange them to form the frame. Use screws to join the pieces. Ensure the frame is square. This will make it stronger. Reinforce corners with brackets. This adds extra strength. Check for any loose screws. Tighten them if needed. Your frame is now ready.
Creating Bike Slots
Learn how to build a bike rack with easy steps. Gather materials, measure space, and follow a clear plan. Create a sturdy and organized bike storage solution for your home.
Spacing The Slots
Each bike slot needs enough space. This prevents bikes from touching each other. Keep at least 18 inches between slots. This allows easy access and avoids scratches. Use a measuring tape for accuracy. Mark each slot with chalk. Make sure lines are straight.
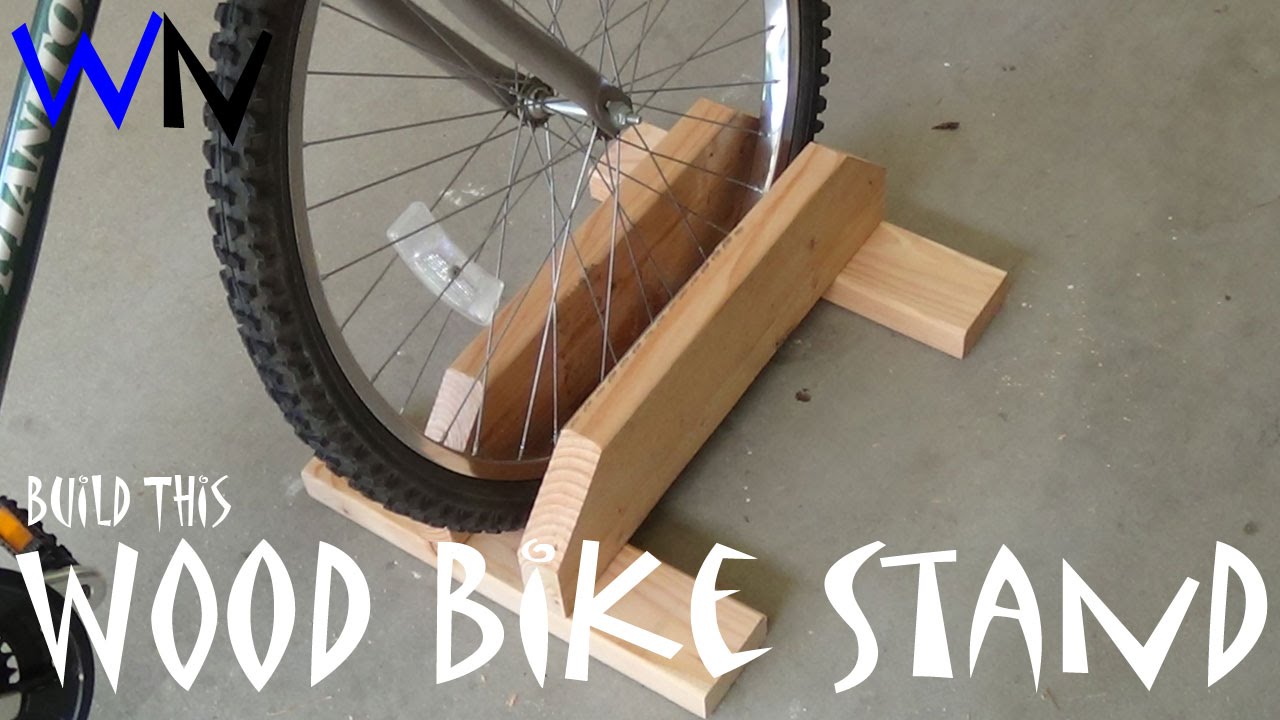
Securing The Slots
Use sturdy materials to secure the slots. Wood or metal works well. Cut the material to match your marks. Attach them firmly to the base. Make sure each slot is stable. Test by gently shaking the slot. It should not move. Ensure all slots are equally secure.
Adding Stability
Adding stability is crucial when building a bike rack. Secure the base with strong materials and ensure proper balance. This helps prevent tipping and keeps bikes safe.
Reinforcing The Structure
A strong bike rack needs a solid structure. Use thick wood or metal for the frame. Bolts and screws should be tight. This avoids shaking. Use braces at corners for extra strength. This keeps the rack from wobbling. Check all parts for sturdiness. Make sure they are well fixed.
Ensuring Balance
A balanced bike rack is safe. Level the base to the ground. This stops tipping over. Use a spirit level to check. Adjust legs if needed. Place heavy items at the bottom. This adds weight for balance. Spread the weight evenly across the rack. This keeps the rack stable. Check balance often. Make sure it stays safe.

Credit: www.singletracks.com
Finishing Touches
Start with rough sandpaper. This removes big bumps. Then, use finer sandpaper. This makes the wood smooth. Always move in the direction of the grain. This helps avoid scratches. Wipe the dust away with a cloth. Now the wood is ready for finishing.
Choose paint or stain. Paint gives a solid color. Stain shows the wood grain. Apply a thin coat first. Let it dry. Apply more coats if needed. Use a brush or a cloth. Make sure the finish is even. This protects the wood. It also makes your rack look great.
Installing Your Bike Rack
Pick a spot with enough space. Ensure it’s easy to access. Avoid busy walkways and avoid blocking doors. The area should be dry and safe. Measure the space to fit the rack. Think about height and width. The bike should hang without touching the ground. Consider nearby walls and objects. Prevent scratches and damage. Choose a location with good lighting.
Gather tools like a drill, screws, and a level. Mark the spot where you will mount the rack. Drill holes for the screws. Use a level to ensure it is straight. Insert screws and tighten them. Check if the rack is secure. Test by gently pulling. Ensure it doesn’t move. Adjust if needed. Hang your bike and check balance.
Maintenance Tips
Creating a sturdy bike rack requires basic tools and materials like wood, screws, and a drill. Ensure the rack is stable by measuring and cutting pieces accurately. Secure the joints tightly for added safety.
Regular Inspections
Check the bike rack every week. Look for any loose screws. Make sure all parts are tight. A wobbly rack can be dangerous. Also, check for rust. Rust weakens the metal. Clean it off if you see any. Inspect the rack after every use. This keeps it in good shape.
Repairing Damages
Fix any damage right away. Small cracks can get bigger. Broken parts can cause accidents. Replace any worn-out parts. Use quality parts for repairs. Do not use tape or glue. They are not strong enough. Make sure the repairs are secure. Test the rack after fixing it. This ensures it is safe to use.
Frequently Asked Questions
How Do I Start Building A Bike Rack?
To start, gather necessary materials like wood, screws, and tools. Measure and cut wood pieces according to your desired dimensions.
What Materials Are Needed For A Bike Rack?
You need wood, screws, a saw, a drill, and brackets. These materials will ensure a sturdy and reliable bike rack.
Can I Build A Bike Rack Without Woodworking Skills?
Yes, you can. Follow simple plans and use pre-cut wood. Many bike rack designs are beginner-friendly and easy to assemble.
How Much Time Does It Take To Build?
Building a bike rack can take a few hours. The time depends on your skill level and the complexity of the design.
Conclusion
Building your own bike rack is practical and rewarding. Follow the steps outlined to create a sturdy, reliable rack. Gather materials, use simple tools, and take your time. Enjoy the process. Your bike will have a safe home. Plus, you save money and gain a useful skill.
Share your experience with friends. Inspire them to build one too. With a little effort, you can have a custom bike rack. Happy building!